The date and time in Windows 11 can be set manually and automatically. You can also change the format to show a 12 or 24-hour clock or adjust the date to make it easier to read.
Here are some of the most common reasons why you might want to change the date and time in Windows 11:
- To correct an incorrect time setting. If your computer’s clock is not set correctly, it can cause problems with programs and apps that rely on the current time. For example, if your clock is set an hour ahead, you might miss important appointments or notifications.
- To change the time zone. If you travel to a different time zone, you’ll need to change your computer’s time zone so that it reflects the correct local time. This will ensure that your programs and apps continue to work correctly.
- To troubleshoot problems. Sometimes, changing the date and time can help to troubleshoot problems with Windows 11. For example, if you’re having problems with a program or app, changing the time zone might fix the problem.
- To play games or use software that requires a specific time or date. Some games or software require a specific time or date to work correctly. For example, some games require that you be playing during a specific event or holiday. In these cases, you might need to change the date and time on your computer to match the requirements of the game or software.
In this guide, we will show you how to change the date and time on Windows 11.
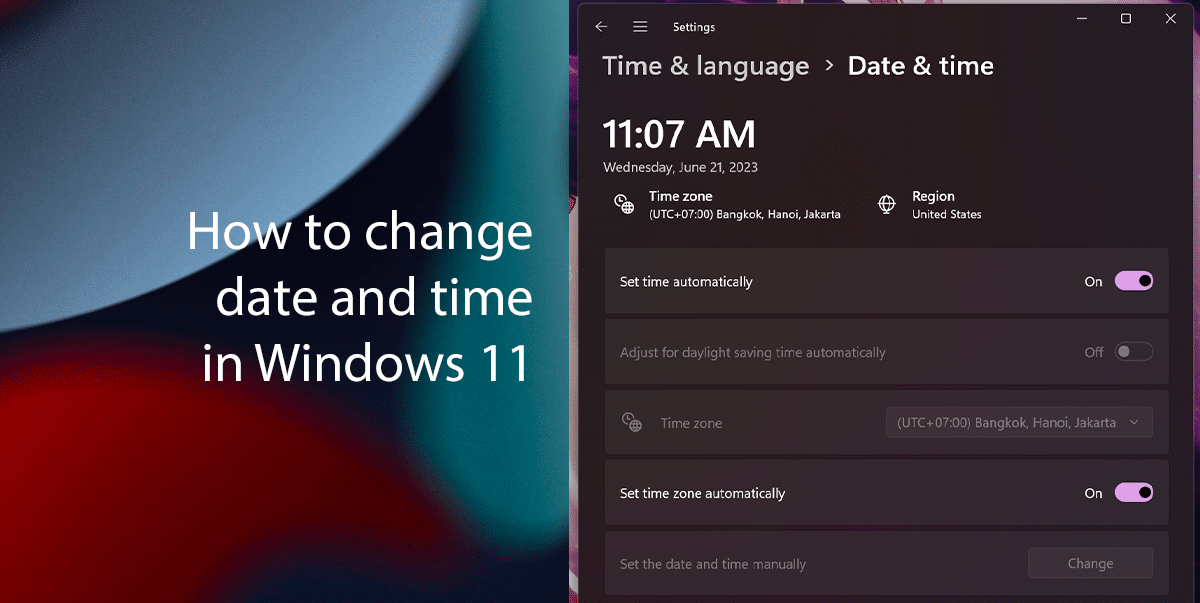
Here is how to change the date and time in Windows 11
Before we start it’s important to note that changing the date and time on your computer can have some unintended consequences. For instance, if you change the date and time to a past date, you might not be able to access online services or apps that require the current date and time. Additionally, changing the date and time can affect the accuracy of your computer’s clock, which can lead to problems with other programs and apps.
Here are the steps on how to change the date and time in Windows 11:
- Open Settings.
- Go to Time & Language, and then click on Date & Time.
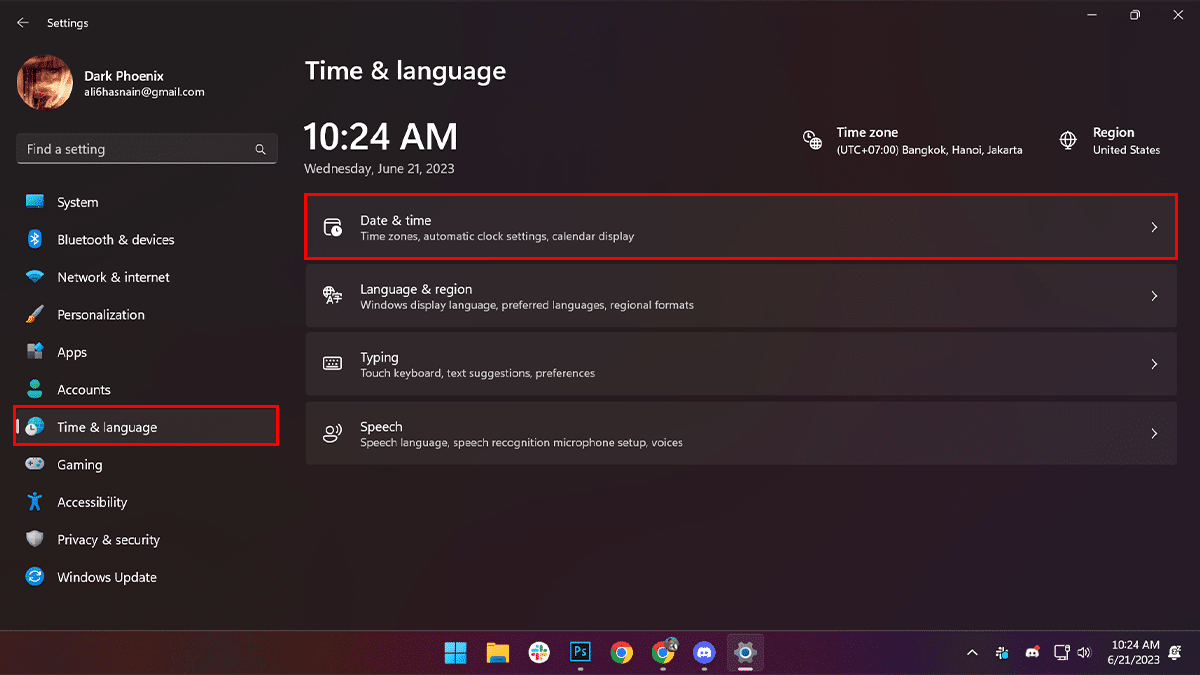
- Toggle off the “Set time automatically” switch.

- Click on Change.
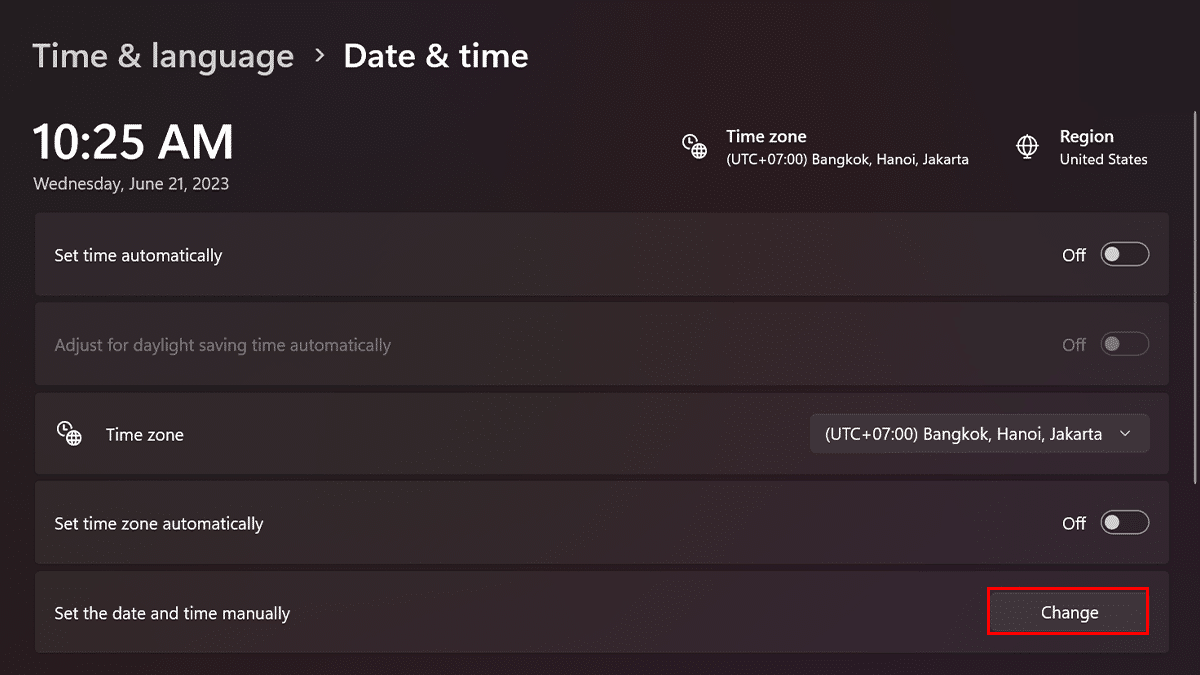
- Enter the correct date and time, then click on Change.

- When done, the System Tray will reflect the updated date and time information for Windows 11.
How to change clock time and date formats
- Open Settings.
- Go to Time & Language, and then click on Date & Time.

- Under the “Related links” section, click the Additional Clocks setting.
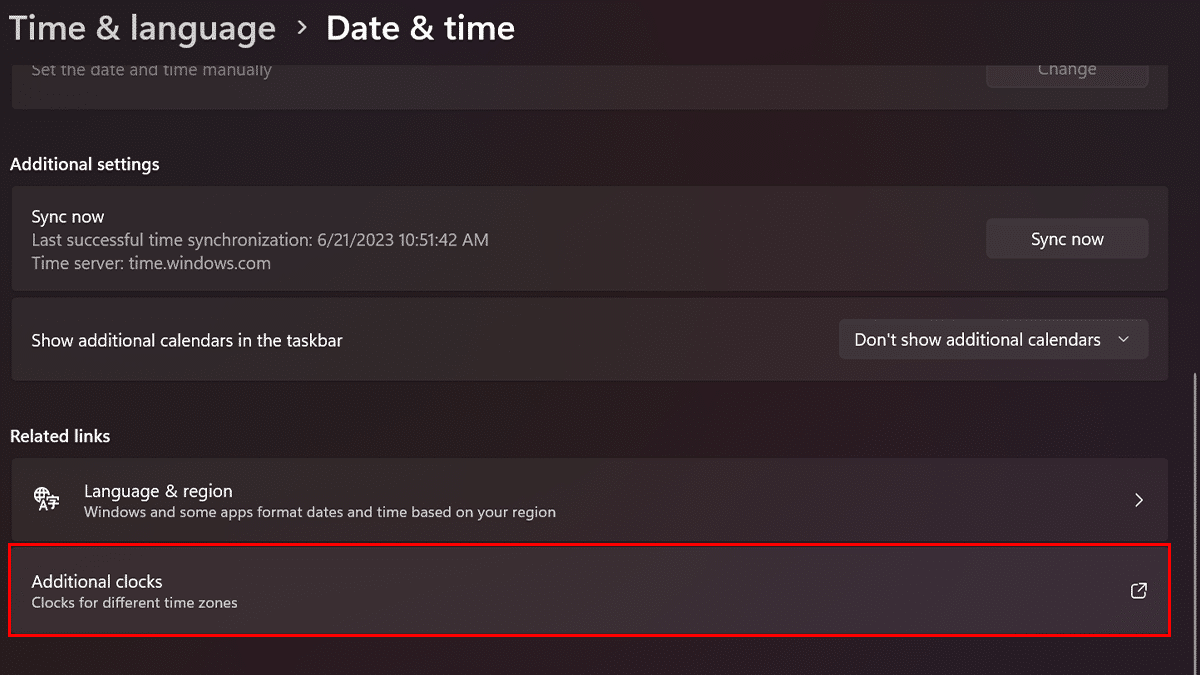
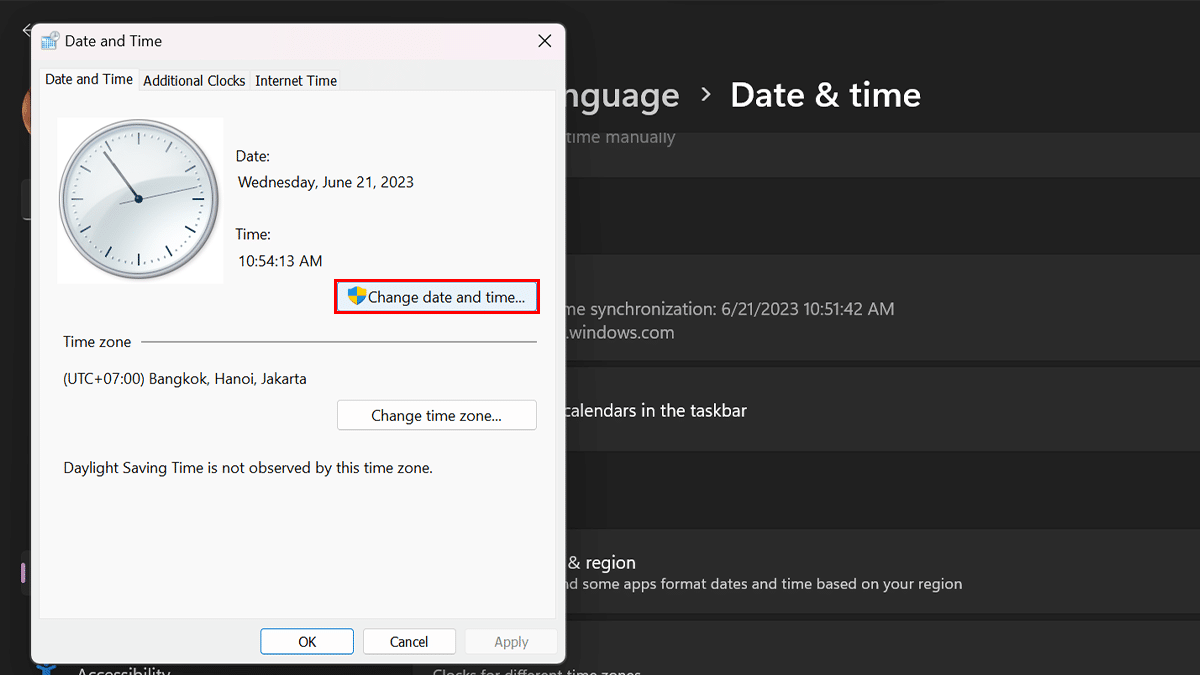
- Click the Date and Time tab, and then click the “Change date and time”.
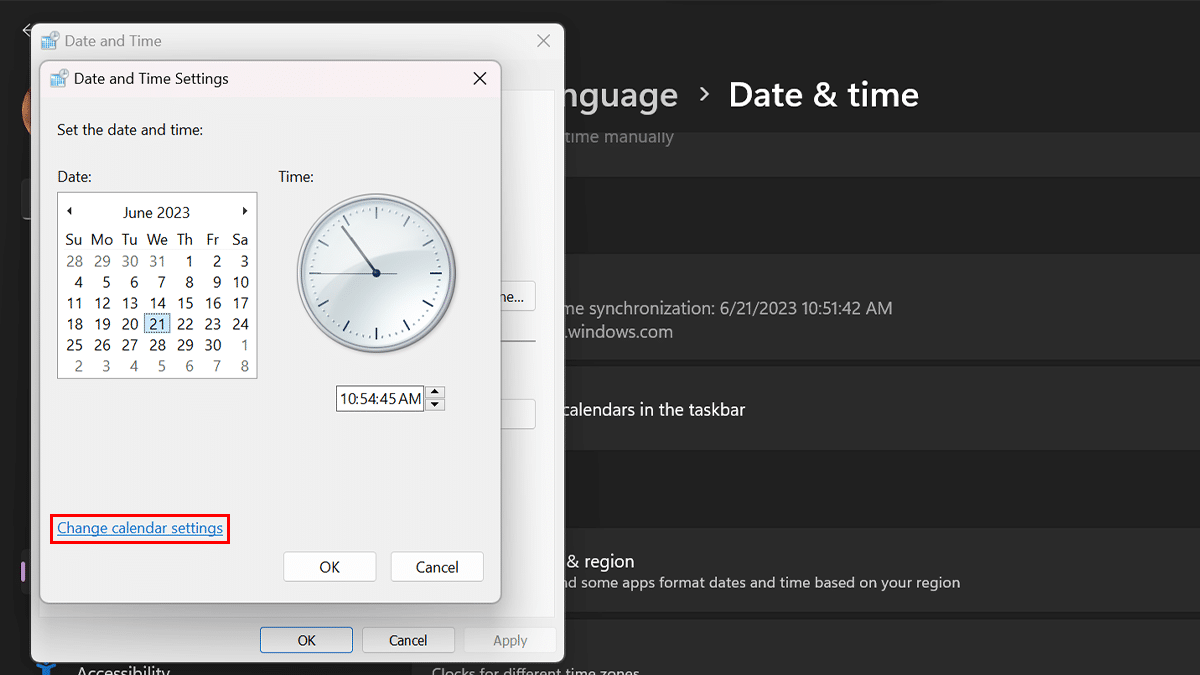
- Click the “Change calendar settings” option.
- Under the “Date and time formats” section, use the “Short date” setting to select the date format. For example, “dd/mm/yyyy.”
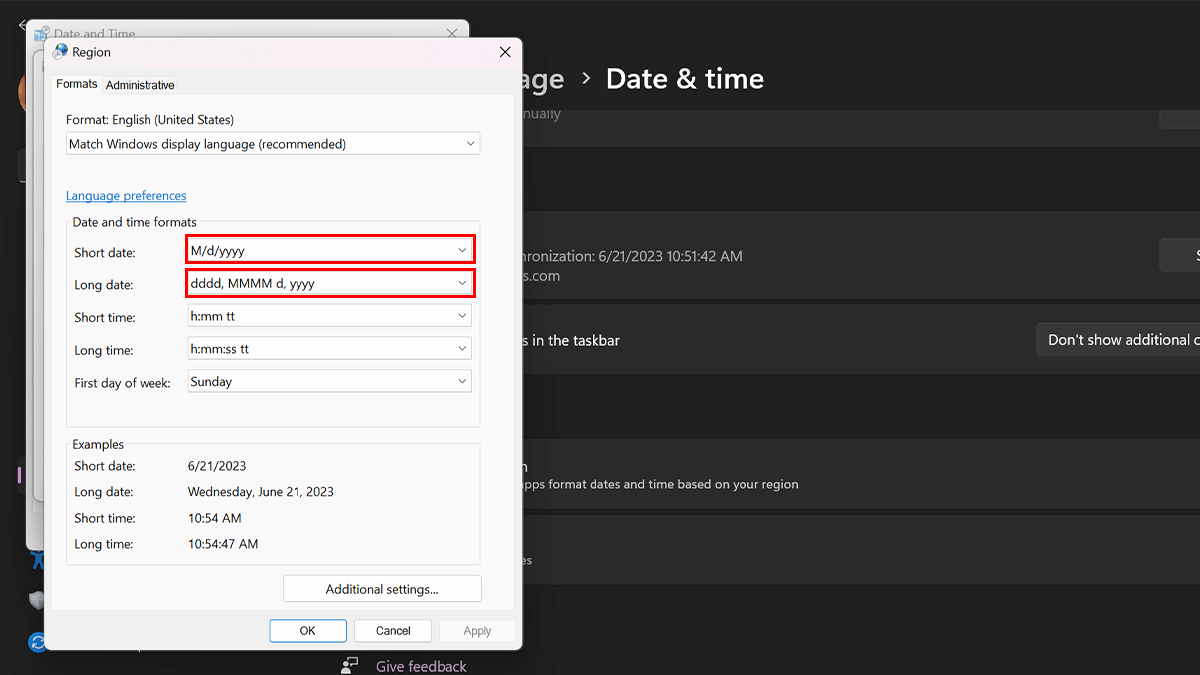
- Use the “Short time” setting to select the clock time and date format.
- Click Apply > OK, then OK again, and click OK one more time.
- When done, the System Tray will reflect the new format for the date and time.
Read more:


