Sometimes, when you notice that your Windows 11 laptop is consuming more power than usual, you can change power plans to configure specific hardware and system to control how the computer consumes energy.
Windows 11 provide us with three schemes: Balanced, Power saver, and High performance. And each has been designed to save battery, optimize the device for performance, or balance battery life and performance.
You can create custom power plans with specific settings to get the specific results you want. In this guide, we will show you how to create, configure, and delete power plans on Windows 11.
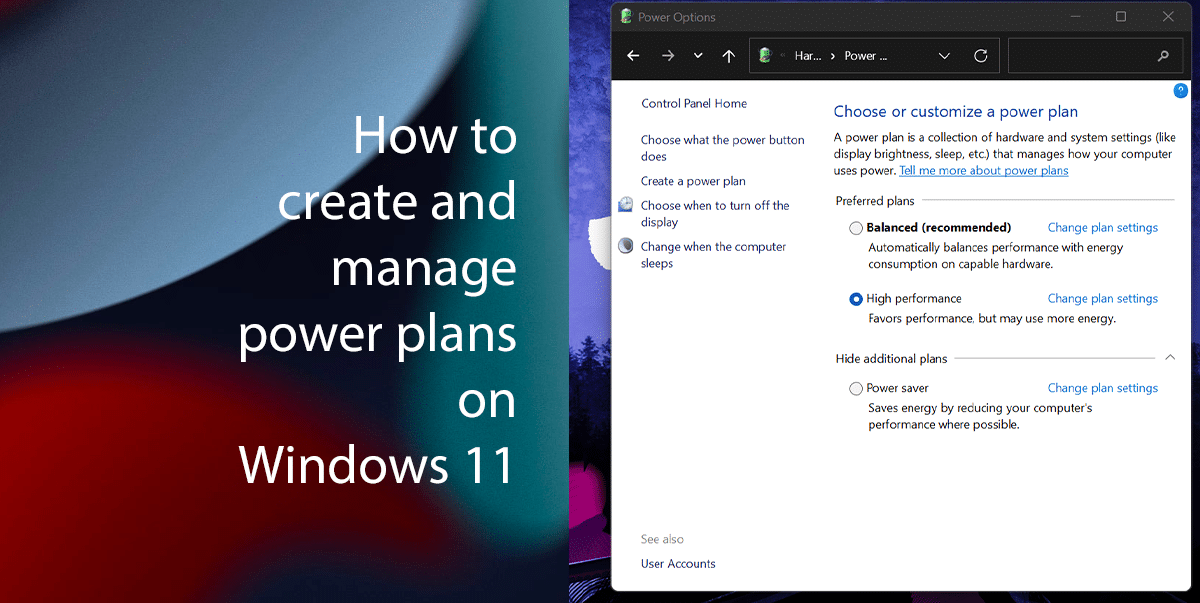
Here is how to create and manage power plans on Windows 11
How to create a power plan
- Open Start > search for Control Panel > click the top result to open.
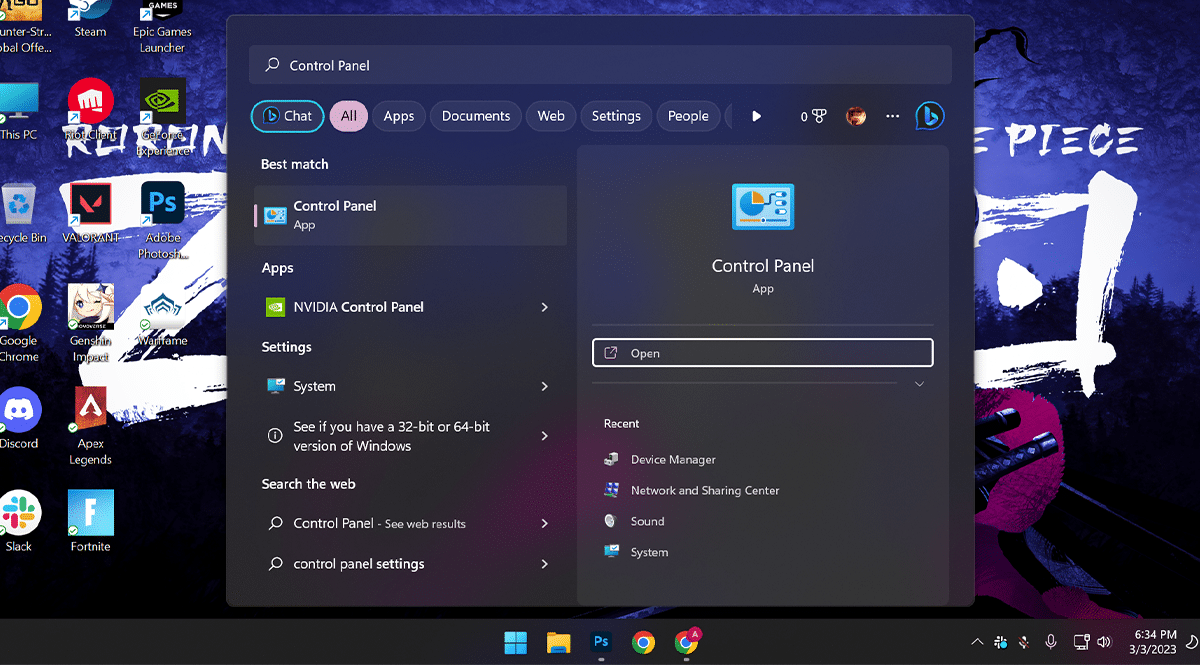
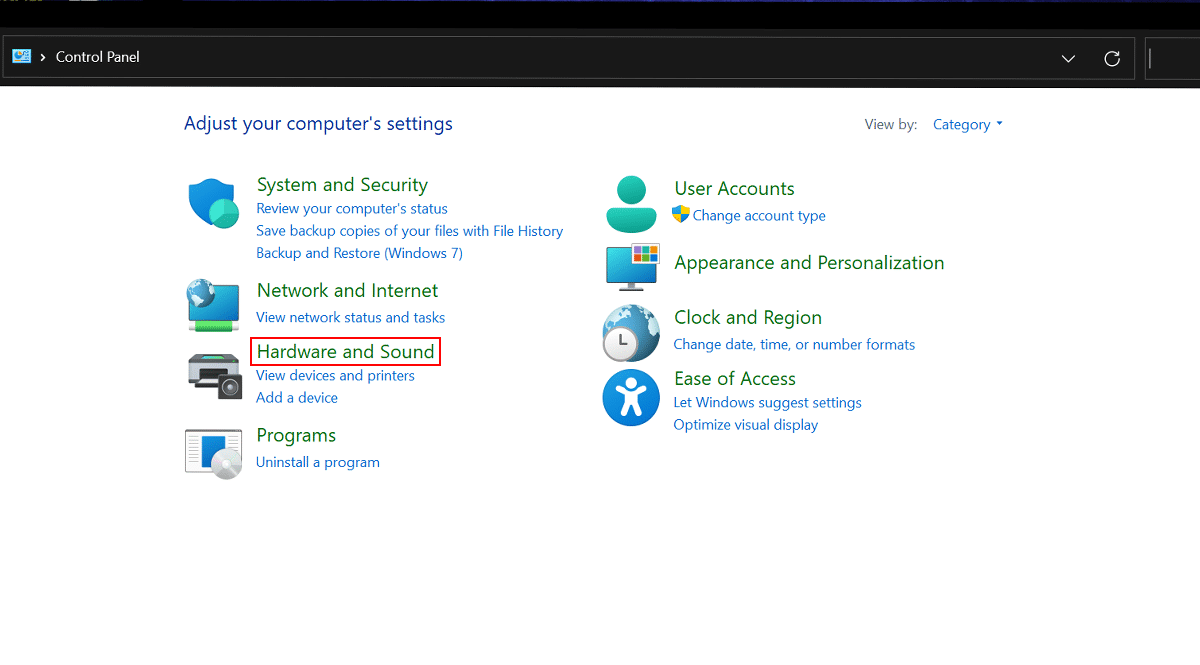
- Click on Hardware and Sound.
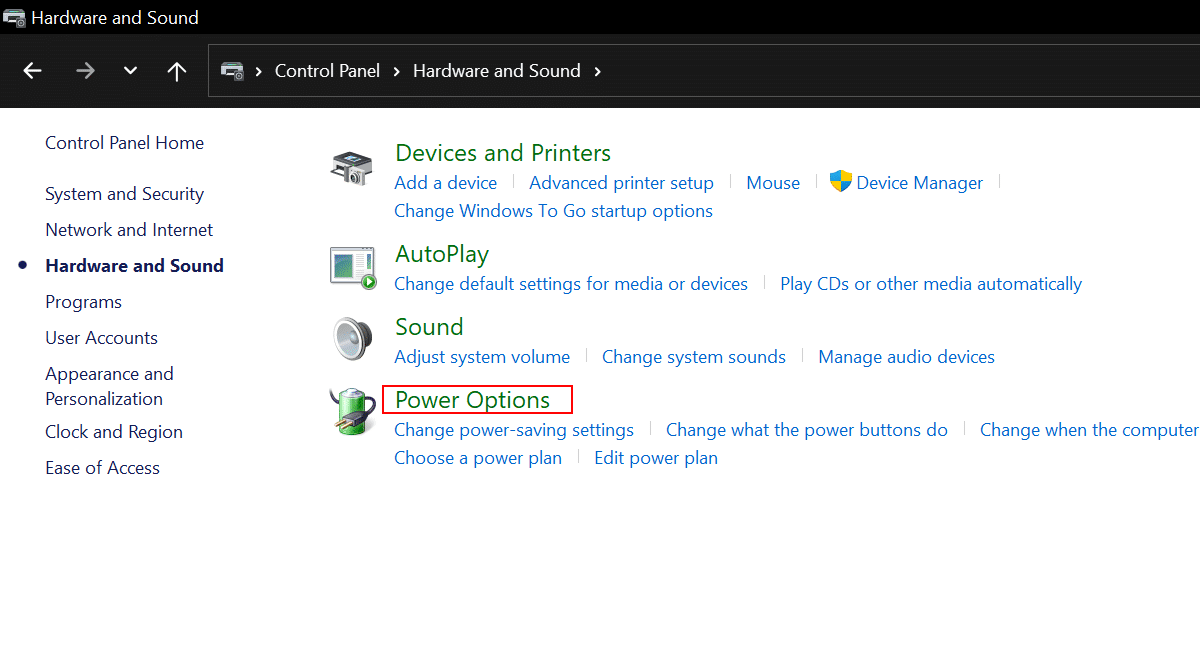
- Click on Power Options.
- Click the Create a power plan button from the left pane.
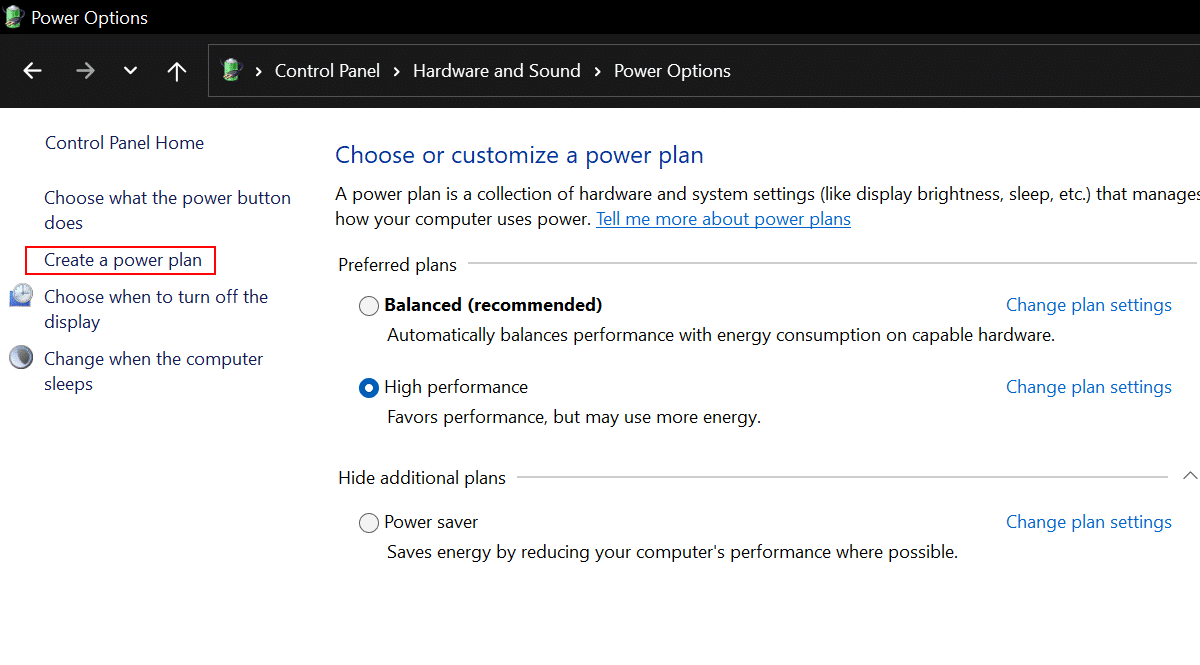
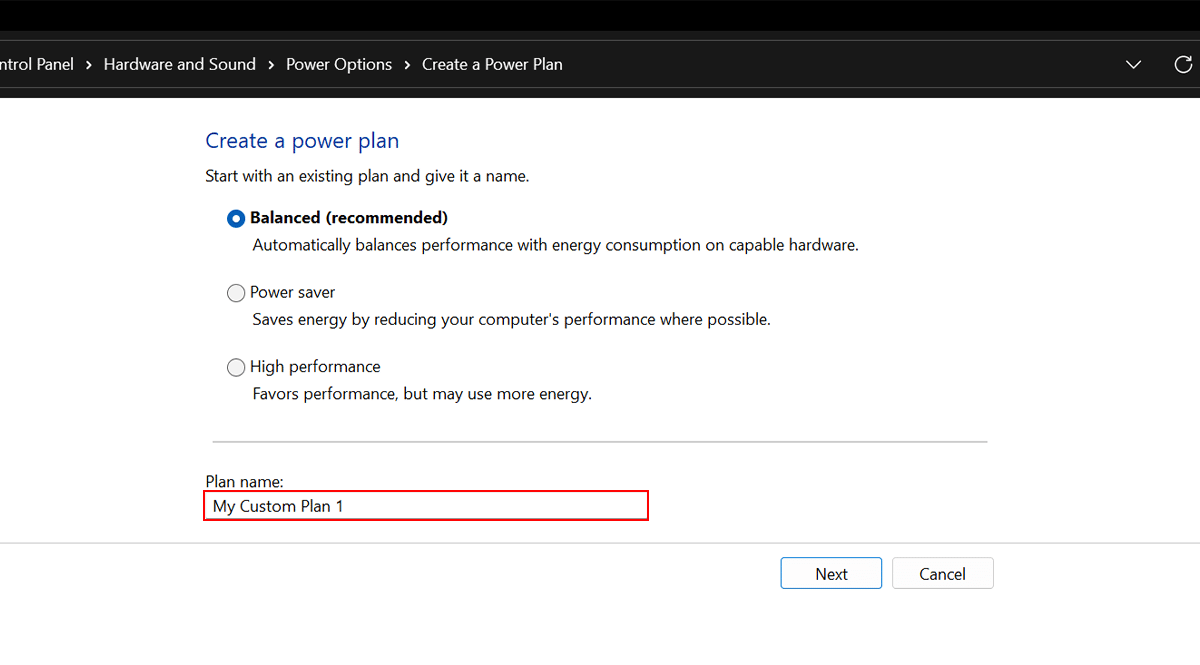
- Select the base power plan with the settings to start > under the Plan name section > type a descriptive name for the new power scheme > click the Next button.
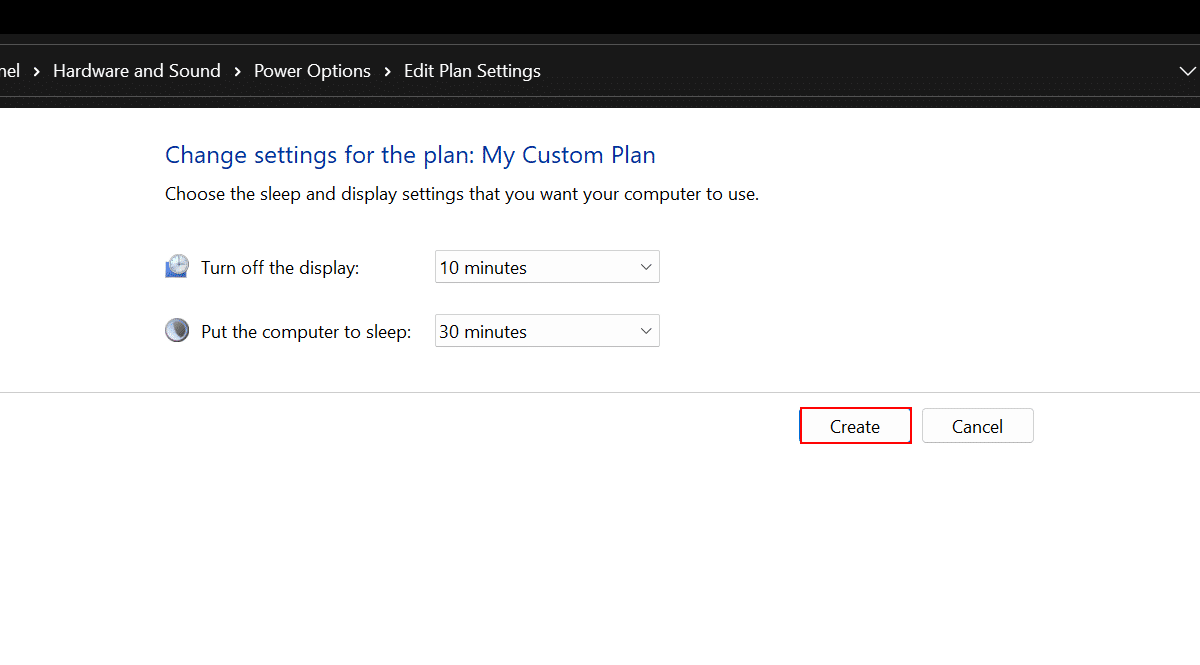
- Select when the device should turn off the display and go to sleep > click the Create button.
How to customize a power plan
Customized power plans can be useful in many situations. Although Windows 11 provides 3 power plans by default. However, creating your own scheme could depend on some changes you might want to do and changing some default settings to personal preferences.
For example, you have a high-end PC and would want to run your computer on the highest performance without worrying about overheating and battery life. In another scenario, you would want to run your PC on high performance but with less heating and low power consumption, or sometimes you need more battery life you can customize it depending on your situation.
So customizing a power plan could be helpful depending on your PC’s hardware and system. Here’s how to do it:
- Open Start > search for Control Panel > click the top result to open.

- Click on Hardware and Sound.

- Click on Power Options.

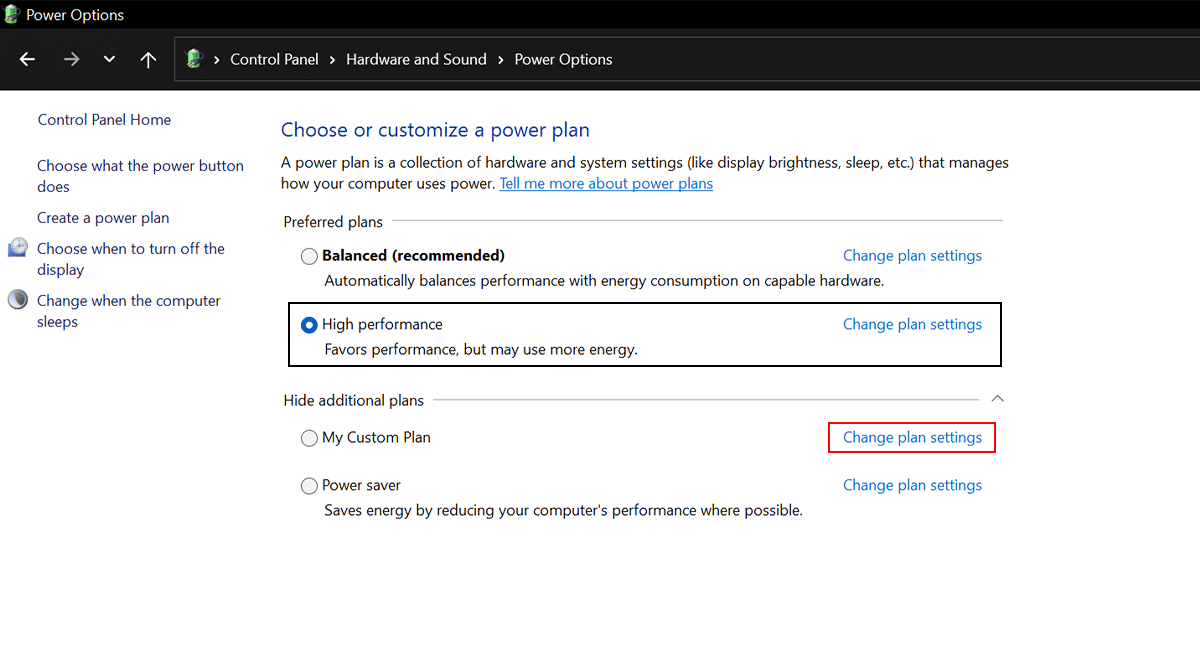
- Click the Change plan settings option next to the custom power plan.
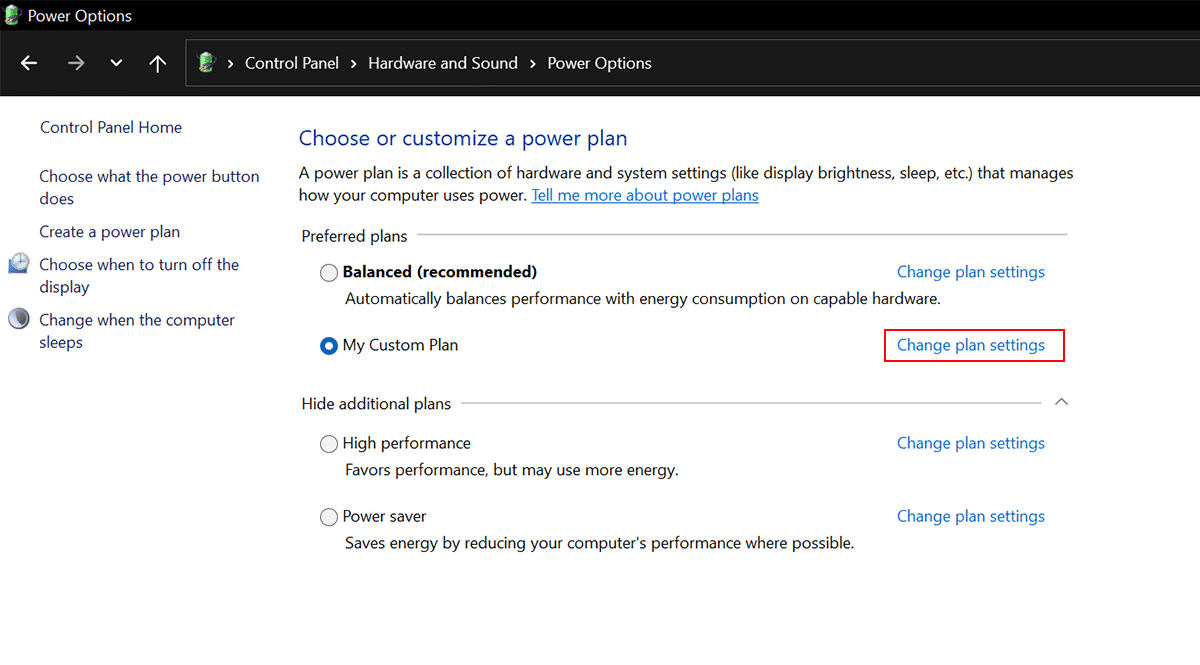
- Click the Change advanced power settings option.
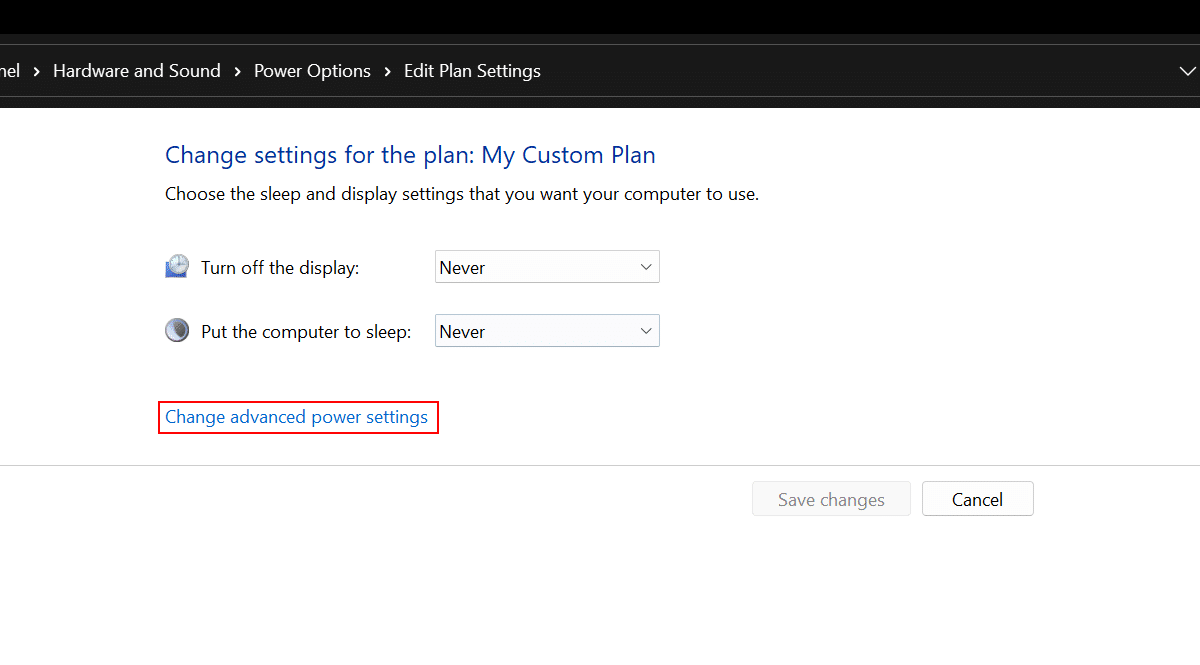
- You can customize various settings, depending on whether you use a laptop or desktop computer.
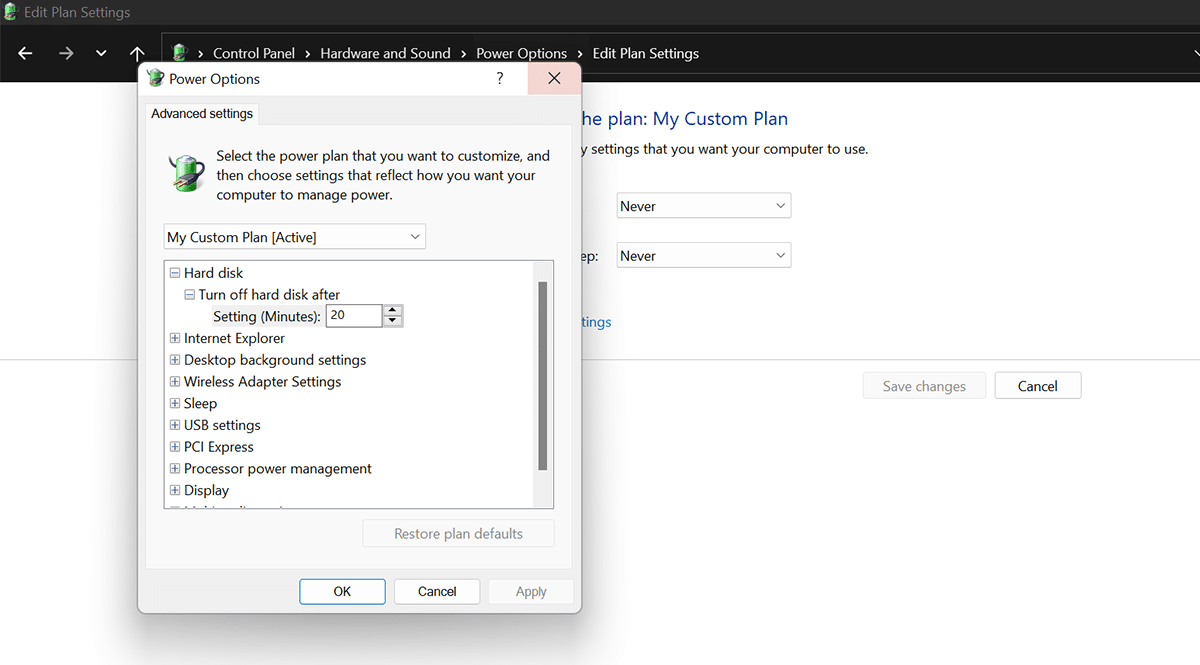
Here is about those options above:
- Hard Disk: This option is for Computers with a traditional rotating platter hard drive can use the “Hard disk” option to specify when to turn it off.
- Wireless Adapter Settings: This option is to set the power mode of the adapter, which helps save battery.
- Sleep: This option includes the settings to decide when the computer should sleep in battery mode or when plugged in and control whether the wake timers should be enabled or disabled.
- USB settings: This option allows you to control the selective suspend setting to conserve battery.
- Display: This option lets you control when the display should turn off to save energy.
- Battery: This option includes several options to control critical battery notification, critical battery action, low battery level, critical battery level, low battery notification, low battery action, and reserved battery level.
- Desktop background settings: This option allows you to specify when the desktop background slide show should be available.
- PCI Express: This option lets you customize power settings for the “Link State Power Management,” which is part of the PCI Express specification and works in combination with the Active State Power Management (ASPM) to save energy for PCIe devices
- Processor power management: This option lets you change the processor’s efficiency at the software level to optimize power consumption while on battery or plugged in.
How to delete a power plan
- Open Start > search for Control Panel > click the top result to open.

- Click on Hardware and Sound.

- Click on Power Options.

- Select a different power plan option if the one to delete is currently selected > click the Change plan settings option next to the custom power plan.
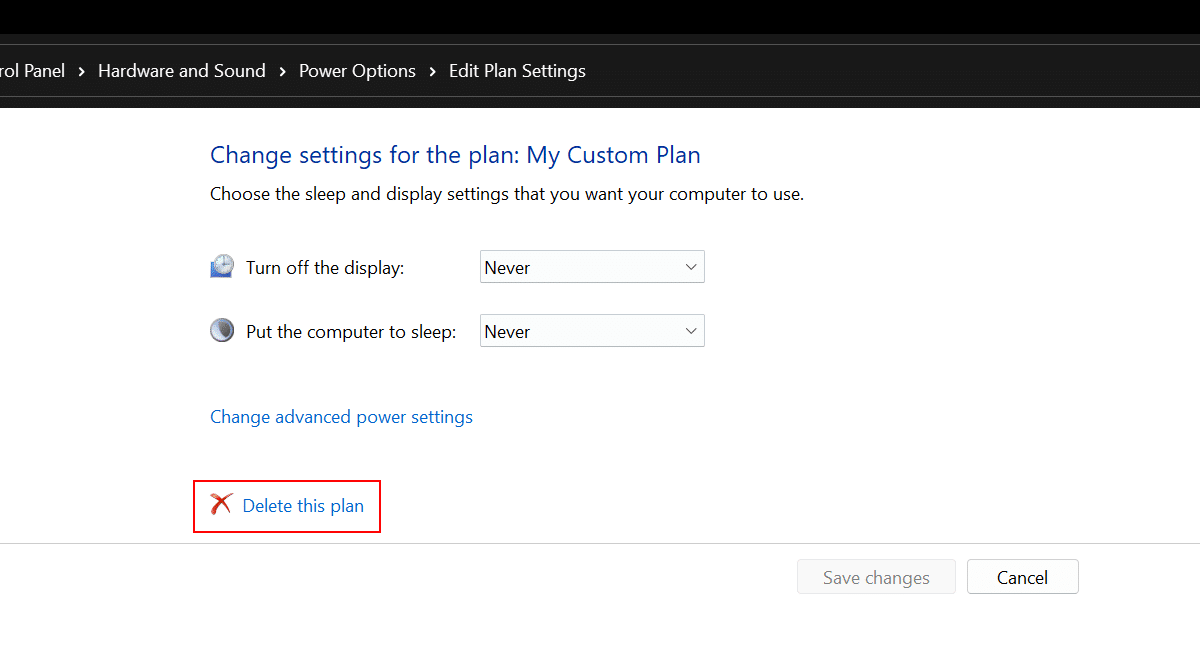
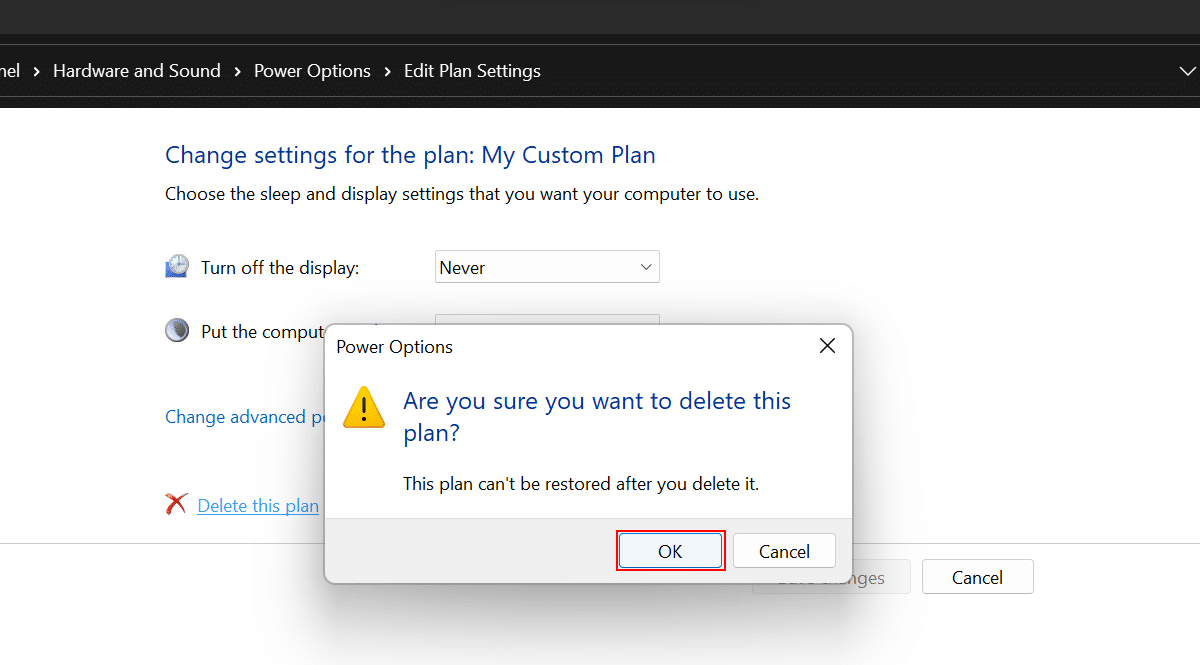
- Click the Delete this plan option.
- Click the OK button.
Read more: