In Windows 11, users can easily create desktop shortcuts for files, folders, and apps in multiple ways, and we will show you how.
Desktop shortcuts are a convenient way to access apps, files, and folders. Usually, you would create shortcuts (commonly on the desktop) to things or places to use frequently.
In this guide, we will show you how to create shortcuts on the desktop in Windows 11.
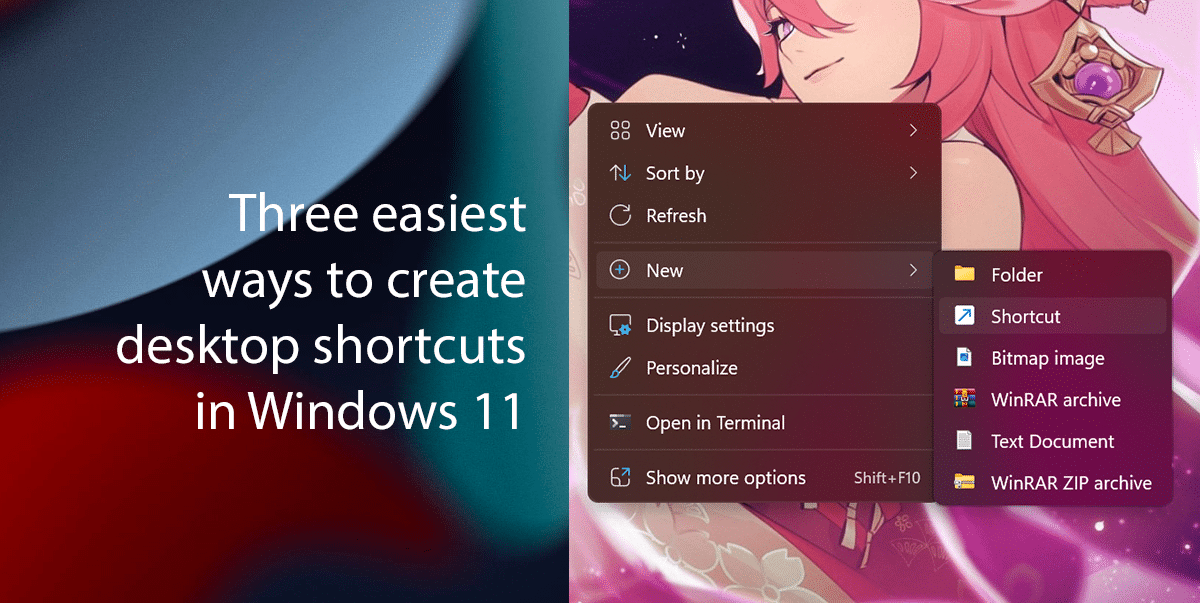
Here are the three ways to create desktop shortcuts in Windows 11, easily
How to create desktop shortcuts using the shortcut wizard
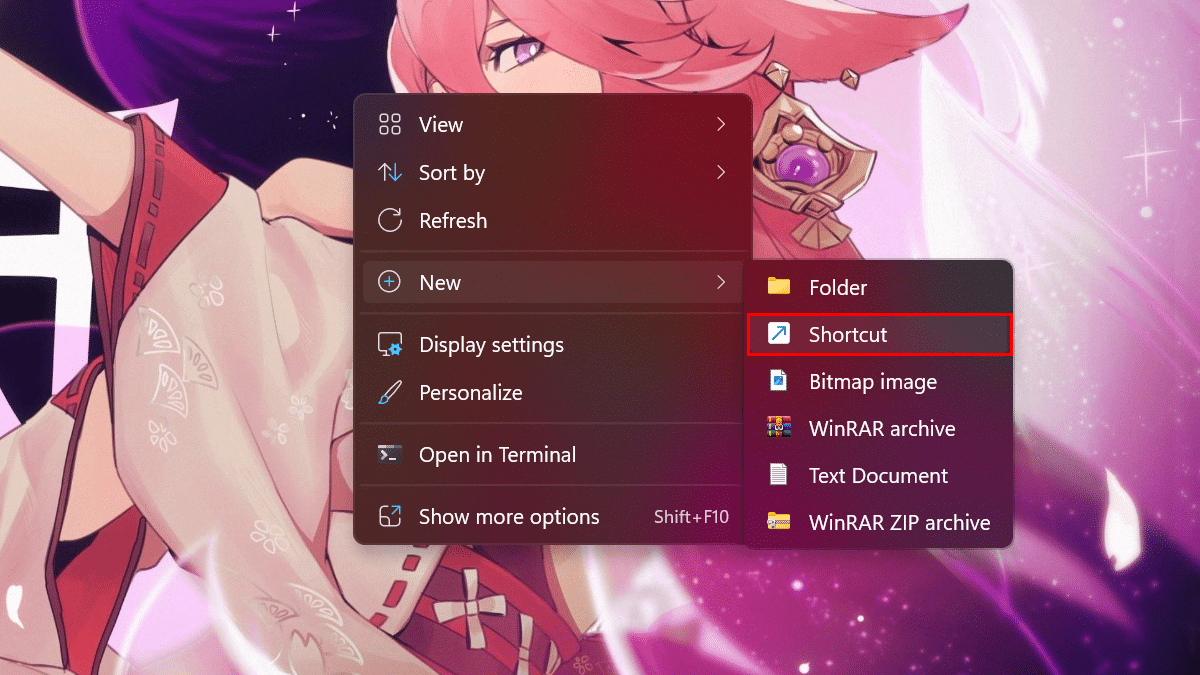
- Right-click on the desktop > select New > choose the Shortcut option.
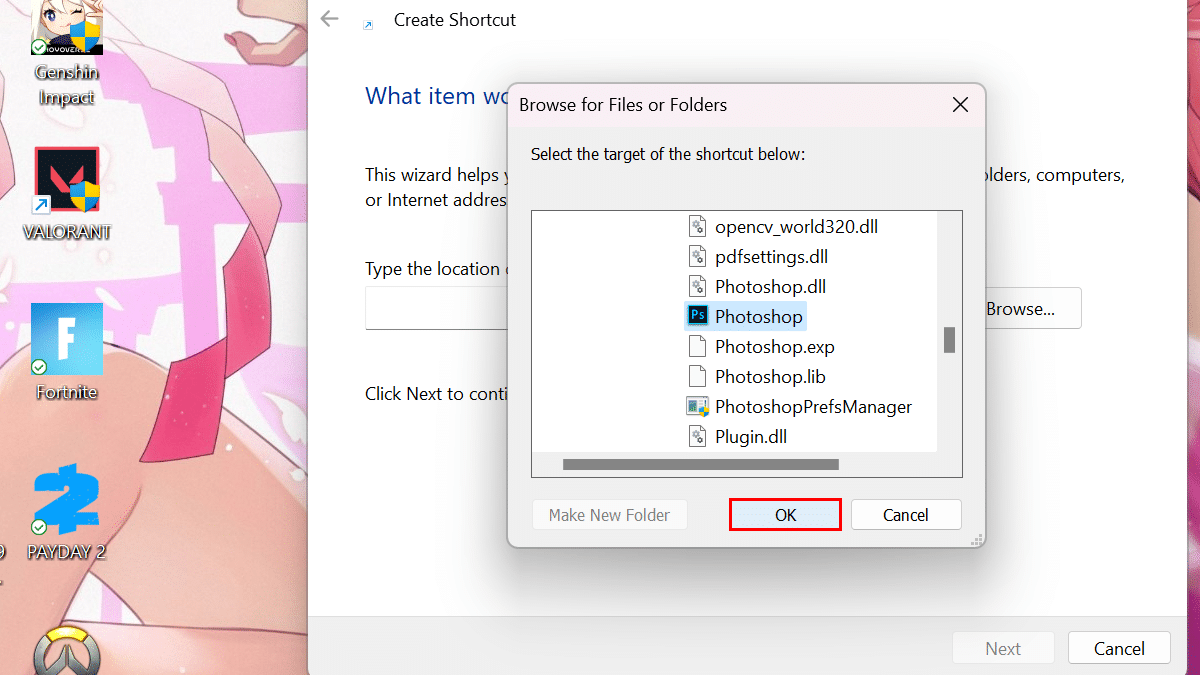
- Click the Browse button.

- Select the file to create a shortcut > click the OK button.
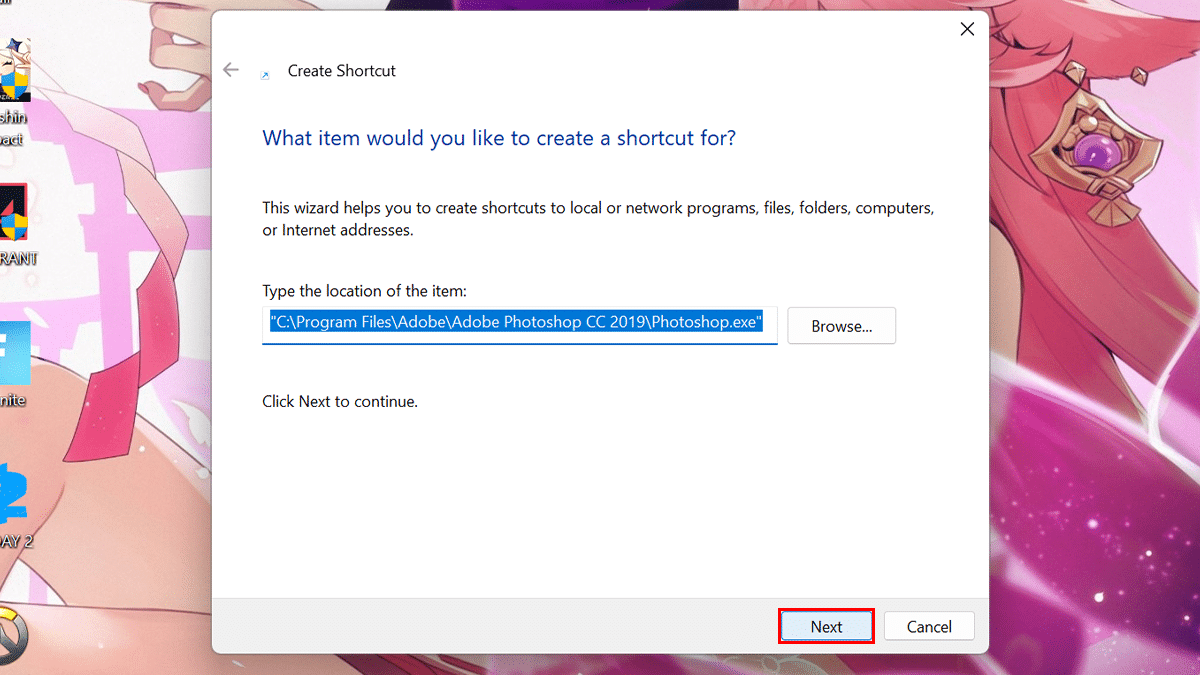
- Click the Next button.
- Confirm a name for the shortcut > click the Finish button.
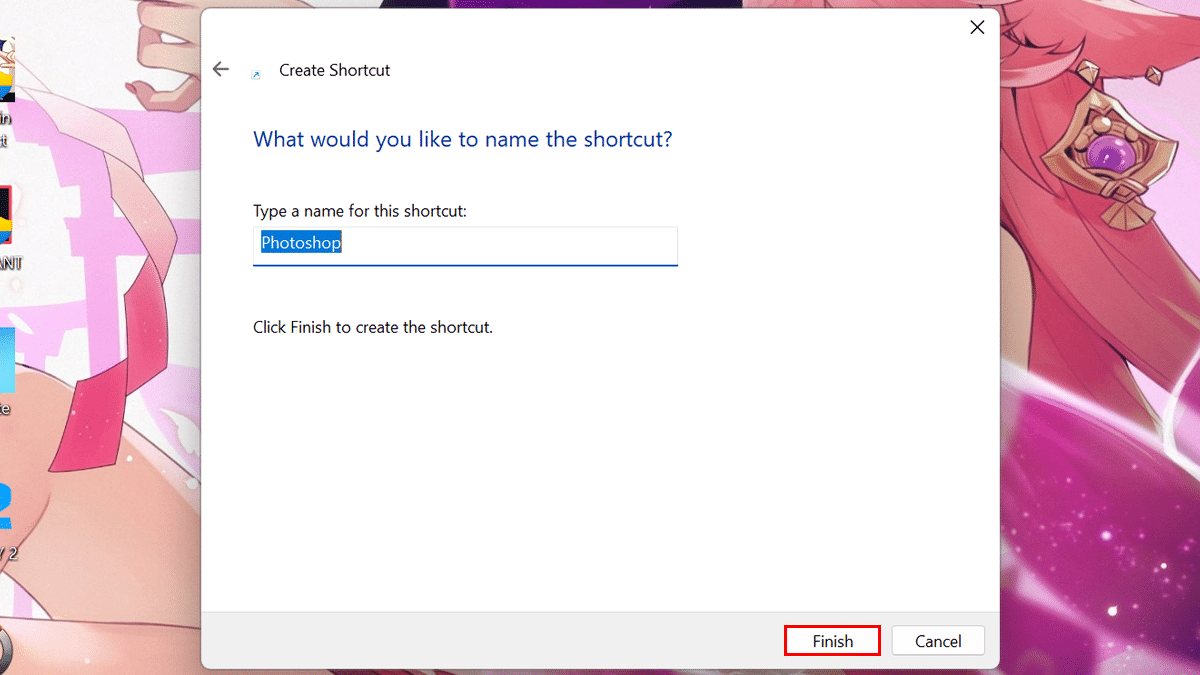
- When done, the shortcut will be created on the desktop to access the file or location faster.
How to create desktop shortcuts using the context menu
- Open File Explorer > browse to the file location to create the shortcut > Shift + Right-click the file > hover mouse over to Send to option > select the Desktop (create shortcut) button.
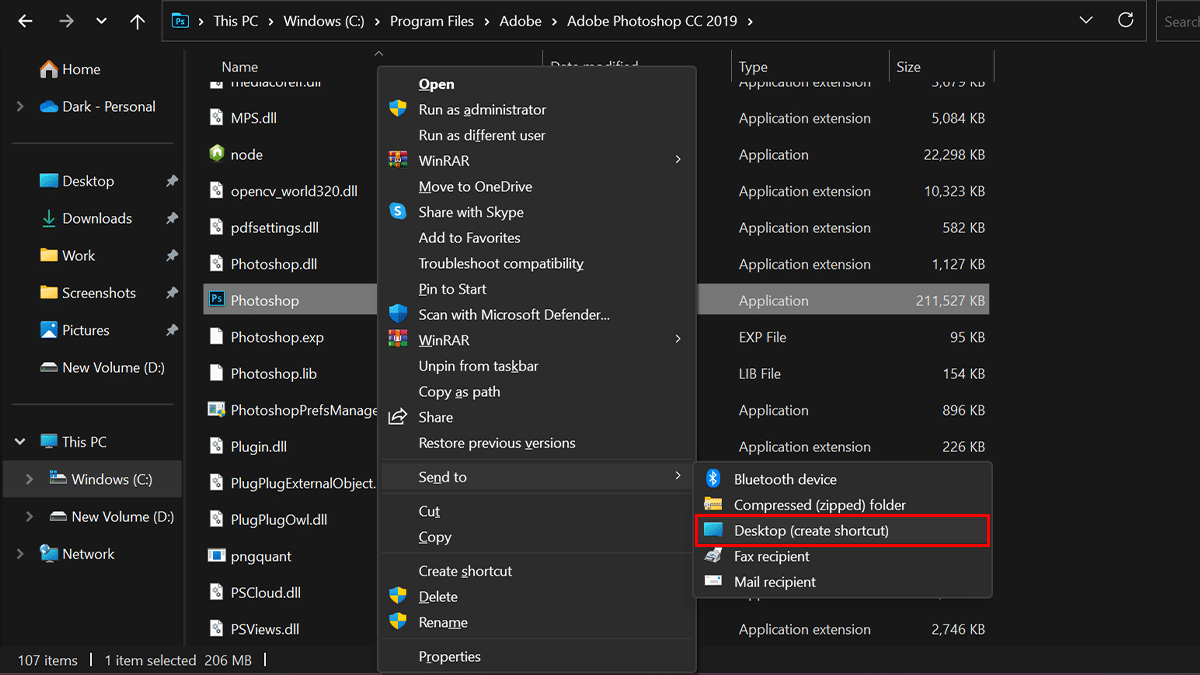
- When done, the shortcut will be created on the desktop to access the file or location faster.
How to create desktop shortcuts using the Start menu
- Open Start > click the All Apps button.
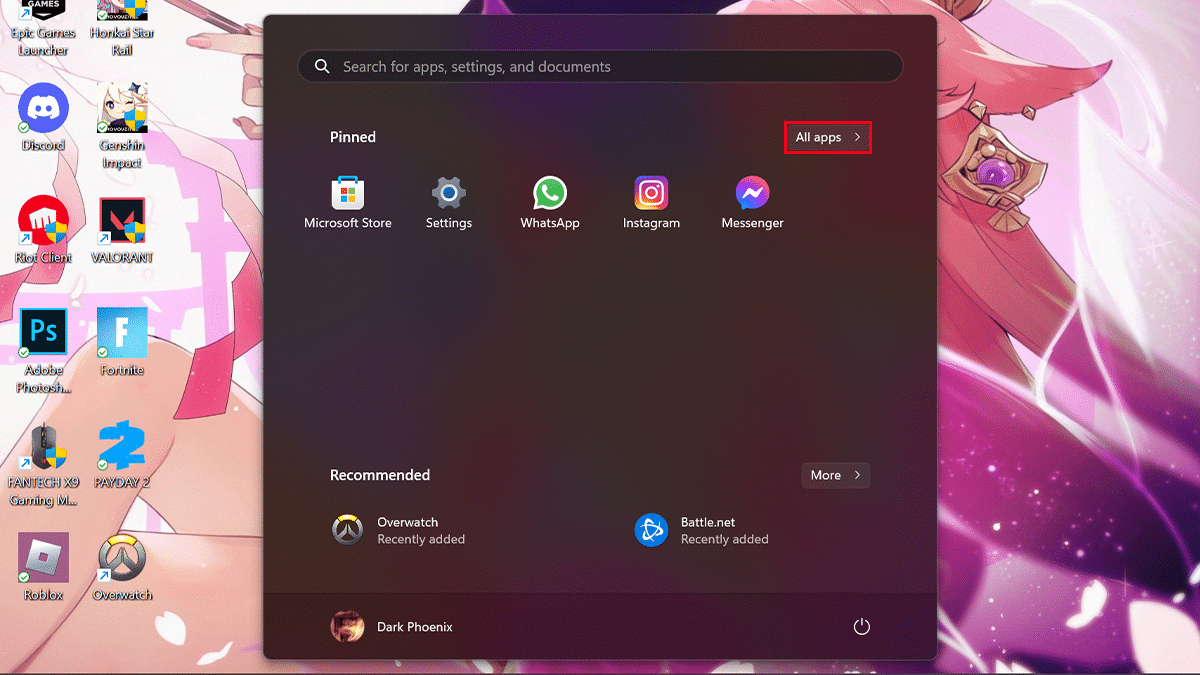
- “Left-click and drag the app” to the desktop to create the shortcut.
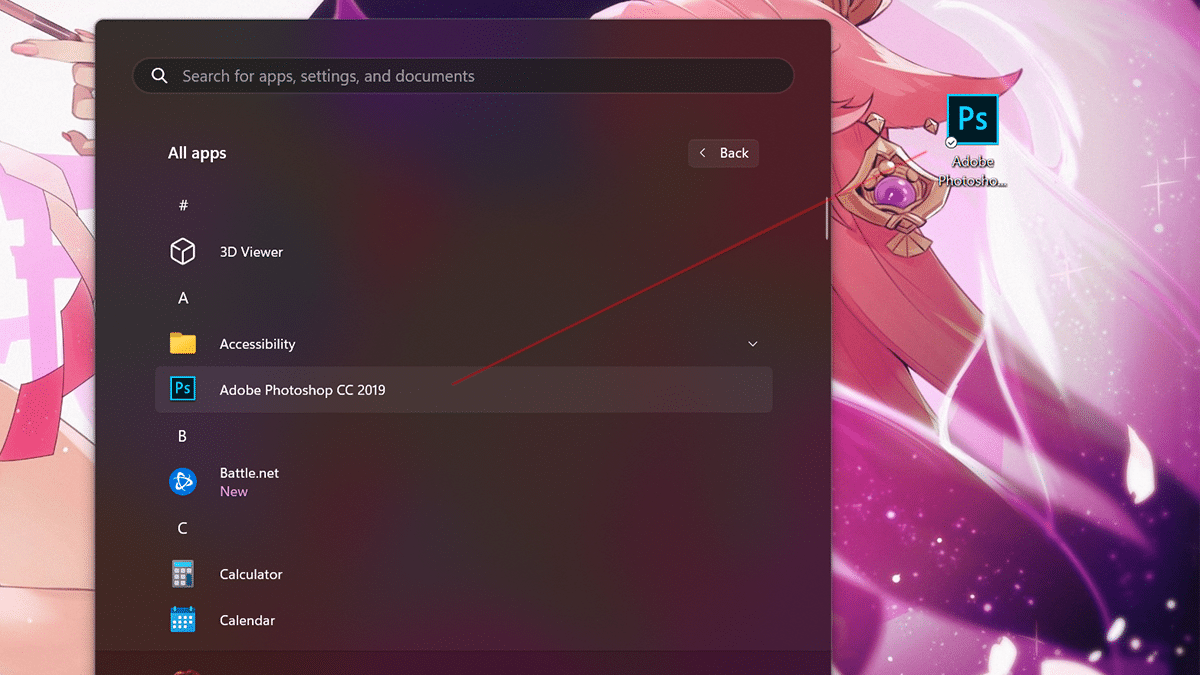
- When done, the shortcut will be created on the desktop to access the file or location faster.
Read more:
- How to enable the Nearby Sharing feature in Windows 11
- How to turn off Microsoft Edge’s sidebar in Windows 11
- How to disable the firewall in Windows 11
- How to stop automatic driver updates in Windows 11
- How to change Virtual Desktop’s wallpaper in Windows 11
- How to enable the new File Explorer in Windows 11
- How to restart VMware Workstation without having to reboot Windows 11
- How to fix any Ethernet (wired) problems in Windows 11