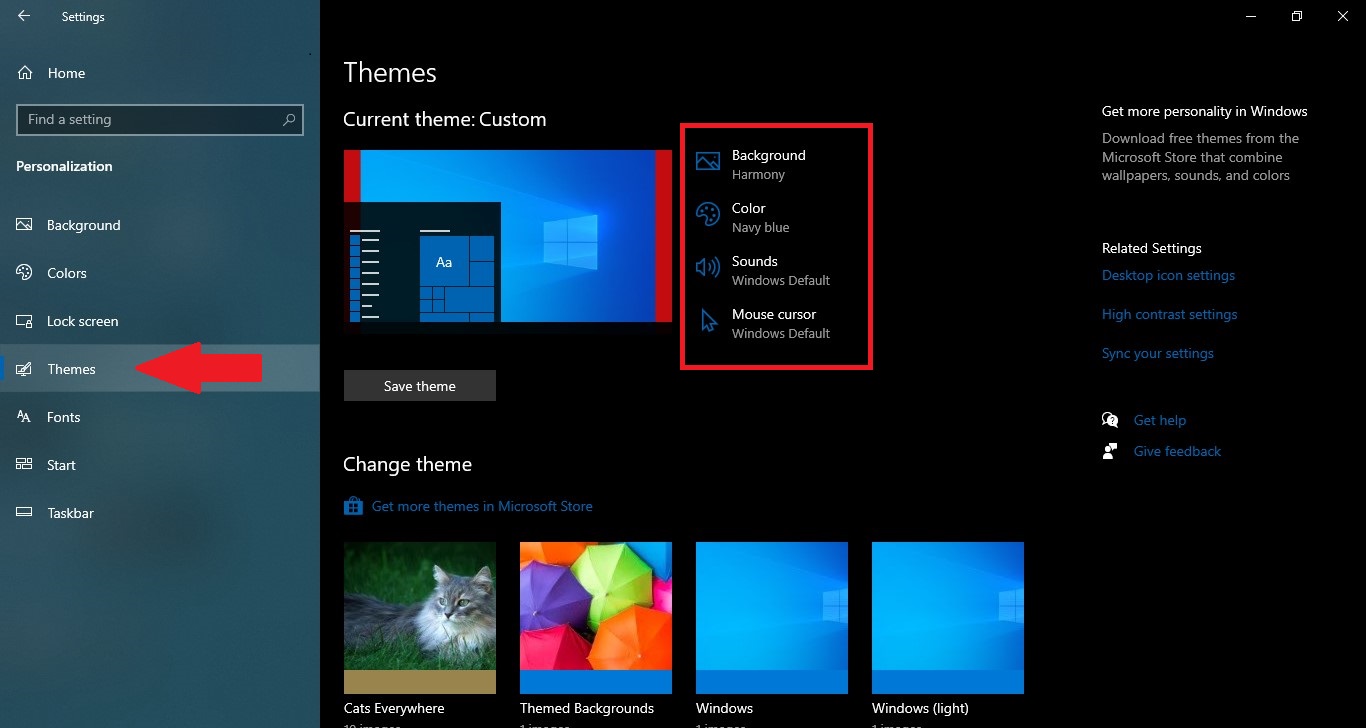
Windows 10 offers a ton of different options for users to personalize their desktop display. One of these features is the ability to change and create themes for Windows 10 devices.
You can either create your own theme from scratch: select your background image, create custom accent colors for your Windows or you can download themes from the Microsoft store and apply them on your device. In this guide, we will show you how you can use both options to customize your device to your liking.
How to create a custom Windows 10 theme
Background
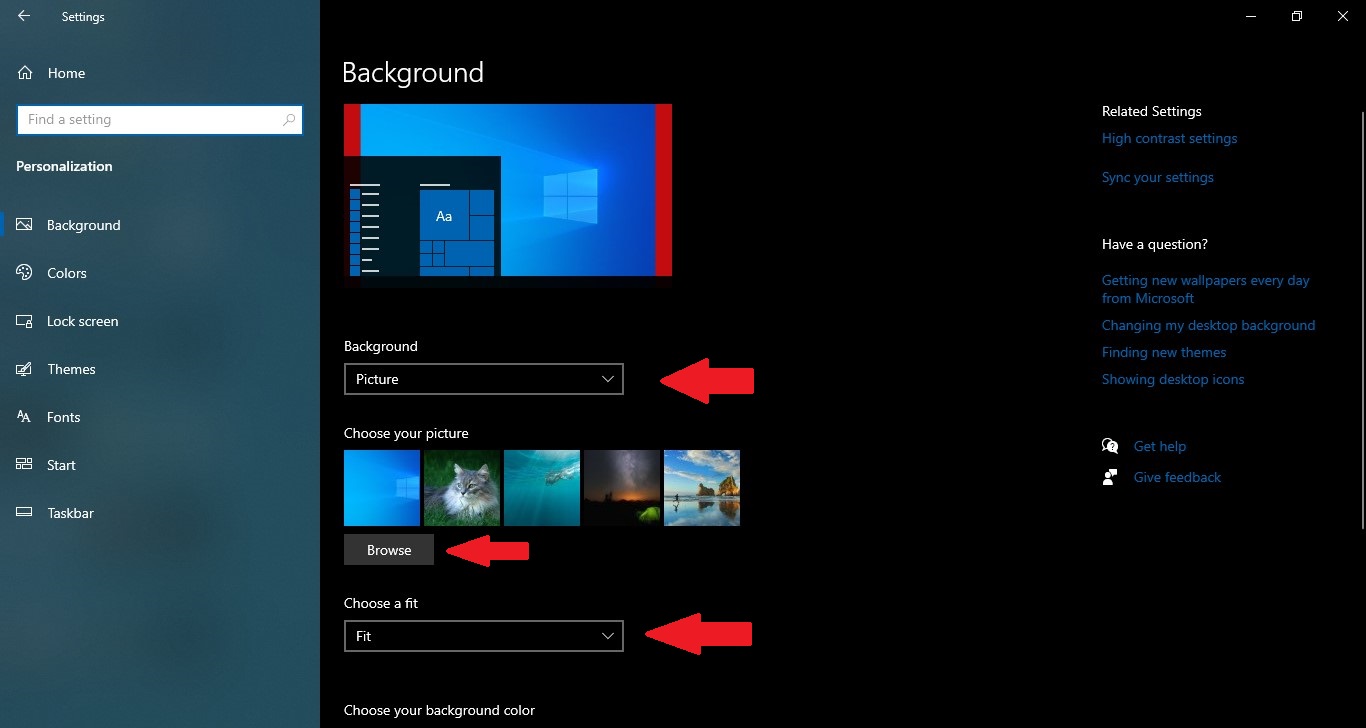
- Head to Settings > Personalization > Background.
- Personalized Under the “Choose your picture” section, click the Browse button and select the folder that contains the image you want to use.
- Then choose a fit.
Accent Colors
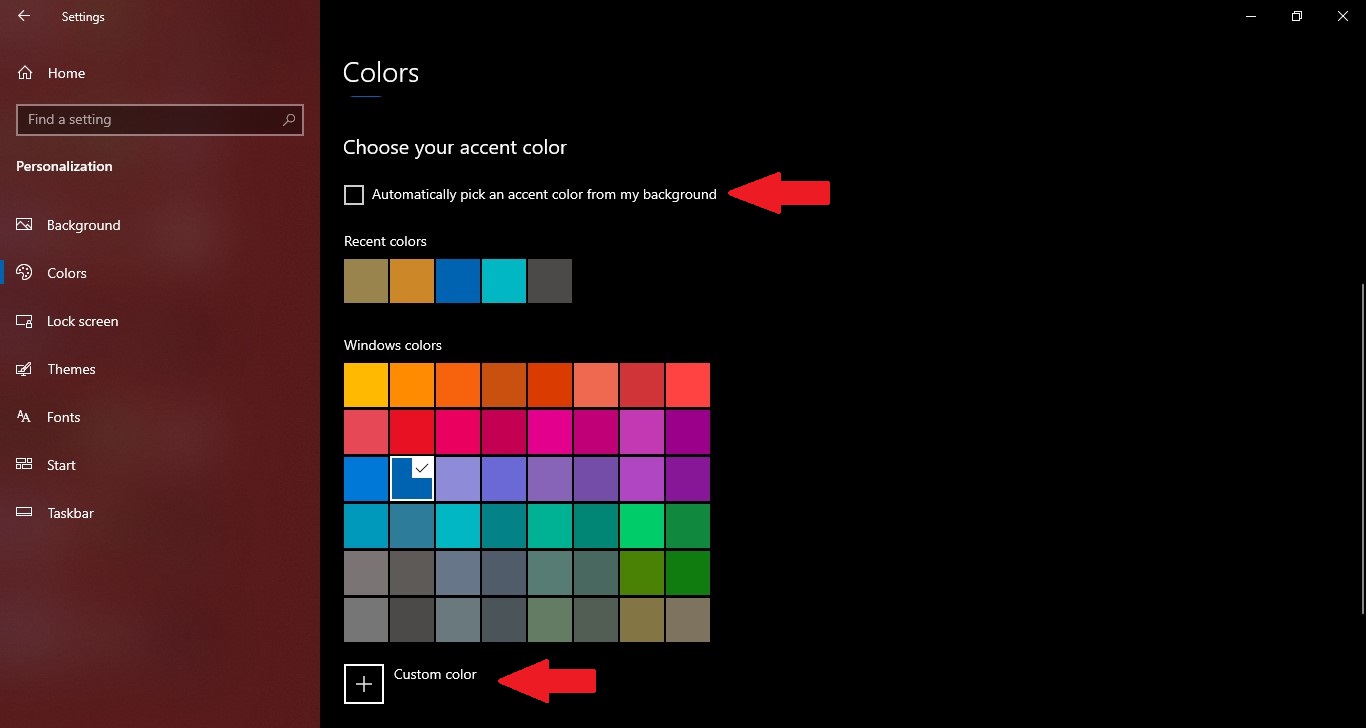
- Go to the Colors tab and choose the accent color you want to set for the display.
- You can also choose to have Windows automatically pick the color based on your background image or customize your own.
How to apply custom theme
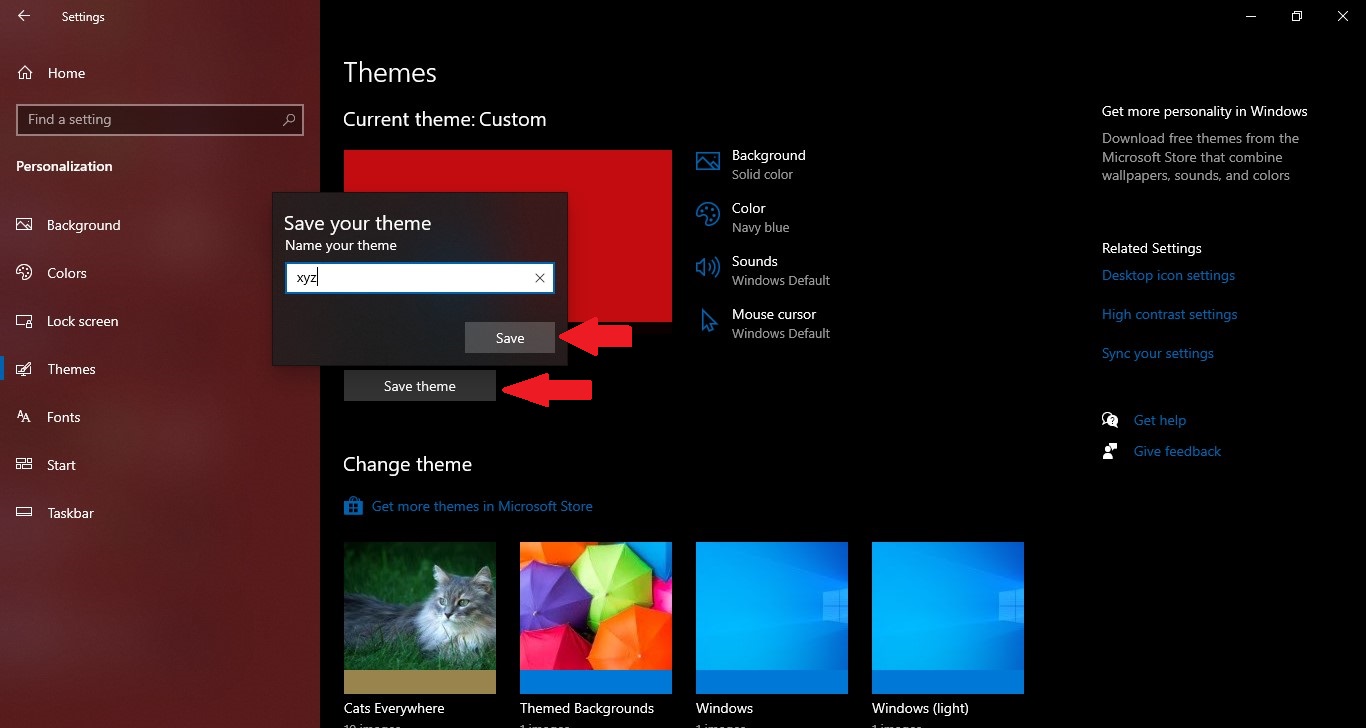
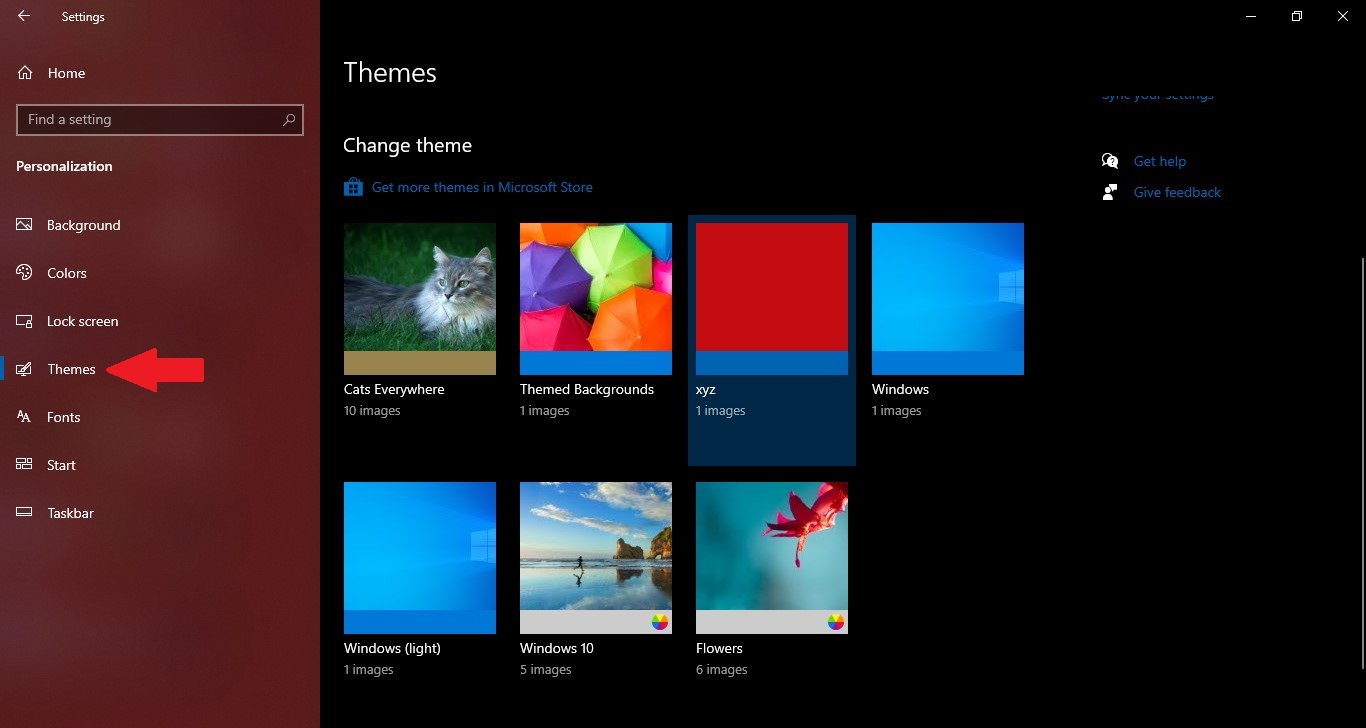
- Once you are done customizing the theme, click on the Themes tab and then the Save theme button.
- Your saved theme will now show up under the list of the other available ones you’ve created or installed when you go to Settings > Personalization > Themes.
How to install and apply Microsoft themes
If you do not want to go through the time-consuming process of creating a custom theme, you can install pre-made themes by Microsoft.
- Download a theme from the Microsoft website. You can find a ton of options there that are great for personalization. The website offers many categories like Movies, Animals, Art, and more.
- Once the theme has finished downloading, double-click on the downloaded “themepack” file to add the theme to your theme library and immediately apply it.
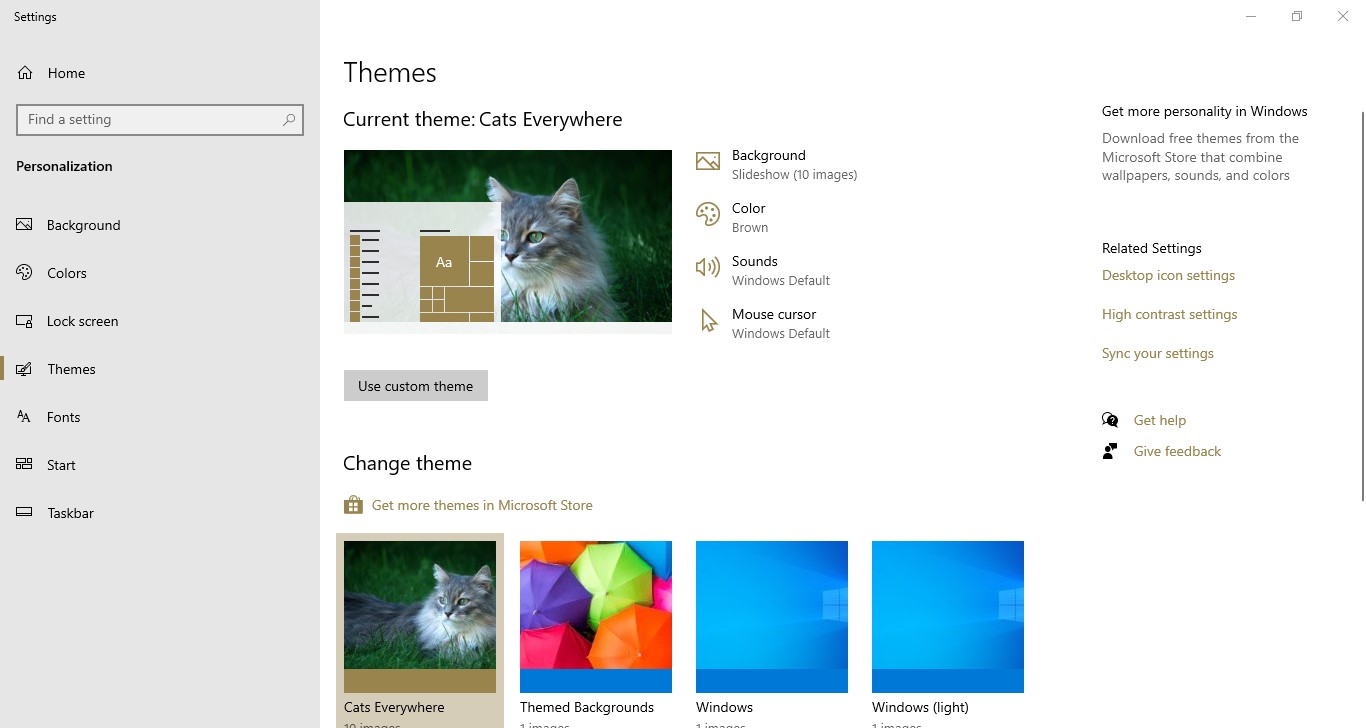
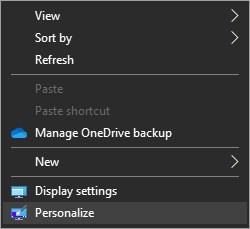
You can also apply themes from the Personalization menu on your desktop. Just right-click an empty space on the desktop background and click “Personalize.” on the drop-down menu.
We hope this guide helped out.
Read Also:


1 comment