In many scenarios, knowing the application Process ID could come in handy. For example: When a program is stuck and you need to terminate the process manually, or while checking the system resources that a particular process is using.
Windows 11 provides every app and service with an identification number known as a Process ID (PID). PID has a lot of uses but it mainly exists to identify each process across the system and programs running multiple instances.
If you are looking to find out if a process is still alive, or what resources a process is using. In this guide, we will show you some of the easiest ways to check the PID for any process (app and service) running in the system on Windows 11.
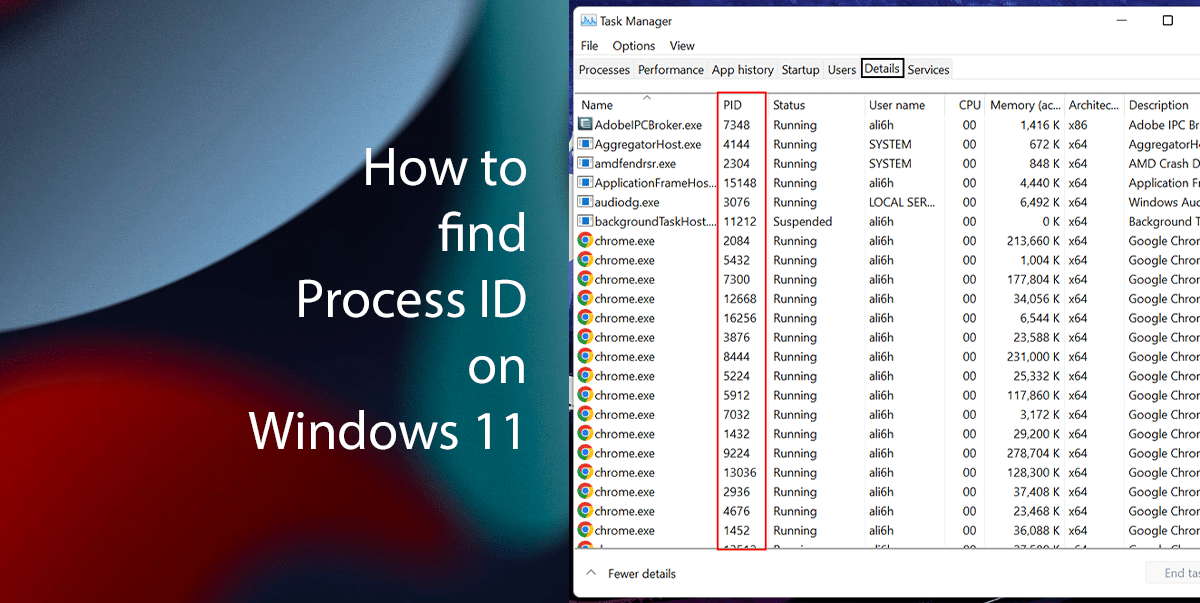
4 easiest ways to find Process ID on Windows 11
How to check the Process ID from the Task Manager
- Right-click on the Start > click on the Task Manager option.
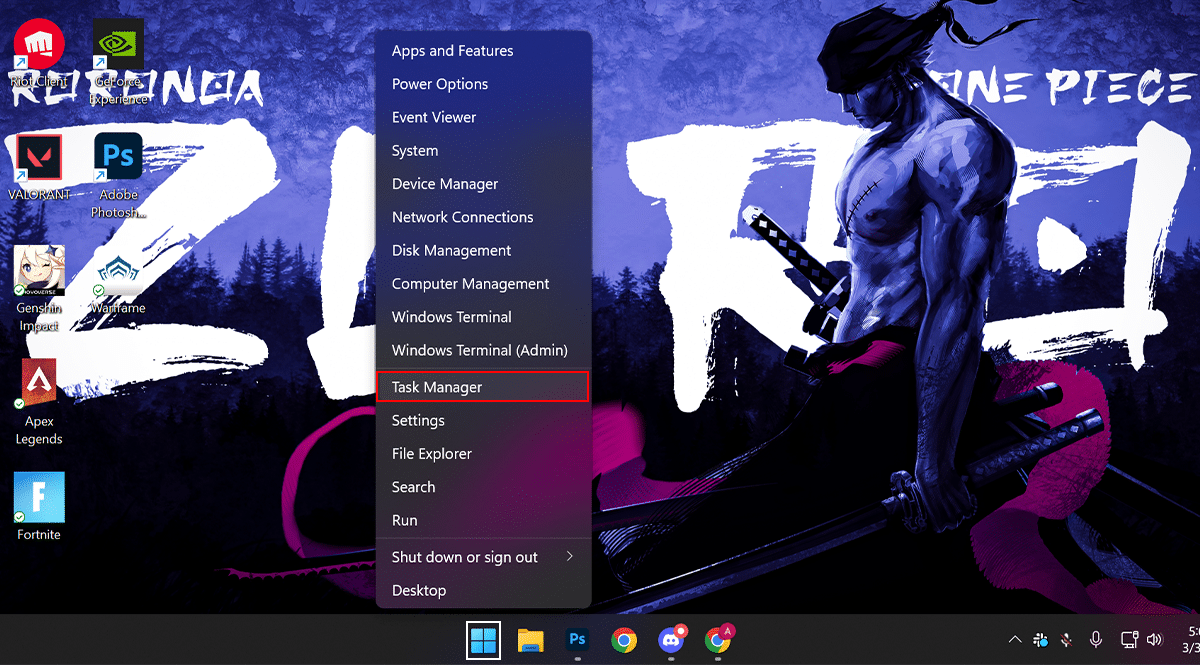
- Quick tip: You can also use the “Ctrl + Shift + Esc” keyboard shortcut to open Task Manager.
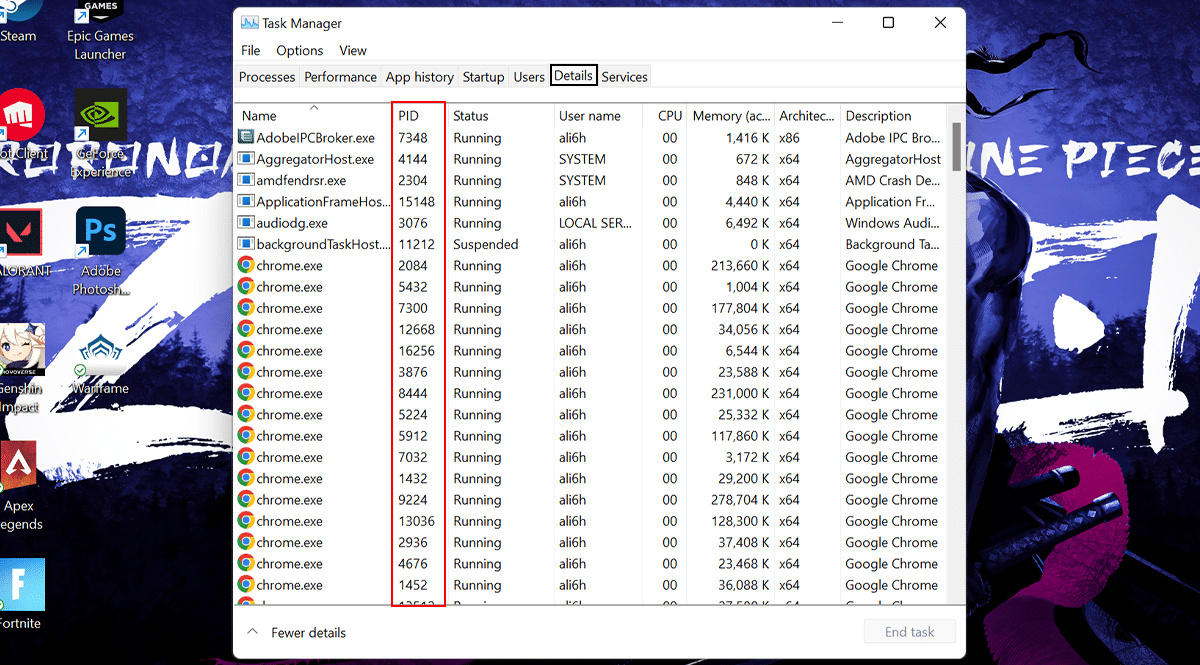
- Click the Details tab > confirm the app’s Process ID in the PID column.
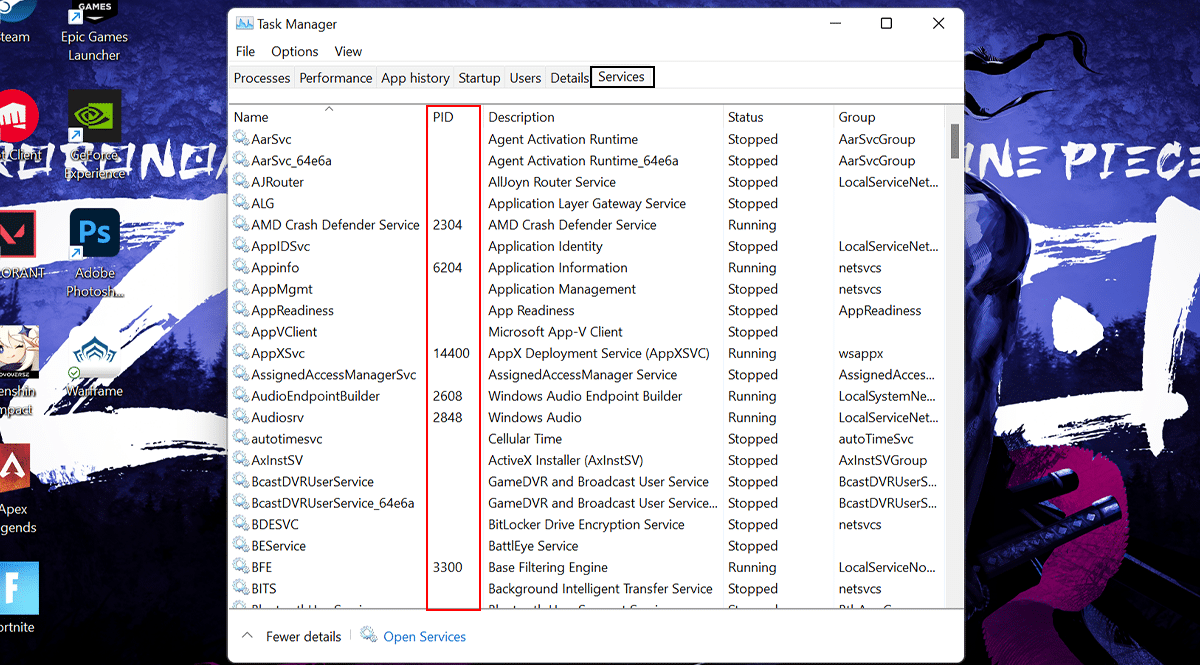
- Click the Services tab > confirm the app’s Process ID in the PID column.
How to check the Process ID from the Resource Monitor
- Open Start > search for Resource Monitor > click the top result to open.
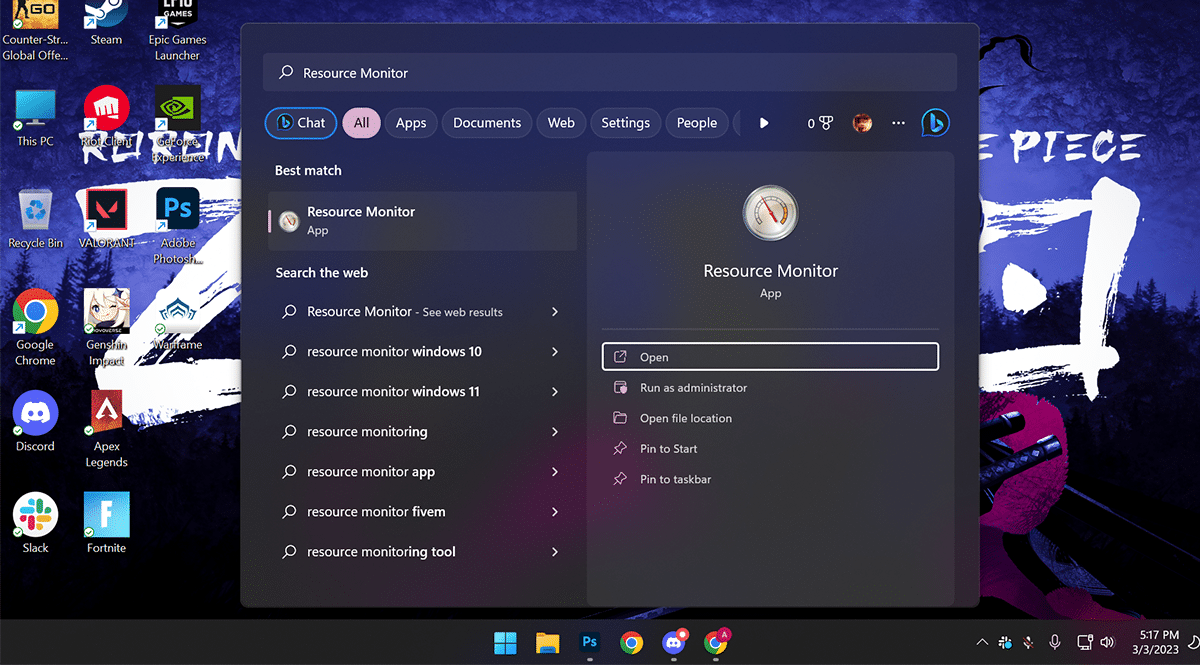
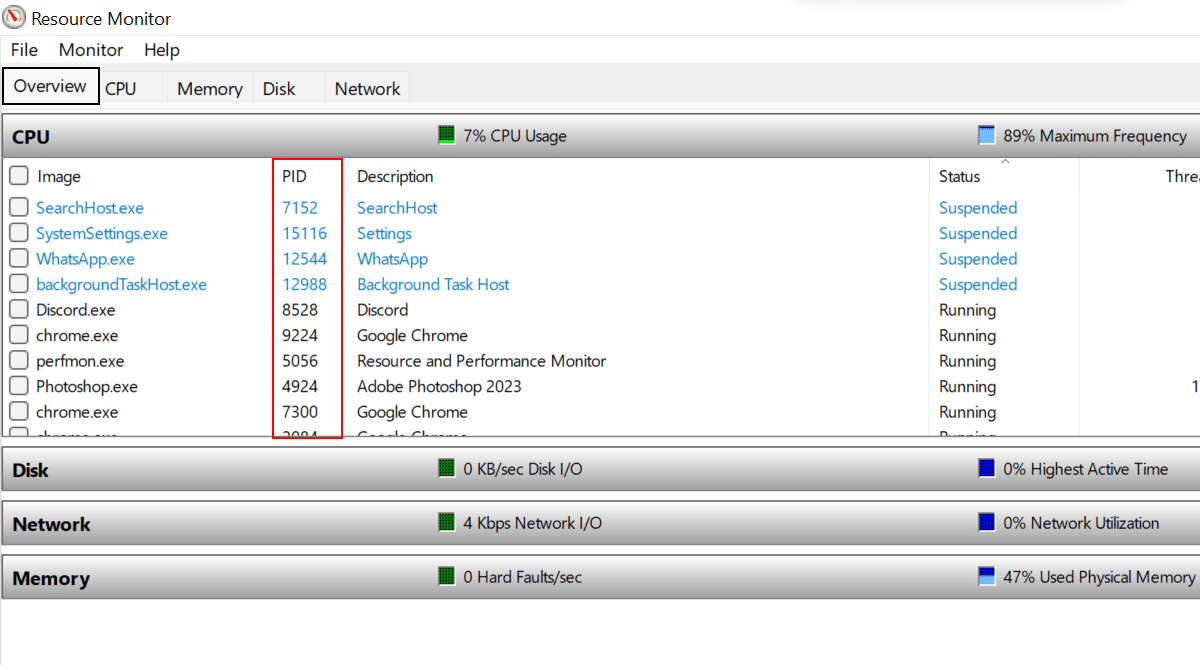
- Click the Overview tab > confirm the Process ID of apps and services in the PID column.
How to check the Process ID from the Command Prompt
- Open Start > search for Command Prompt > click the top result to open.
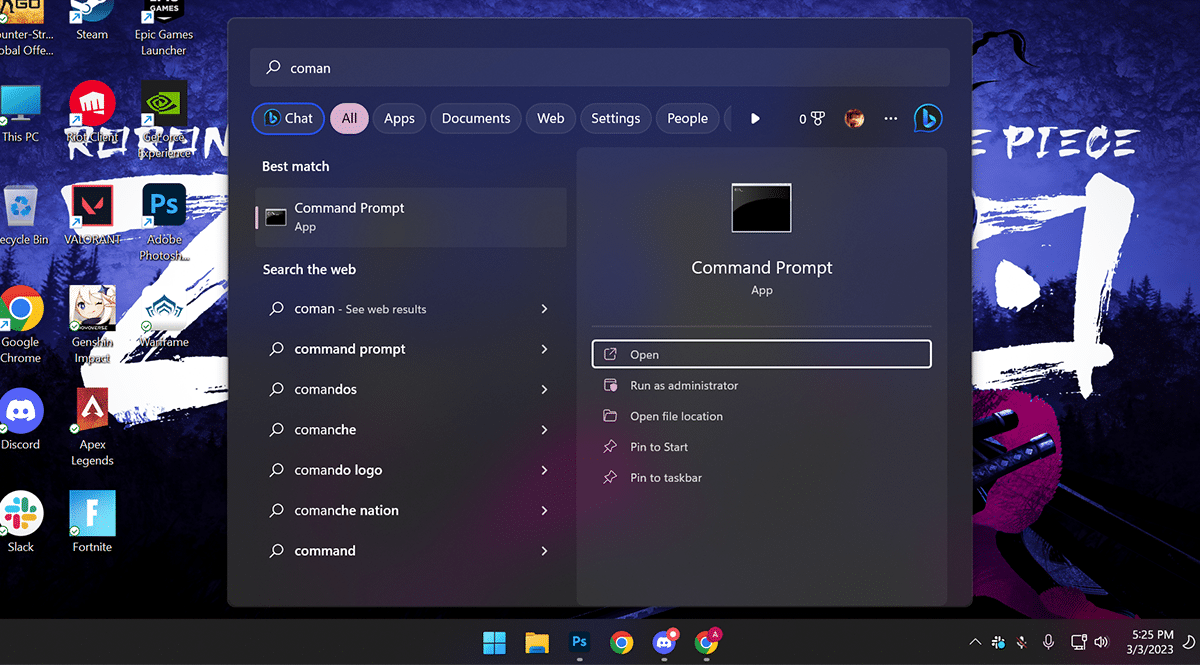
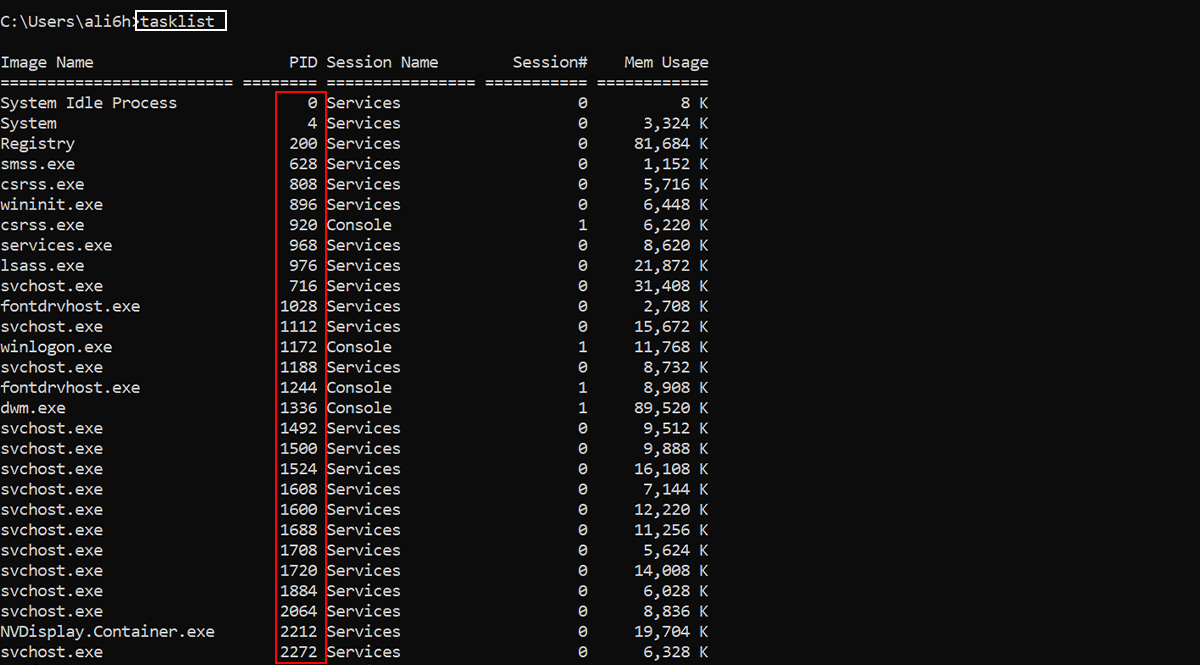
- Type the following command to view the Process ID list: tasklist > press Enter.
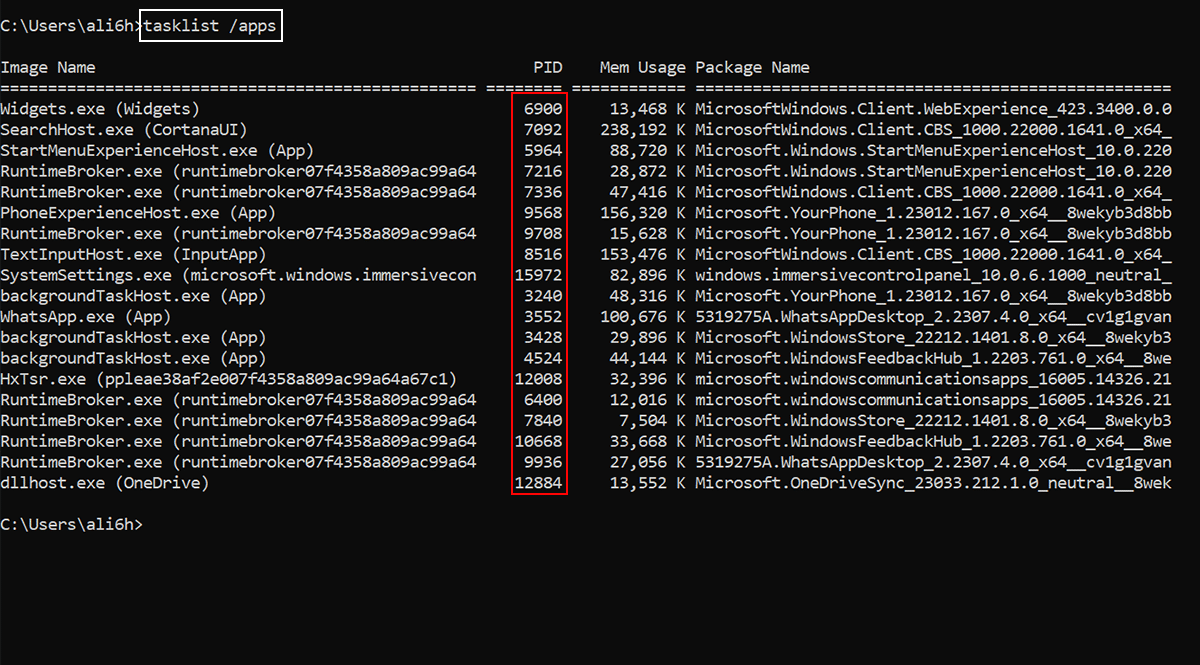
- Type the following command to view a list of Process IDs for Microsoft Store apps: tasklist /apps > press Enter.
How to check the Process ID from the Powershell
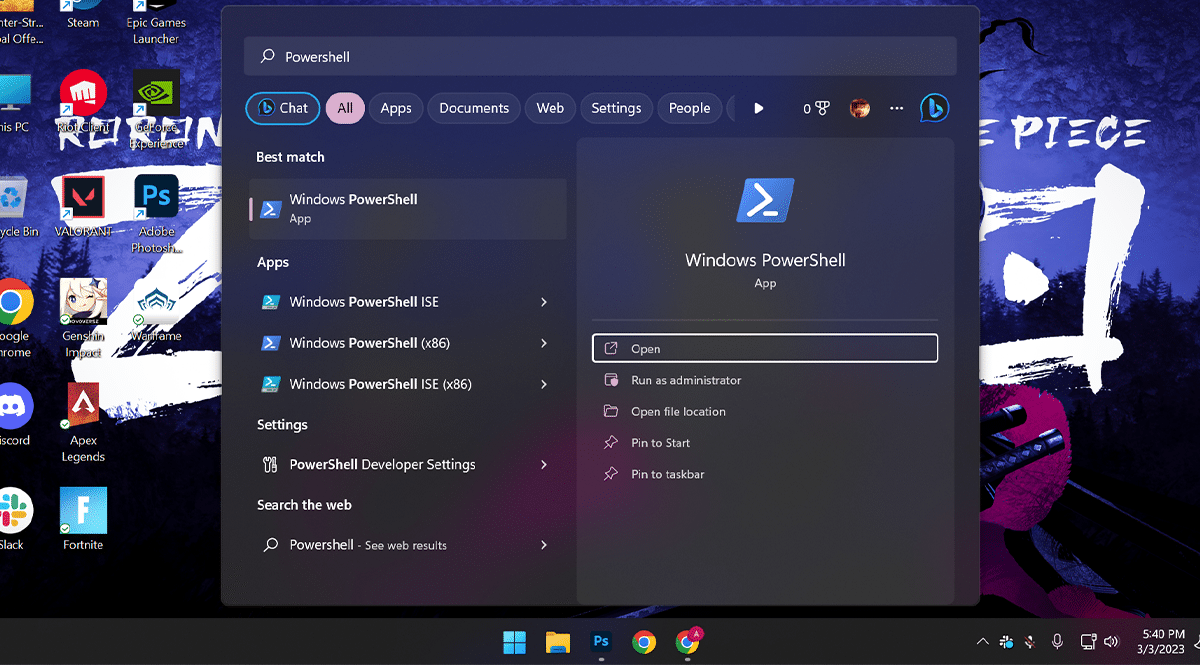
- Open Start > search for Powershell > click the top result to open.
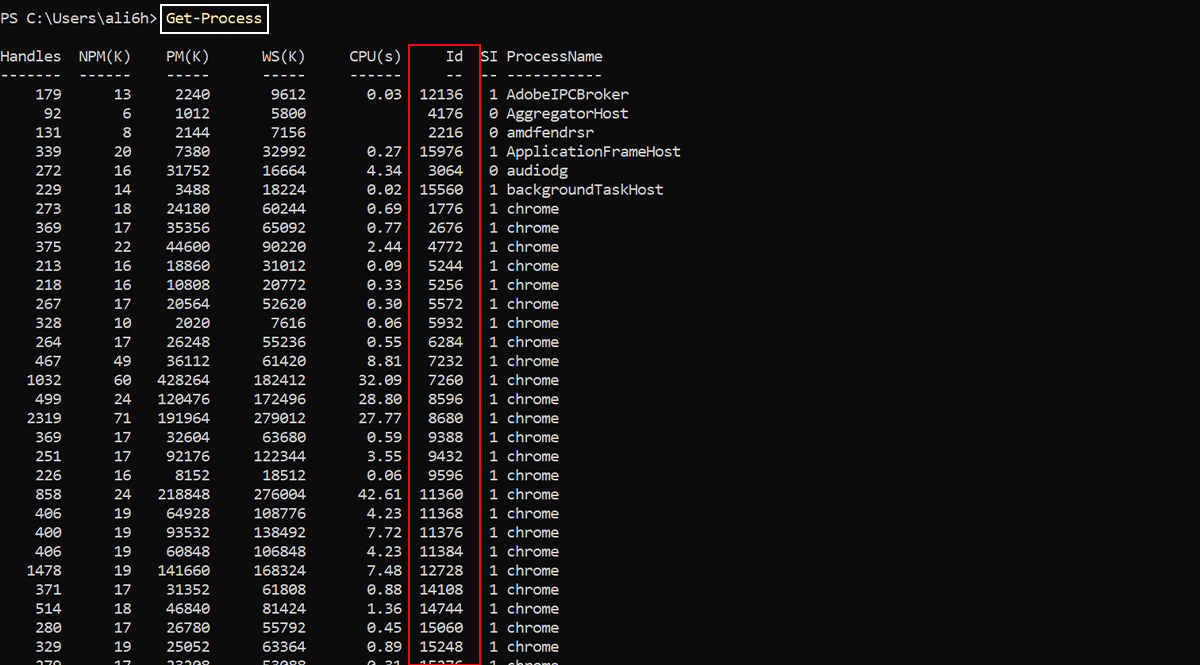
- Type the following command to view the Process ID list: Get-Process > press Enter.
Read more:


