Apple’s native Notes app is updated with several new features in the latest iOS 17 update which has enhanced its value as a capable Notes app.
Now users can inline PDFs, and document scans in Notes which makes it easy to view and mark them up, along with creating checklists, and notes with tablets and the ability to organize them in smart folders, collaborate on shared folders or notes, edit them, and much more. Furthermore, you can add photos and sketches to your entries, and iCloud support syncs your notes across your iOS, iPadOS, and macOS devices.

One of the most important features of the Notes app is the option to lock any note to protect its information from prying eyes.
Many users, like myself, use the Notes app to create personal checklists and entries or save confidential credentials like bank account numbers, ATM pins, passwords, and others. It is important to password protect or lock these notes to prevent someone untrustworthy from accessing them, especially in case of theft.
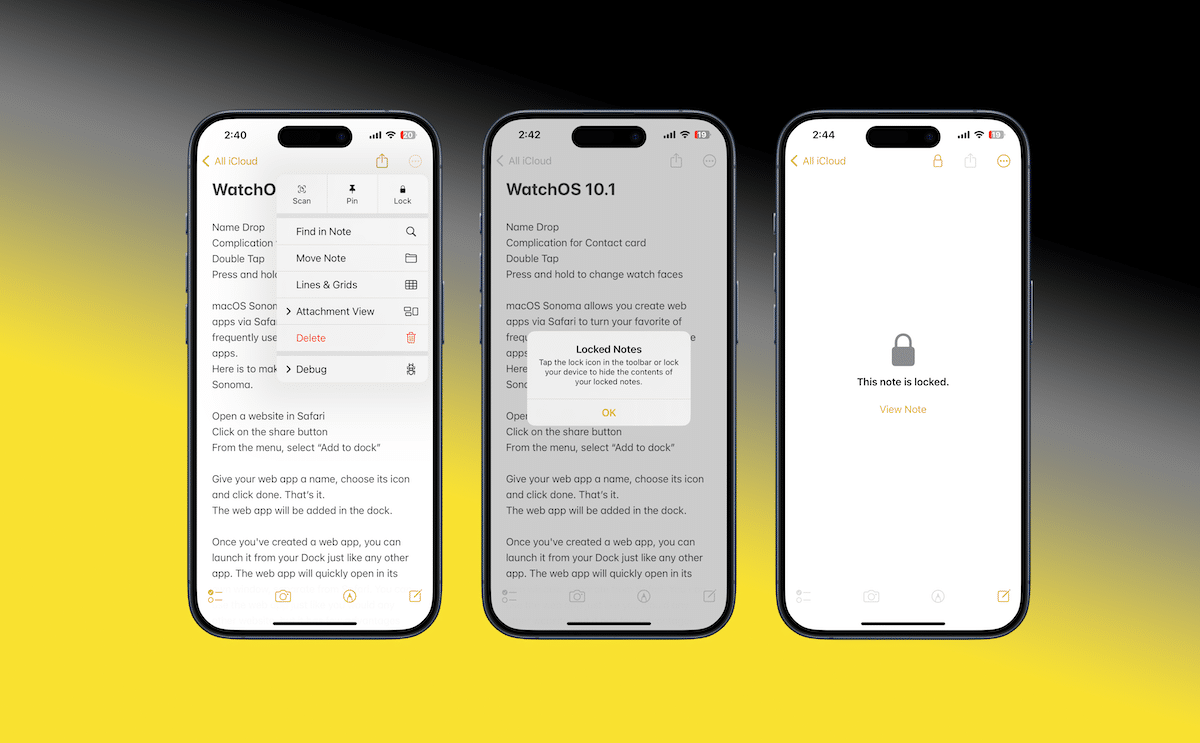
Here is how to can lock your important notes or entries in the Notes app in iOS 17.
How to password-protect notes in the Notes app in iOS 17 on iPhone, iPad, and Mac
Make sure that your device is updated to the latest iOS, iPadOS, and macOS versions, and follow the steps listed below to lock your important notes or entries in the Notes app across Apple devices.
- Open a notes in the Notes app.
- iOS and iPadOS: tap on the three dots menu and select the “Lock” option.
- macOS: tap on the lock icon in the Status bar,
- Then enter the passcode of your device to lock the note.

In iOS and iPadOS, you can enable Face ID and in macOS, you can enable TouchID to quickly unlock the locked notes in the app. When you unlock one note, all of the locked notes in the app are unlocked and you only have to enter the device passcode once to enable the feature, so you can quickly lock other notes with a single tap.
I hope you find this feature and guide useful. Let us know which other guides you will like us to cover in the comments section.


