While it might not be necessary for personal emails or when you’re sharing pictures with family members, a lot of Gmail users like to have an email signature for business reasons. Rather than typing out your contact information every time you have to send a business email, you can use Gmail’s signature feature to save yourself some time.
Since this is not a default option, you will need to head into your Gmail settings to add or change an existing Gmail signature. To learn how to create an HTML email signature in Gmail, follow this easy guide.

How to add an email signature to Gmail
An email signature comprises a few lines of text placed at the bottom of all outgoing mail. It can contain your name, company, phone number, etc. You can use this space to share contact information and to advertise both yourself and your business in a summarized form.
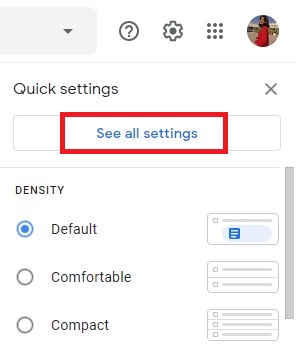
- To add a signature on the Gmail website, open Gmail, and click the Settings icon on the top right. It’s the small gear-shaped to the left of your profile image.

- Click See All Settings to open the full settings menu.

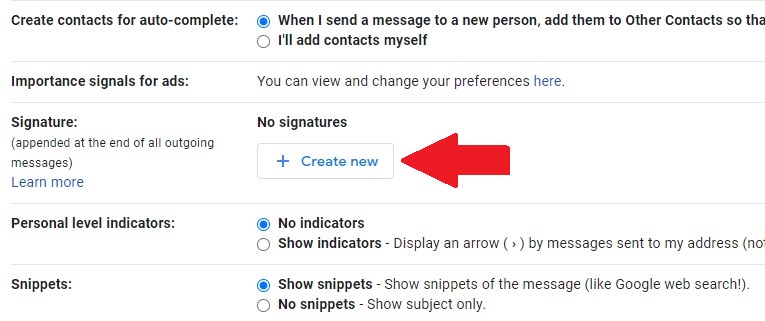
- Scroll most of the way down the page until you find the Signature option, and click the Create New button.

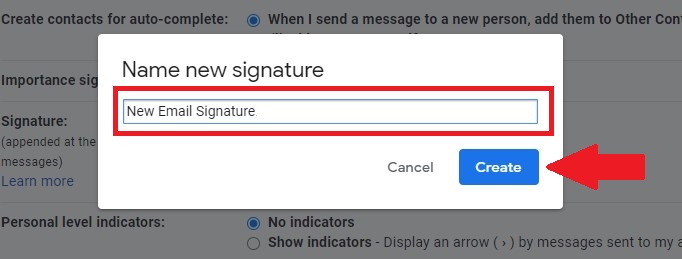
- Next, name your signature and then click Create.

- Type anything you’d like in the box to the right of your new signature. This is where you should add your full name, the name of your company, and perhaps your phone number or social media accounts.

- Below the text editor where you just added your signature, in the Signature defaults section, click the name of your email signature to add it as the default signature to use with new emails.

- In the box beside that one, do the same thing to use your new signature as the default option for replies and forwarded email.

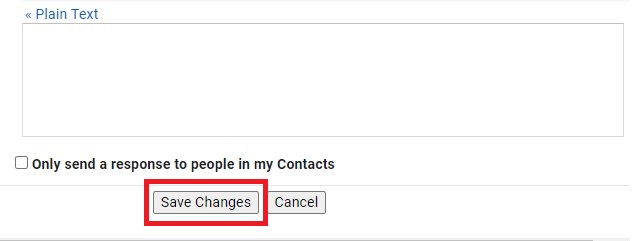
- Lastly, scroll to the bottom of the page and click Save Changes to save your new signature.

We hope this guide helped you out.
Read Also: