On Windows 11 default screen orientation is landscape mode, which allows us to better utilize the space from left to right. However, you can change the screen orientation from landscape to portrait depending on the content.
Screen rotation displays content on your Windows 11 PC in landscape (horizontal) or portrait (vertical) and isn’t available for all apps.
Normally, you would want to rotate the screen when you are using an external monitor for an app to view its content vertically, such as when coding or using social media platforms, dealing with infographics or pictures can be a lot easier when it’s in portrait mode, or if someone accidentally flipped your screen around on your PC and you don’t know how to fix it.
Whatever the reason, in this guide, we will show how to change the screen orientation on Windows 11.

Here is how to change screen orientation on Windows 11
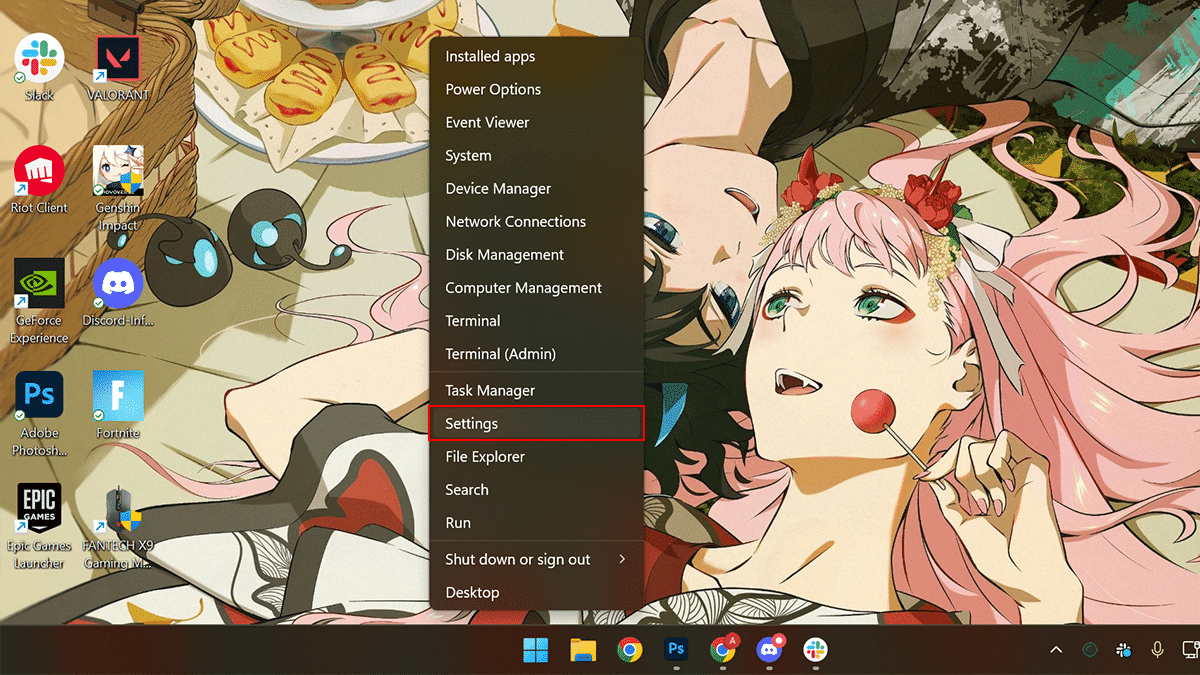
- Right-click on Start > click on Settings.

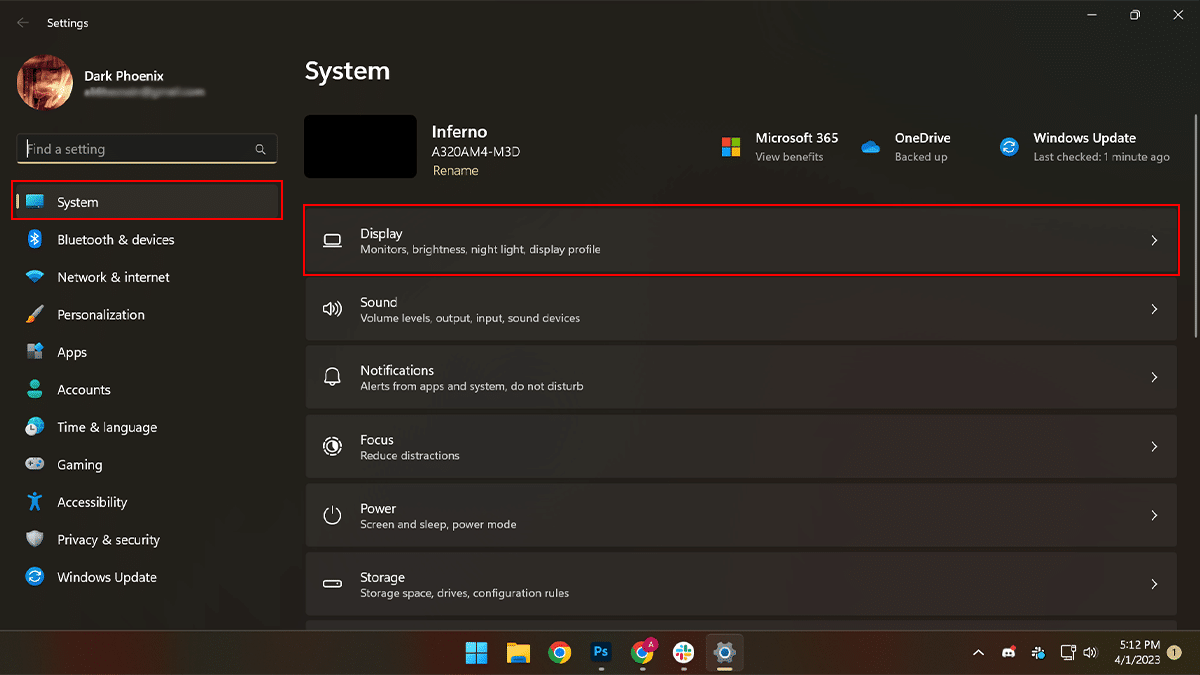
- Click on System on the left pane > click the Display tab.

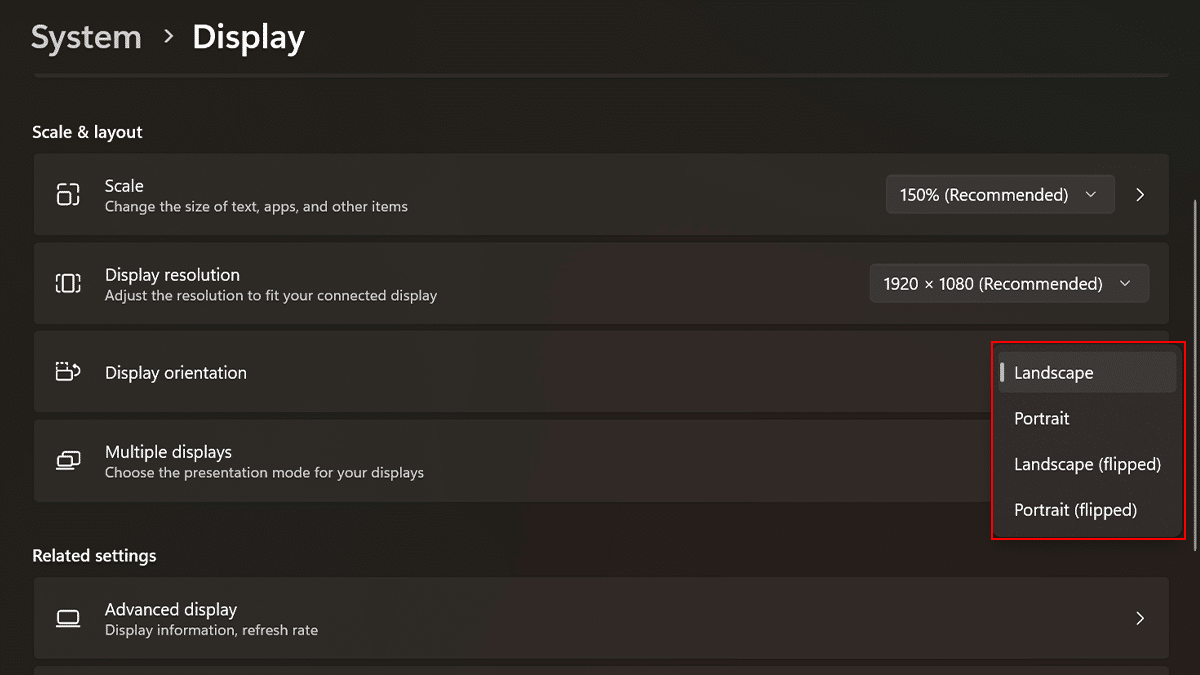
- Under the “Scale & layout” section, select the screen orientation with the “Display orientation” setting:
- Landscape – rotates the screen 180 degrees.
- Portrait – rotates the screen 90 degrees.
- Landscape (flipped) – changes the orientation from vertically to horizontally but also flips the view.
- Portrait (flipped) – changes the orientation from horizontally to vertically but also flips the view.

- When done, you can start using the computer in the desired orientation.
- Note: If you are on a tablet, rotating the device should change its orientation automatically. If it doesn’t work, you may have turned on the option to lock rotation. You can disable “Rotation lock” from the “Quick Settings” flyout using the “Windows key + A” keyboard shortcut or from the “Display” settings page.
Read more: