In Windows 11, users can easily create a new partition on a hard drive using Disk Management.
A partition describes the logical section on the drive that is formatted and configured with a file system like NTFS or FAT32 and drive letter to store files. Usually, users can have multiple partitions on the hard drive that appear on File Explorer as different drives.
You can create as many partitions as you need, but there are limitations depending on the partition style. If the device uses the Master Boot Record (MBR) partition style, you can only have up to four “primary” partitions and only one of them can be set as “active,” usually, this is the partition where the operating system is installed.
However, if the hard drive is initialized as GUID Partition Table (GPT), you can create as many primary partitions as needed since the limitation is 128 partitions.
In this guide, we will show you how to create a new partition on a hard drive on Windows 11.
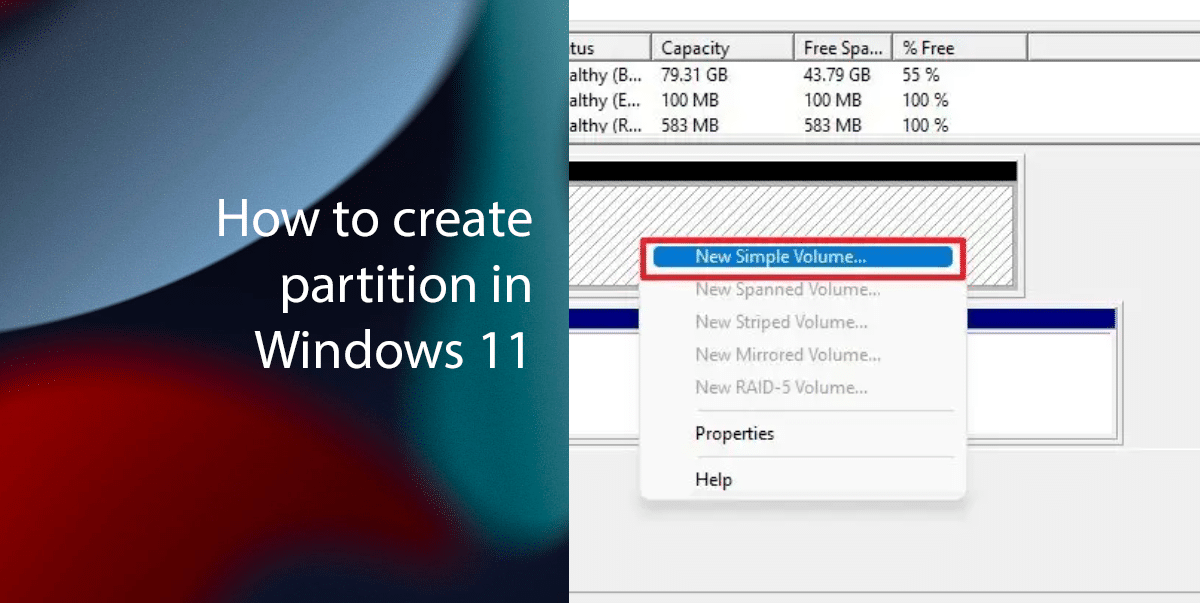
Here is how to create a partition in Windows 11
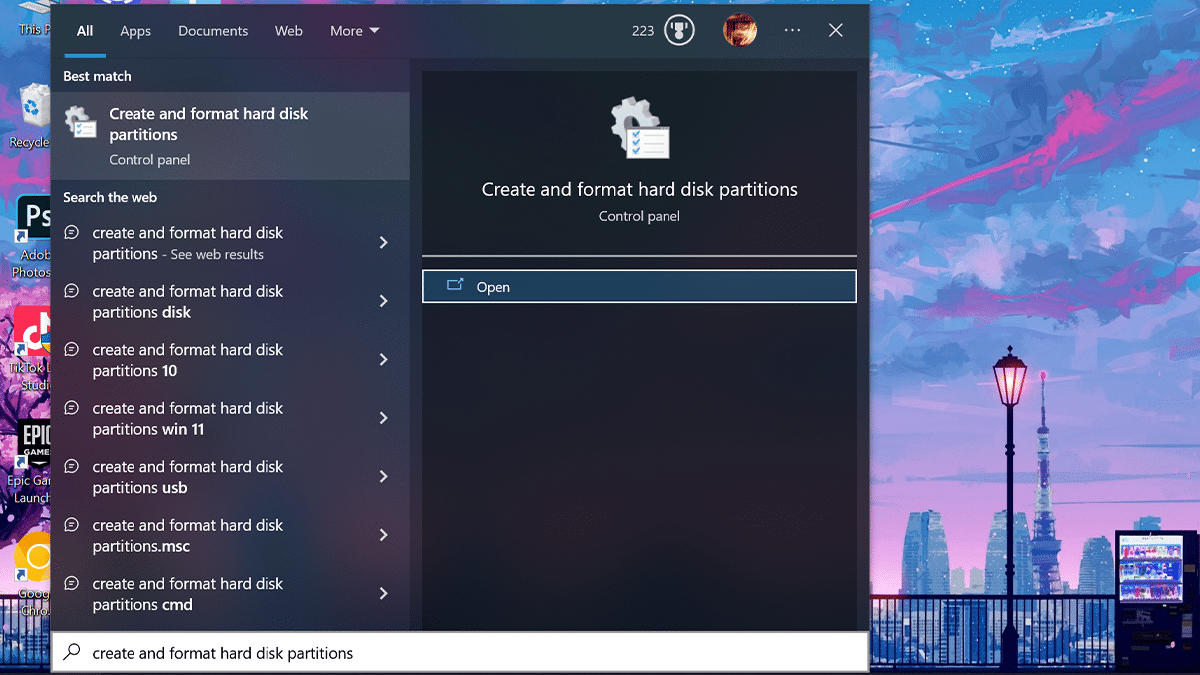
- To open the Disk Management app, open Start > search for Create and format hard disk partitions > click the Open button.
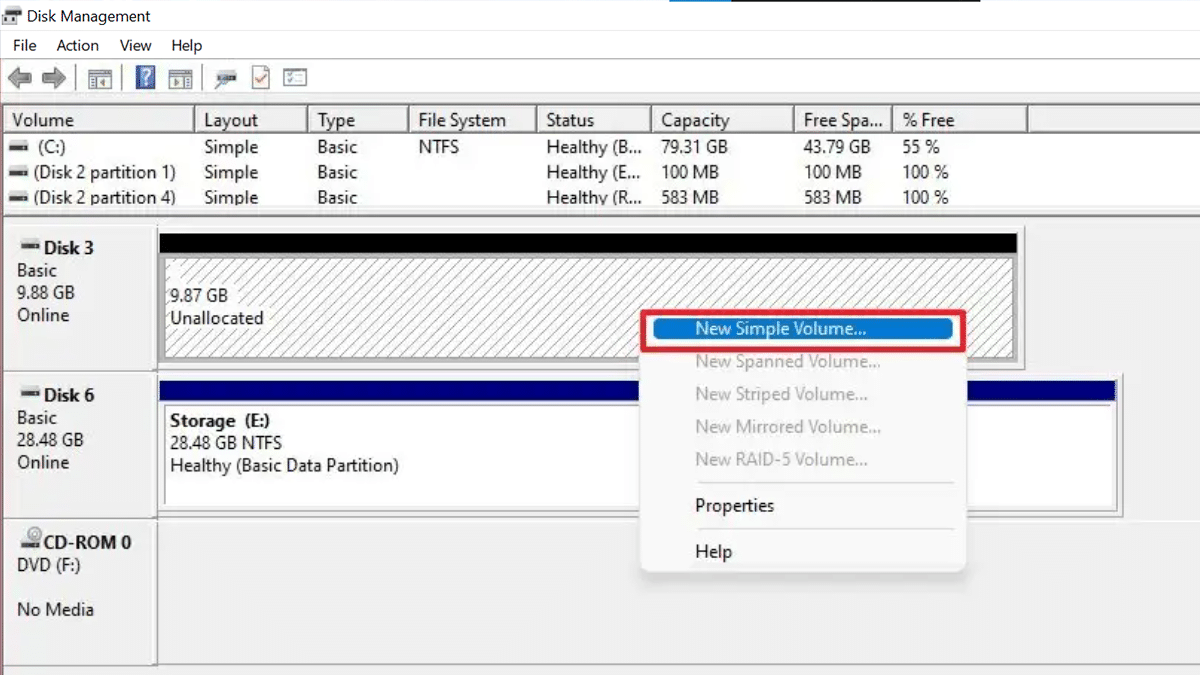
- Right-click the drive with the “Unallocated” and select the “New Simple Volume” option.
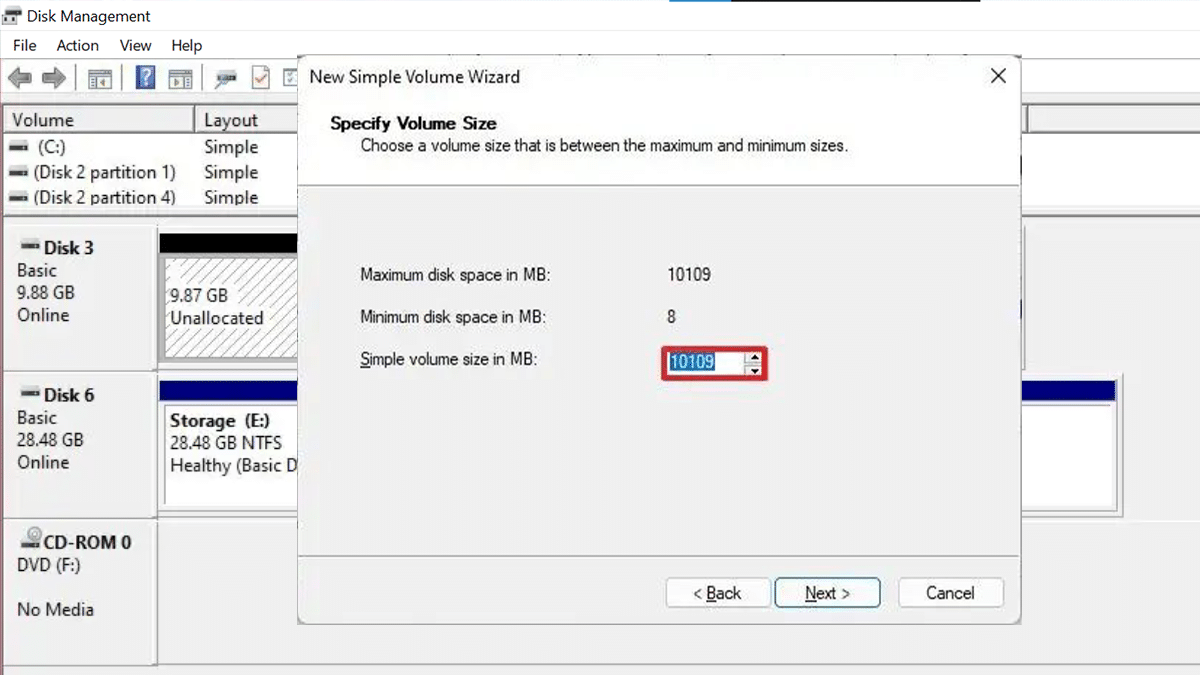
- Click the Next button > confirm the size of the partition in the “Size” setting.
- Click the Next button > select the “Assign the following driver” option and choose the letter for the new partition.
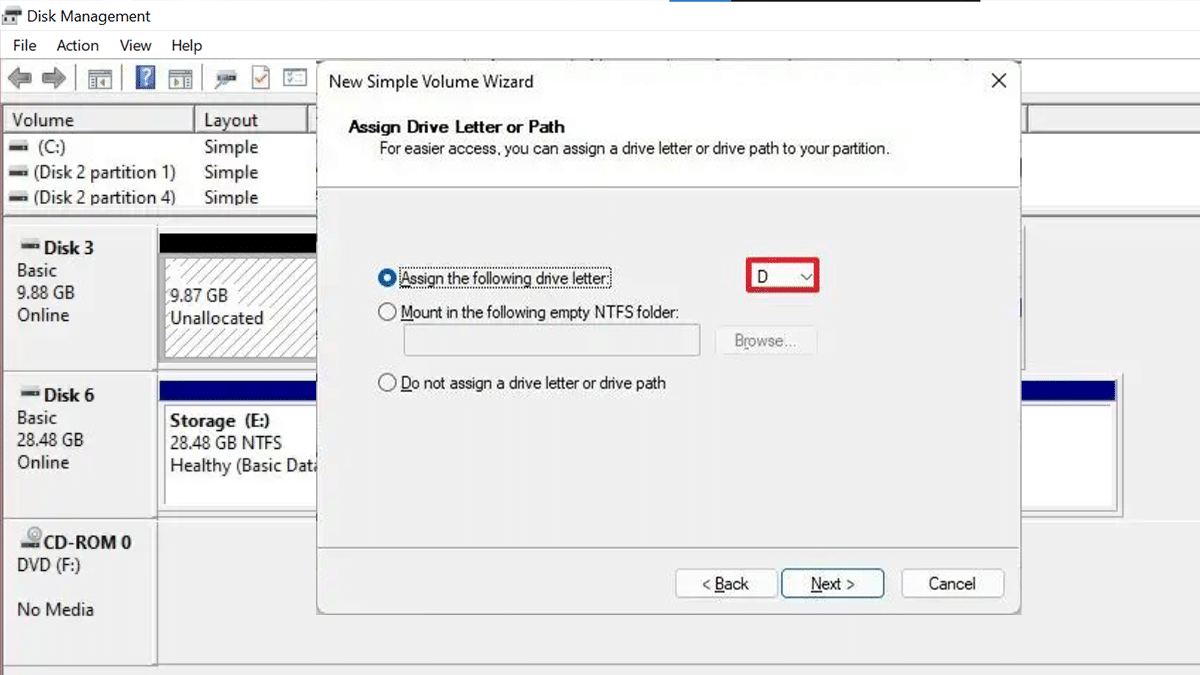
- Click the Next button > select the “Format this volume with the following settings” option > select the NTFS option in the “File System” setting.
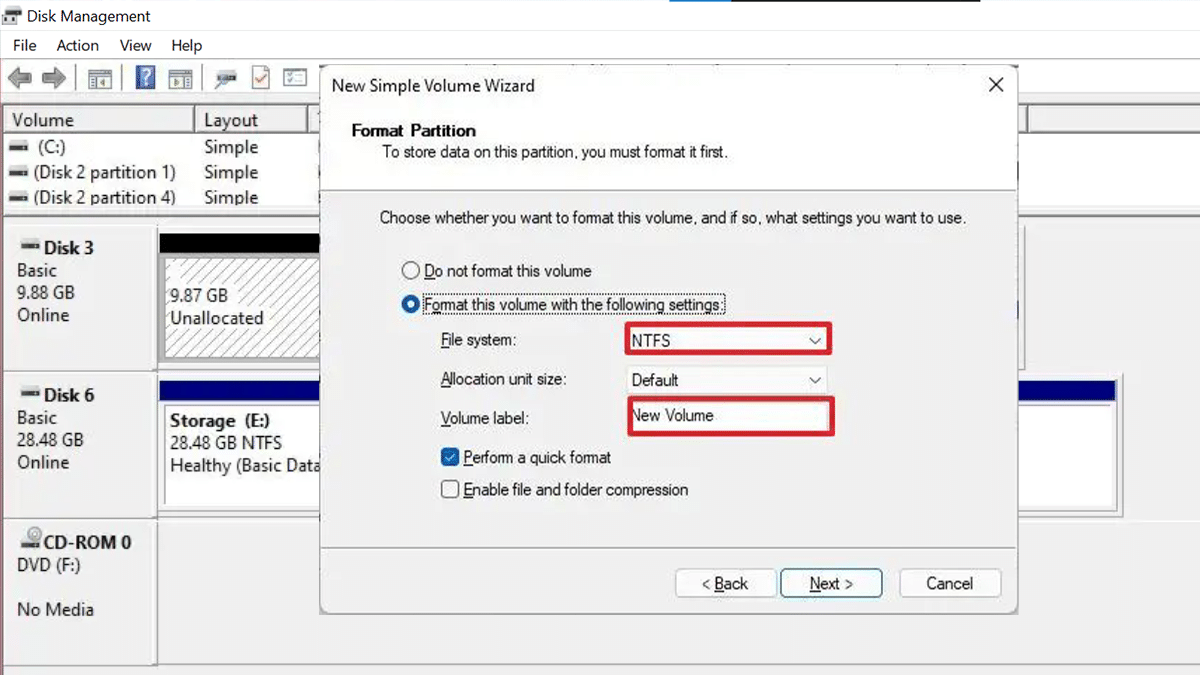
- Confirm the drive’s name in the “Volume label” setting > check the “Perform a quick format” option > click the Next button > click the Finish button.
- When done, Disk Management will create and format the partition on the SSD or HDD storage on Windows 11.
Read more: