As part of its commitment to building inclusive products, Apple has introduced a new feature for speech accessibility, Personal Voice in iOS 17. The new feature is designed for users, who are diagnosed with amyotrophic lateral sclerosis (ALS) or have other conditions which could impact their speaking ability progressively, to create a digital replica of their voice in a private and secure way.
Integrated with Live Speech, Personal Voice reads out loud whatever users type during phone and FaceTime calls and in-person conversations in a voice that sounds like them.
In this guide, we will show you how to set up and use Personal Voice on iOS 17.
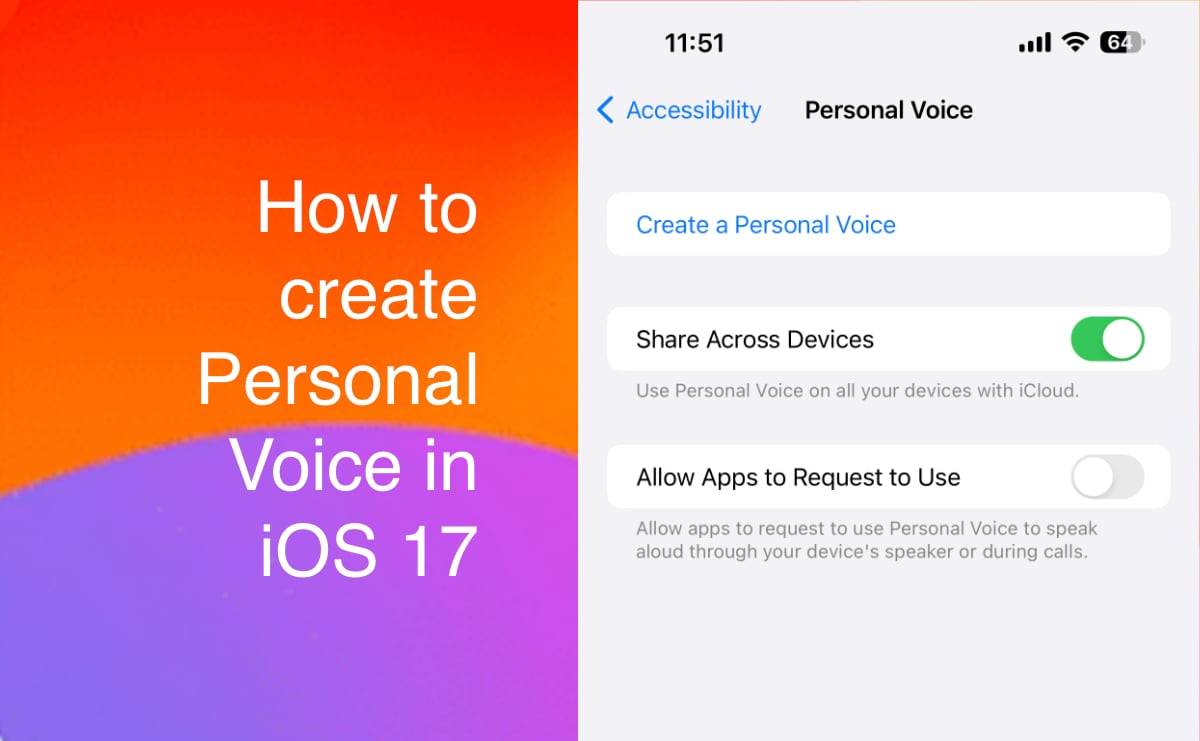
Here is how to set up Personal Voice on iPhone to speak out text in your own voice
Personal Voice and Live Speech accessibility features are available across Apple devices. Once the custom voice is created, users can choose to sync it across devices.
Before getting started, make sure that your iPhone is updated to iOS 17 or newer, then follow the steps listed below:
- Open the Settings app > Accessibility
- Tap on the Personal Voice > Create a Person Voice.
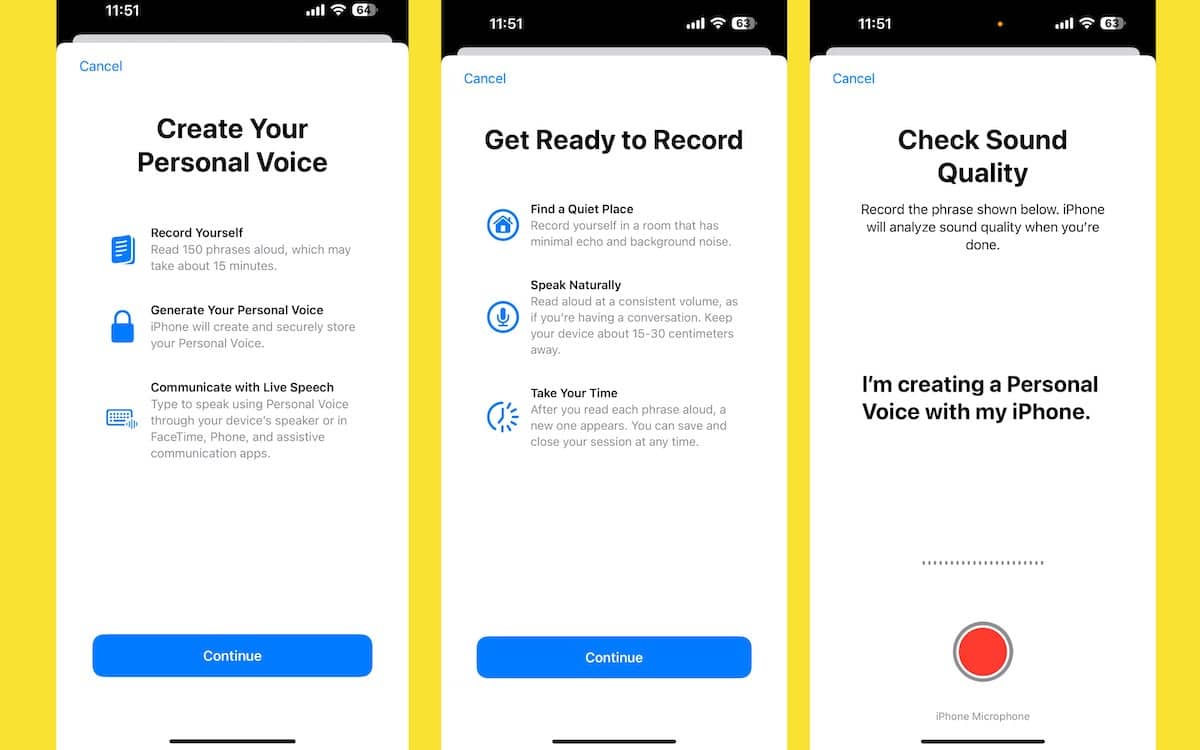
- Tap Continue in the Create Your Personal Voice instructions
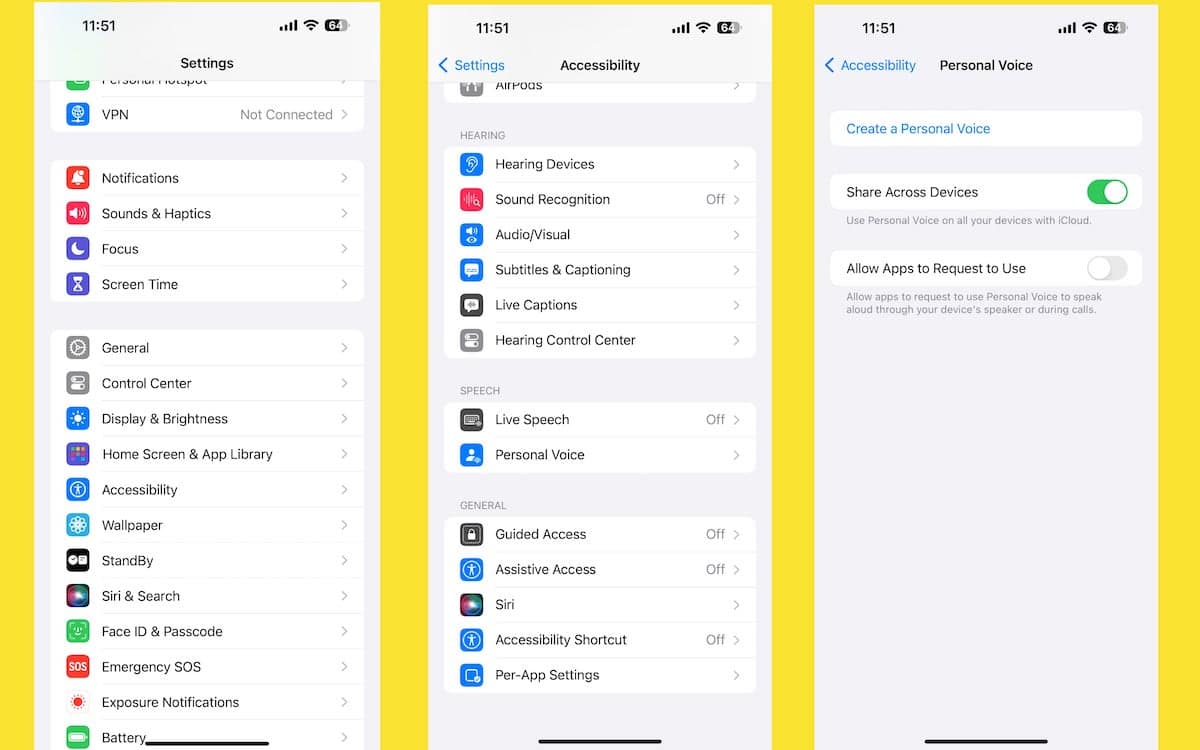
- Tap Continue again in the Get Ready to Record instruction prompts.
- Next, select a name for your voice and tap Continue.
- Tap on the red record button and read out the phrases which appear on the screen.
- First, you wil have to record the Check Sound Quality prompt, to assess the noise level and clarity of voice in the environment.
- If there is background noise, the app will stop recording and send a “Background noise” alert.
- Tap Continue on the “You’re Ready to Go” prompt to start recording.
- This process takes 15 minutes.
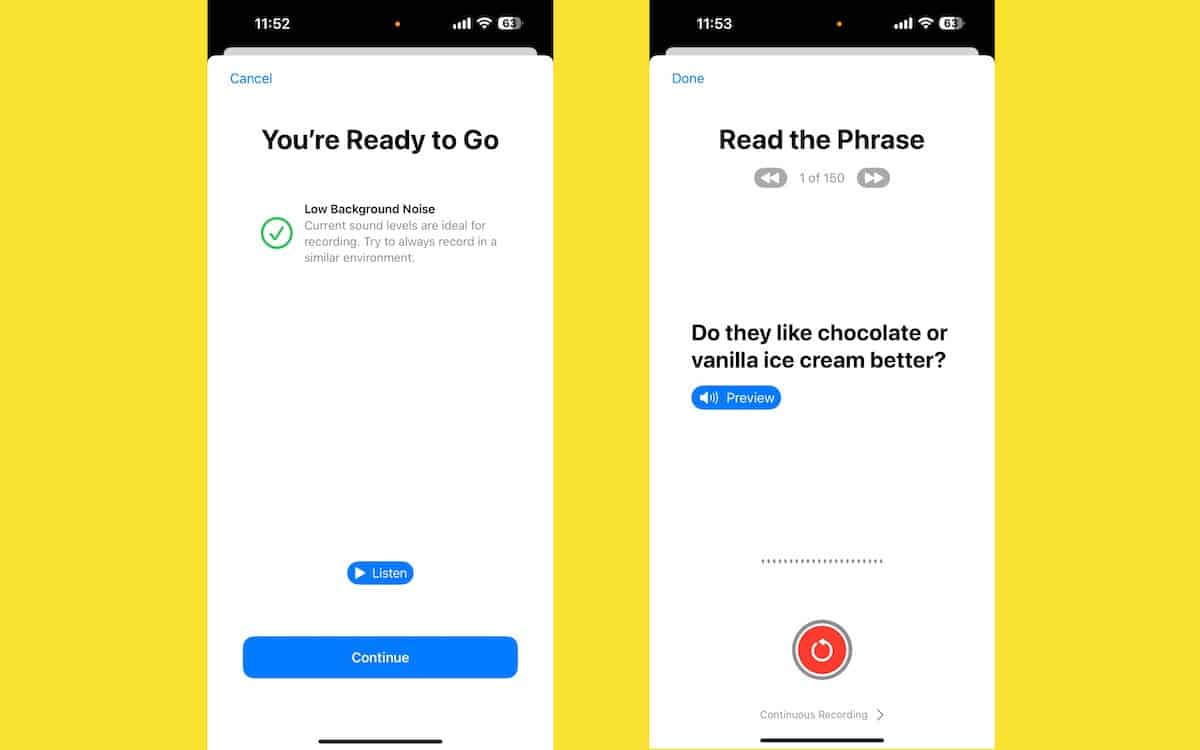
- Tap on the “Replay” button to record a certain phrase again.
- If you want to pause or stop the recording, tap Done to end the procedure and you can restart it at a later time by following steps 1 to 3 and selecting the Personal Voice name.
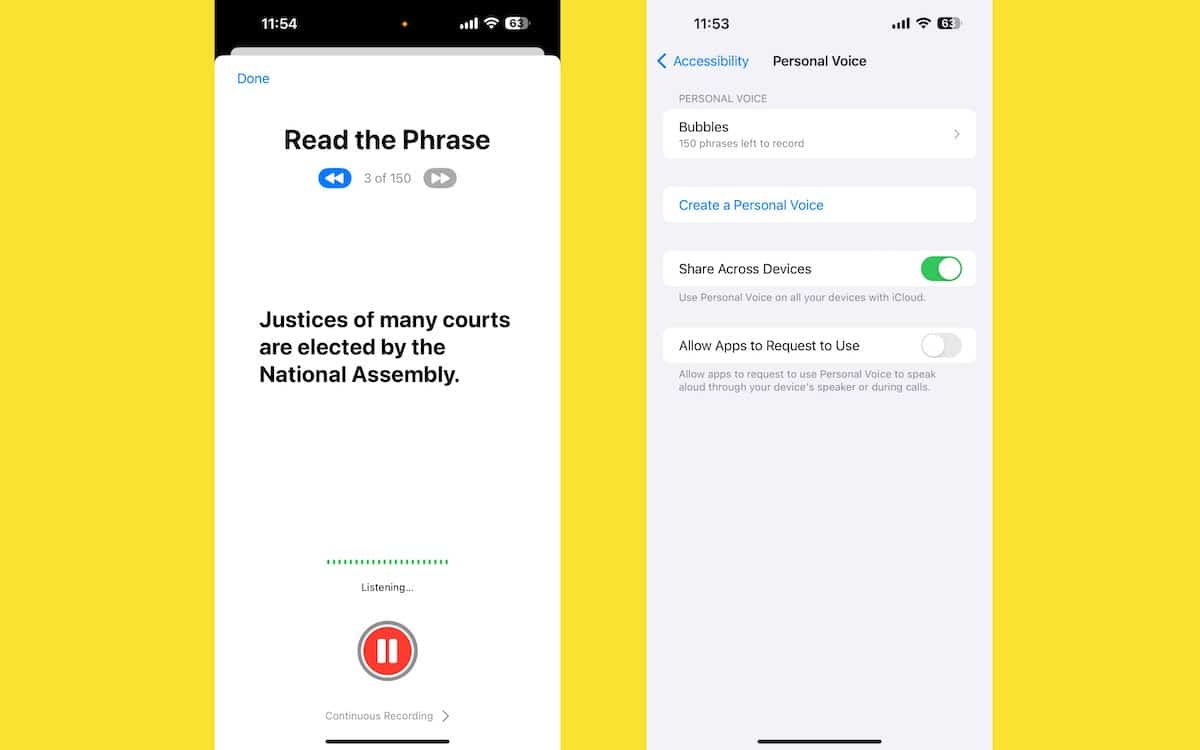
- This process takes 15 minutes.
- In the “You’re Done Recording” UI, tap Continue.
- Tap on Done in the “Preparing Your Personal Voice” UI to create your voice. This process is completed on the device, overnight.
- Select “Allow” for the feature to send you a notification.
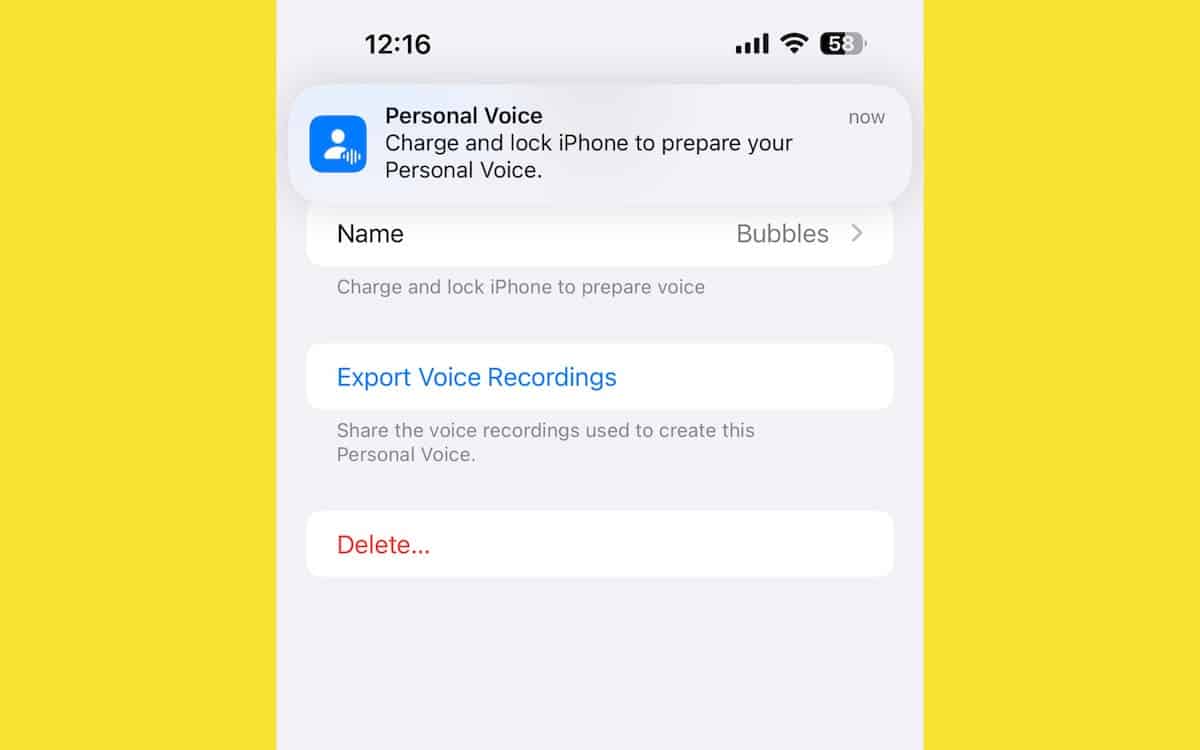
- Next, plug in your iPhone, and tap Done. You will receive a notification when the custom voice is generated.
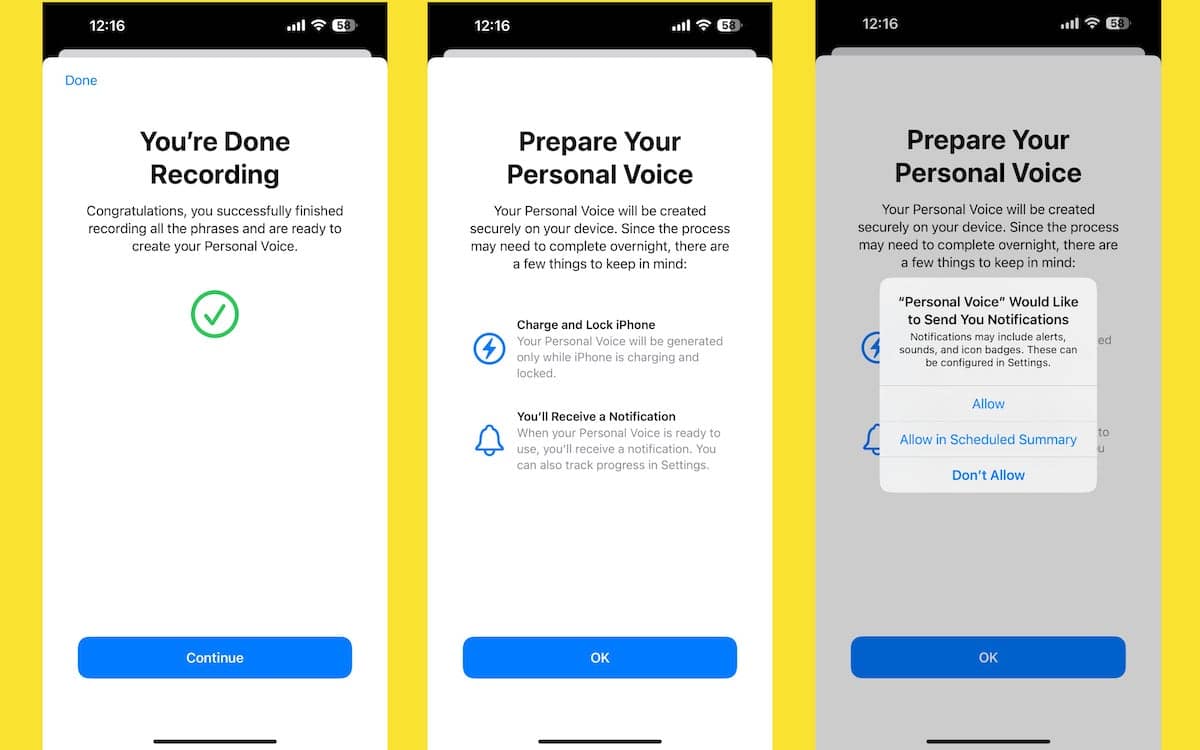
You must keep in mind that it might take longer to generate the custom voice, so do not worry if you do not receive a notification the next morning.
How to use Personal Voice in Live Speech in iSO 17
Currently, Personal Voice can only be used through the Live Speech feature which speaks out loud whatever your type during a phone and FaceTime call or in-person conversations. Here is how to select Personal Voice for the Live Speech feature.
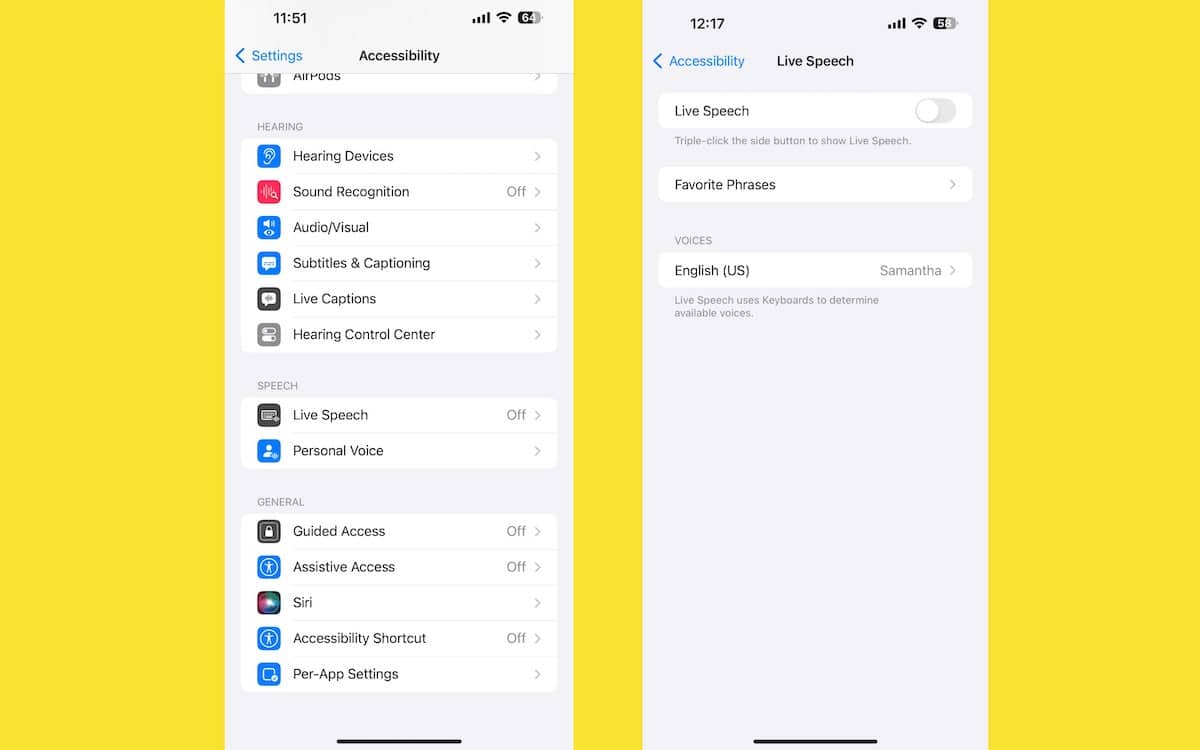
- Open the Settings app > Accessibility.
- Tap on the “Live Speech” option.
- In the menu, swipe the toggle right or tap on it to enable the feature.
- Tap on the “Voices” > Personal Voice.
- Select the custom voice your want to use it.
You can also add Favorite Phrases to quickly access them to be read out loud by triple-pressing the power button.
Read More:
- How to use Guided Access on iPhone when letting someone else use it
- How to organize Home Screen pages on iPhone
- How to use AirTag to locate misplaced or lost items
- How to disable “Allow Paste From” pop-ups on your iPhone
- How to add multiple languages to the keyboard on iPhone
- Roblox now supports M1 Apple Silicon; Here is how to get fully native version
- How to delete words from predictive text on iPhone


