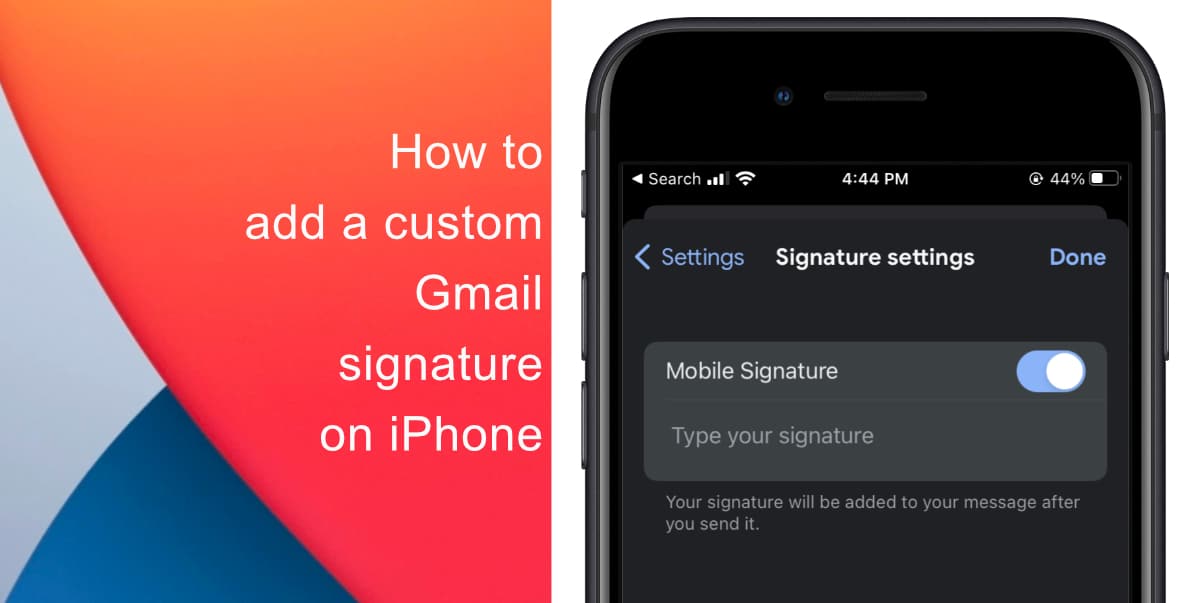
Did you know that you can add a custom Gmail signature to your emails? Email signatures are a great way to add a professional touch to your emails, providing recipients with essential information about yourself, such as your name, job title, and contact information. By default, Gmail includes a standard signature at the bottom of every email, but you can customize it to suit your needs.
If you have already created an email signature using the Gmail web client, it will carry over to the Gmail app on iPhone or iPad. However, you may wish to have a custom Gmail signature when using the Gmail app on your mobile device. Here’s how to add a custom Gmail signature on iPhone.

Learn how to add a custom Gmail signature on iPhone
- To set a custom Gmail signature on your iPhone, you will first need to log into the Gmail app using the account you wish to set the signature for.
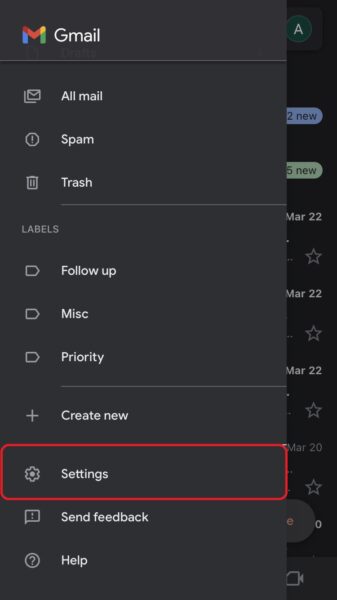
- Once you’re logged in, tap the menu icon, which looks like three lines stacked on top of each other. Scroll down and choose Settings from the menu.

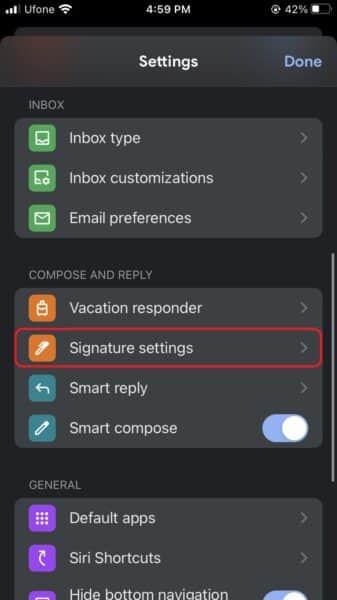
- Now tap Signature Settings This will take you to the signature settings page, where you can add or edit your signature.

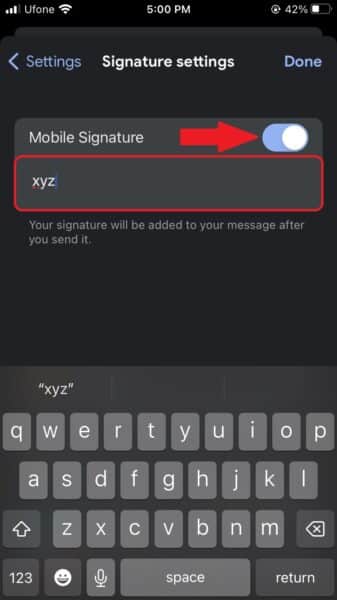
- Toggle the switch for Mobile Signature to the ON position. This will activate the custom signature feature for the Gmail app on your iPhone.

- Now you can create your custom Gmail signature. Type in the information you want to include, such as your name, job title, contact information, and any other relevant details.
- Once you have created your signature, tap Done to save it. Now any emails you send from the Gmail app on your iPhone or iPad will include the custom mobile signature you specified.
Remember, if you have already created a Gmail signature using the web client, it will be used by default when you send emails from the Gmail app on your mobile device.
We hope this guide helped you learn how to add a custom Gmail signature on iPhone. If you have any questions, let us know in the comments below.
Read more: