Windows 11 users can easily disable the Microsoft Defender Firewall in multiple ways, and we will show you how.
The Windows 11 firewall is a security feature that helps protect your computer from unauthorized access. It does this by blocking incoming and outgoing network traffic unless it is specifically allowed by a rule. The firewall is turned on by default, but you can disable it if you need to.
A few reasons why you might want to disable the firewall in Windows 11 are stated in the following:
- To troubleshoot network problems: Sometimes, the firewall can interfere with network connections. If you’re having problems connecting to the internet or other devices on your network, disabling the firewall can help you to troubleshoot the issue.
- To test software: If you’re developing or testing software that needs to make network connections, you may need to disable the firewall in order to test it properly.
- To improve performance: The firewall can use some system resources, so disabling it can theoretically improve the performance of your computer. However, the impact on performance is usually very small, and it’s not worth disabling the firewall for this reason alone.
- To connect to a network that requires it: Some networks, such as public Wi-Fi networks, may require you to disable the firewall in order to connect.
In this guide, we will show you how to disable (re-enable) the built-in firewall on Windows 11 in the two easiest methods. Note that disabling the firewall can make the computer more vulnerable to security threats. If you’re not sure whether or not you should disable the firewall, it’s best to leave it enabled.
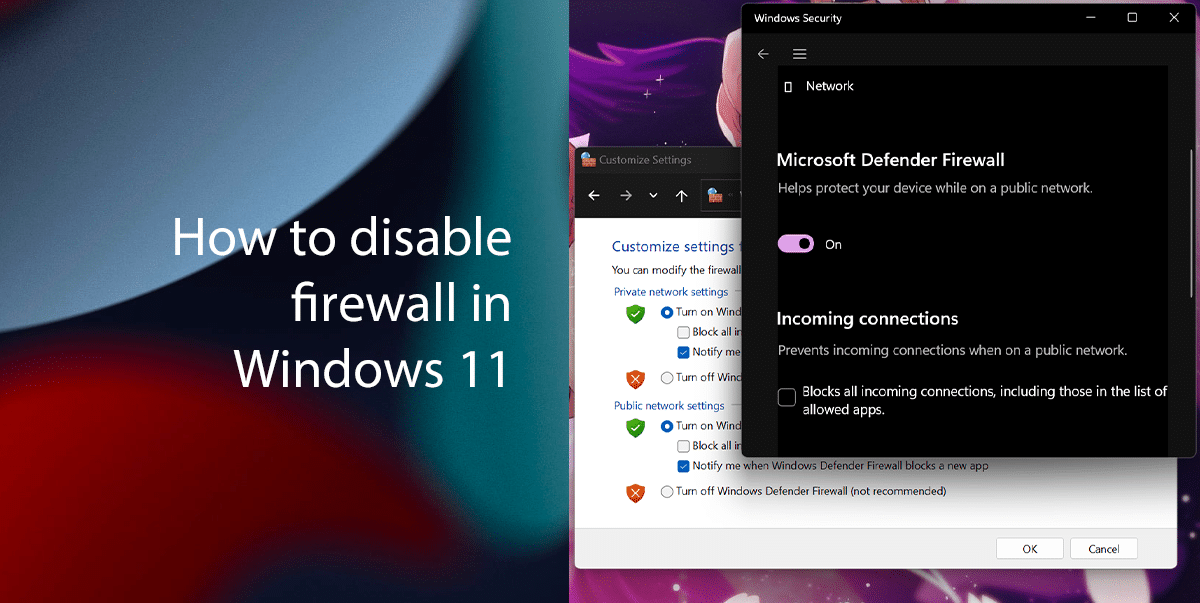
Two easiest ways to disable (re-enable) the built-in firewall on Windows 11
How to disable the built-in firewall from Windows Security
- Open Windows Security > click on Firewall & network protection.
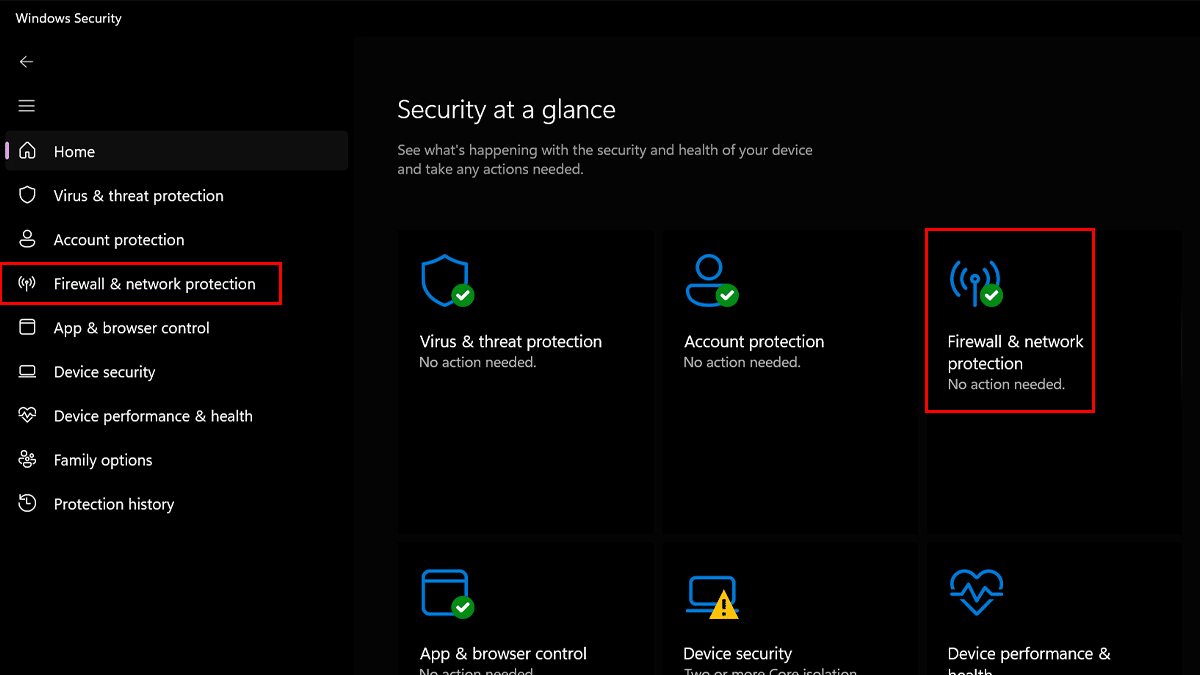
- Click the active network option.

- Turn off the “Microsoft Defender Firewall” toggle switch to disable the firewall.
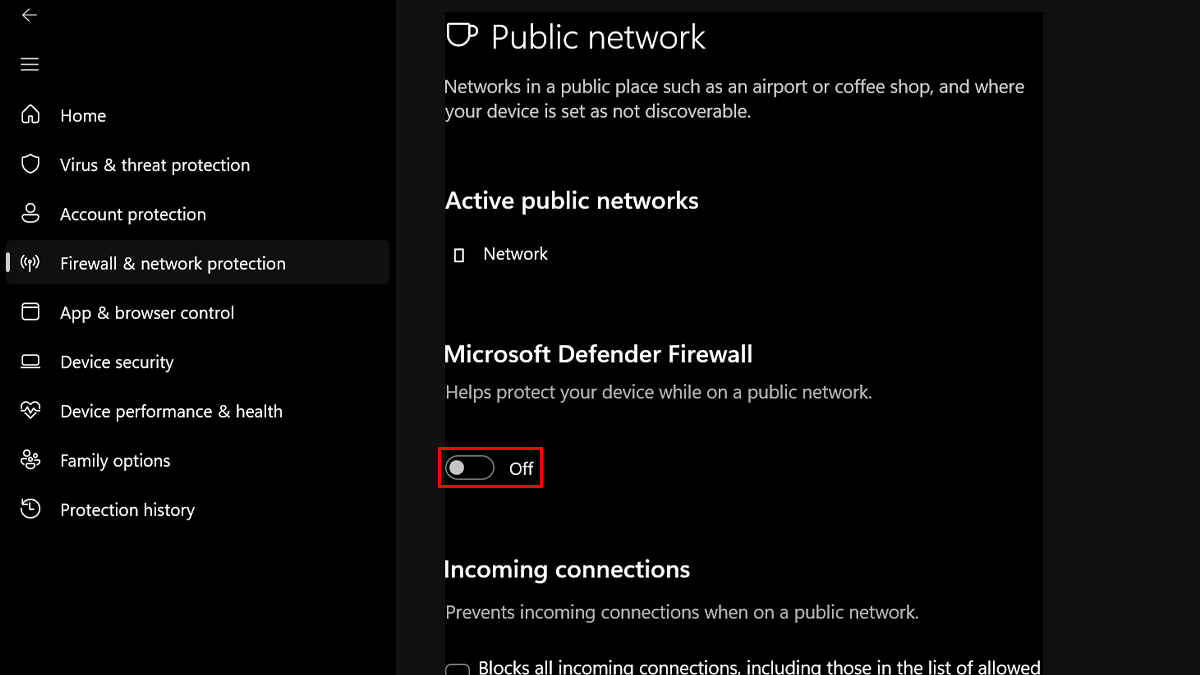
- When done, the firewall will disable for active network profile. You can also turn off the firewall for all networks using the method, including “Domain network,” “Private network,” and “Public network.”
How to enable the built-in firewall from Windows Security
- Open Windows Security > click on Firewall & network protection.

- Click the active network option.

- Click the Turn on button. Or click the Restore settings button (if applicable).
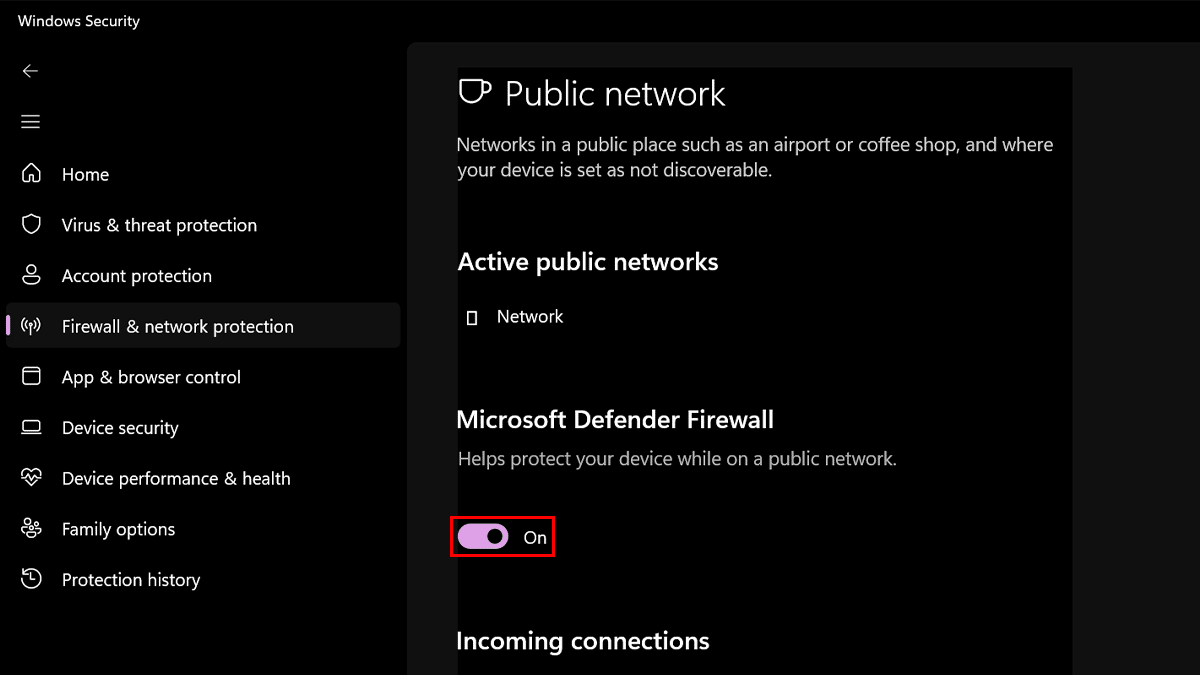
- After you complete the steps, the Microsoft Defender Firewall will enable again on the computer.
How to disable the built-in firewall from Control Panel
- Open Control Panel > click on System and Security.
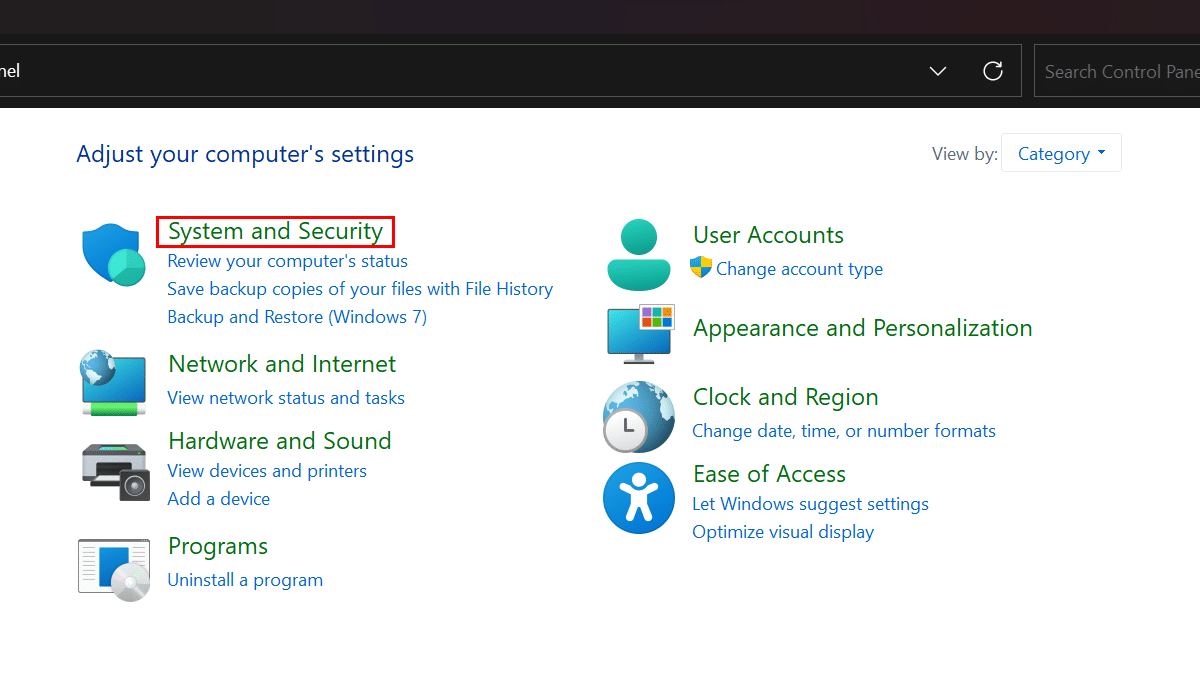
- Click on Windows Defender Firewall.
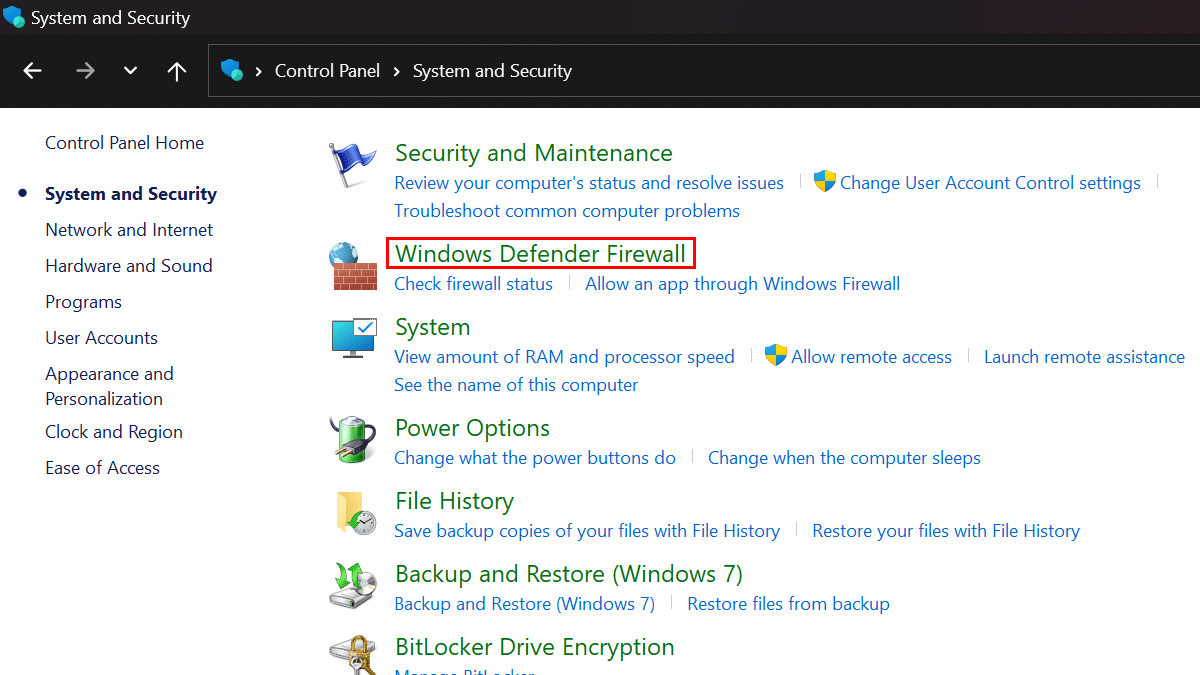
- Click the “Turn Windows Defender Firewall on or off” option from the left pane.
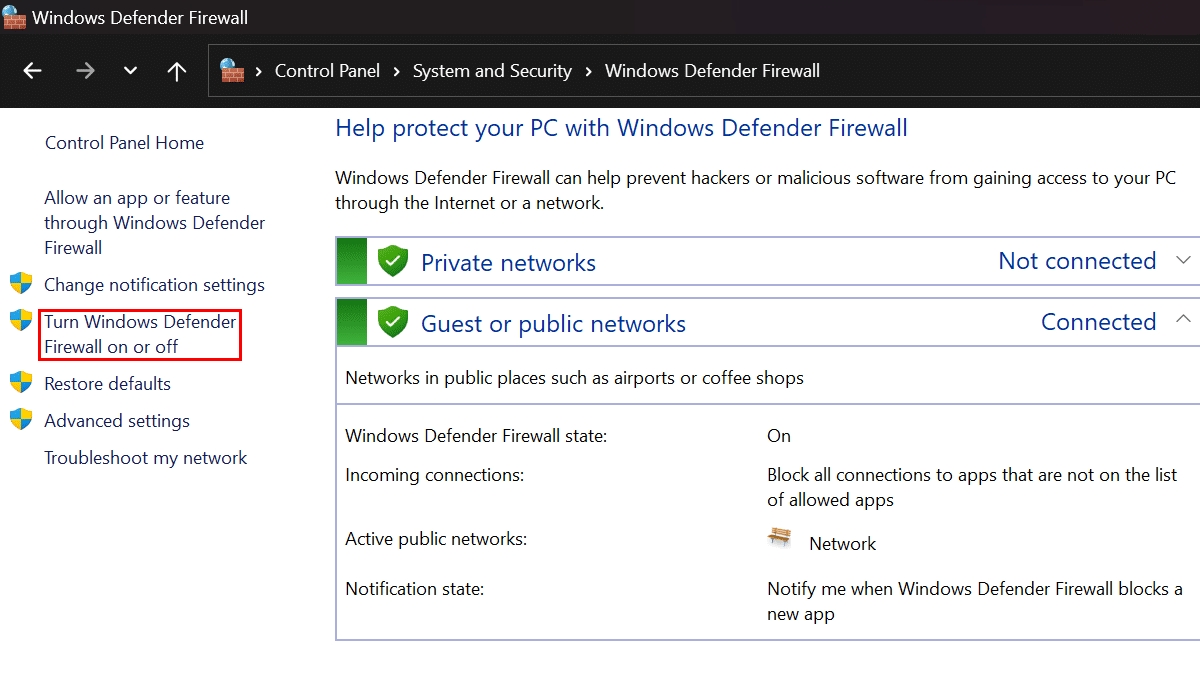
- Select the “Turn off Windows Defender Firewall” option under the “Private network settings” section > select the “Turn off Windows Defender Firewall” option under the “Public network settings” section.
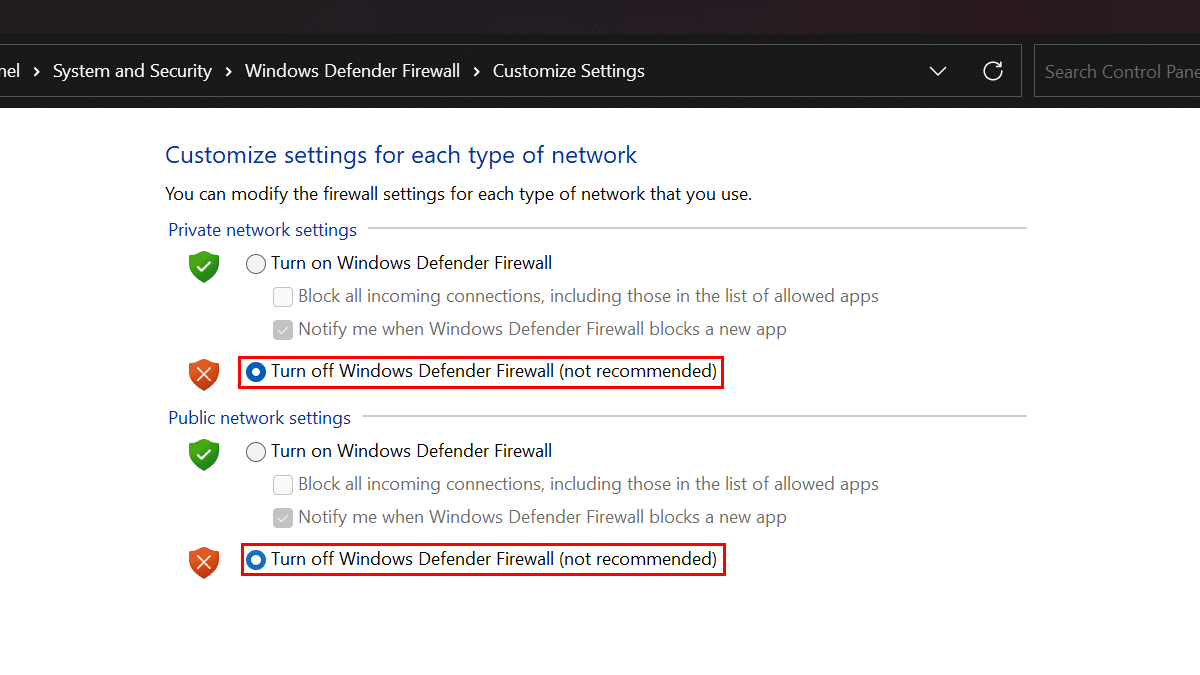
- Click the OK button.
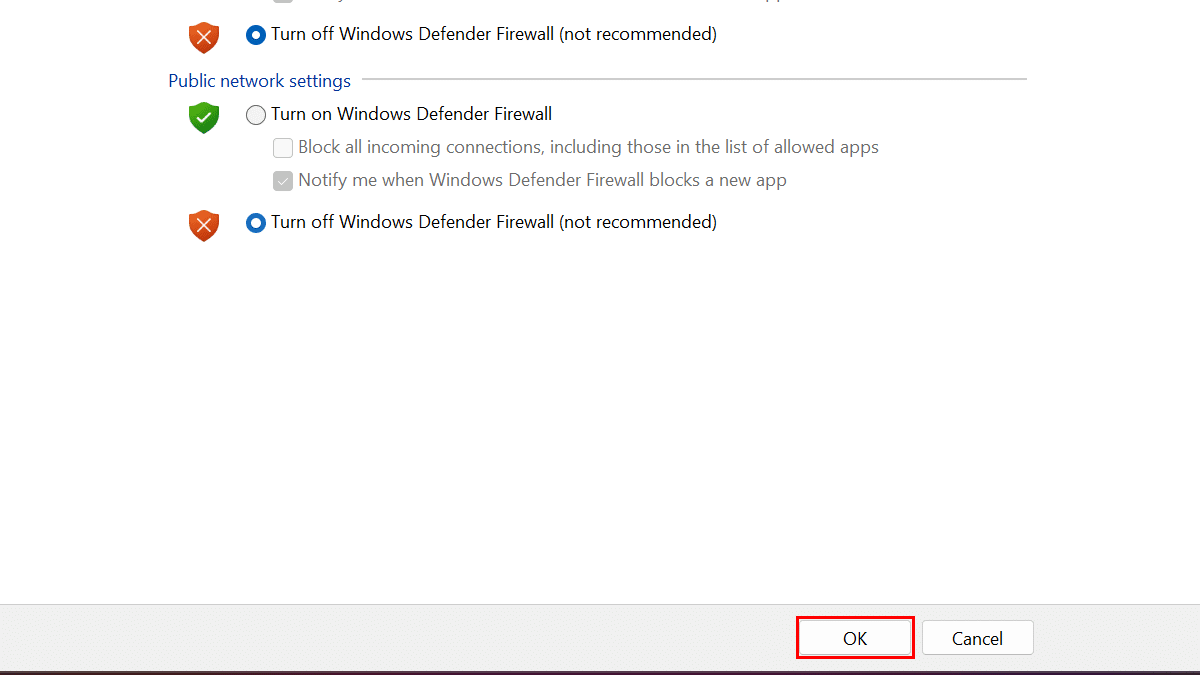
- When done, the firewall will no longer protect the device from malicious connections.
How to enable the built-in firewall from Control Panel
- Open Control Panel > click on System and Security.

- Click on Windows Defender Firewall.

- Click the “Turn Windows Defender Firewall on or off” option from the left pane.

- Select the “Turn on Windows Defender Firewall” option under the “Private network settings” section > select the “Turn on Windows Defender Firewall” option under the “Public network settings” section.
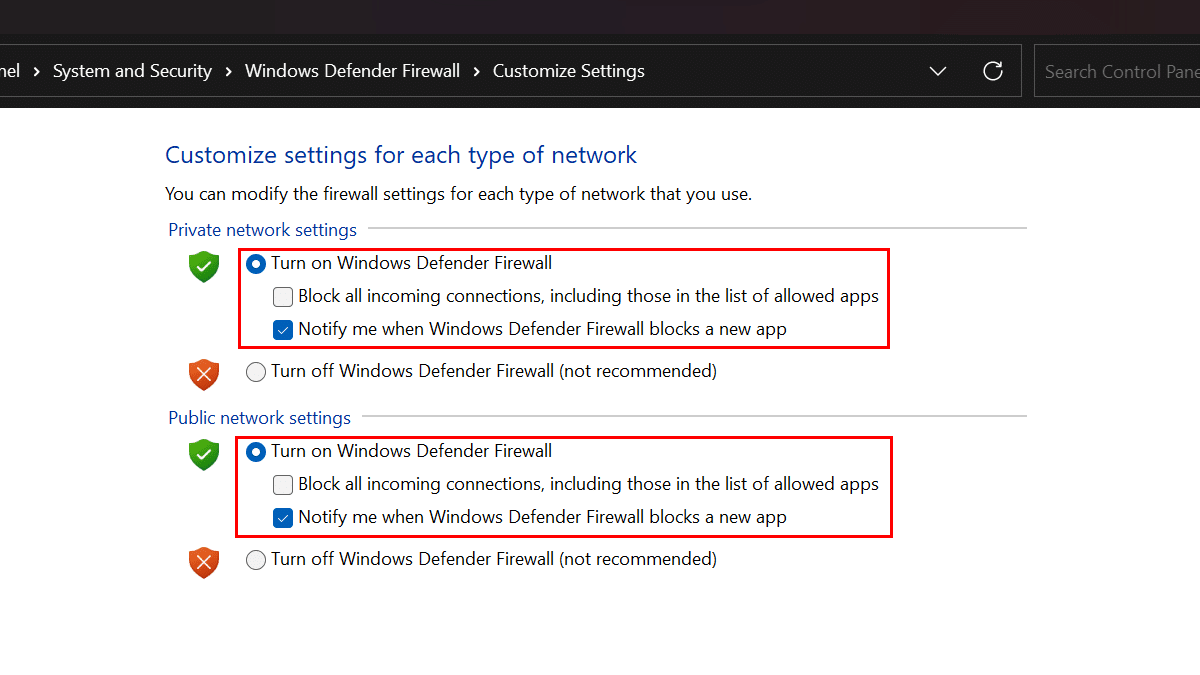
- Click the OK button.
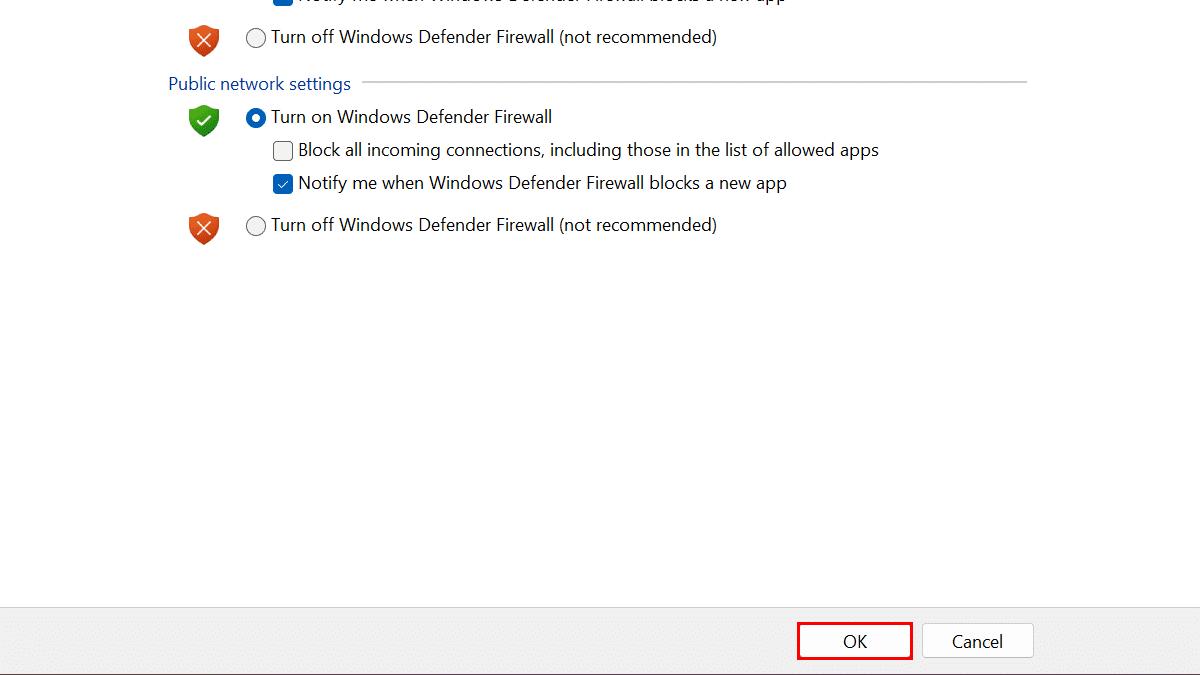
- When done, the built-in firewall will be enabled on the computer.
Read more: