Windows 11 users can remove the search box from the Taskbar in at least two ways, and we will show you how.
If you prefer not to show the search box in Taskbar, you can use the Settings app or the Registry option to disable the Taskbar search box. Note that you will only be removing the search box from Taskbar and the search experience will still be accessible from the Start menu.
Here are some of the reasons why you might want to disable the search box from the Taskbar:
- You don’t use the search feature very often.
- You want to free up space on the Taskbar.
- You want to prevent others from searching your computer without your permission.
In this guide, we will show you how to disable the Taskbar search box in Windows 11.
Here is how to disable the Taskbar search box in Windows 11
How to disable the Taskbar search box from Settings
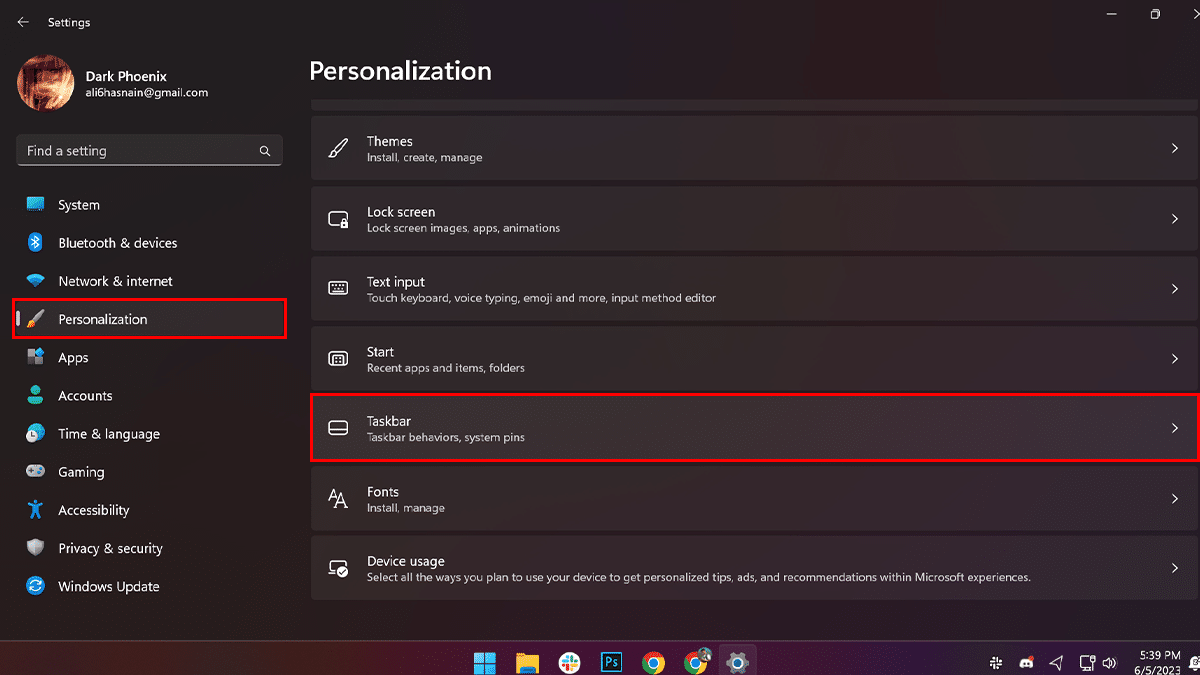
- Open Settings > click on Personalization > click on the Taskbar tab.
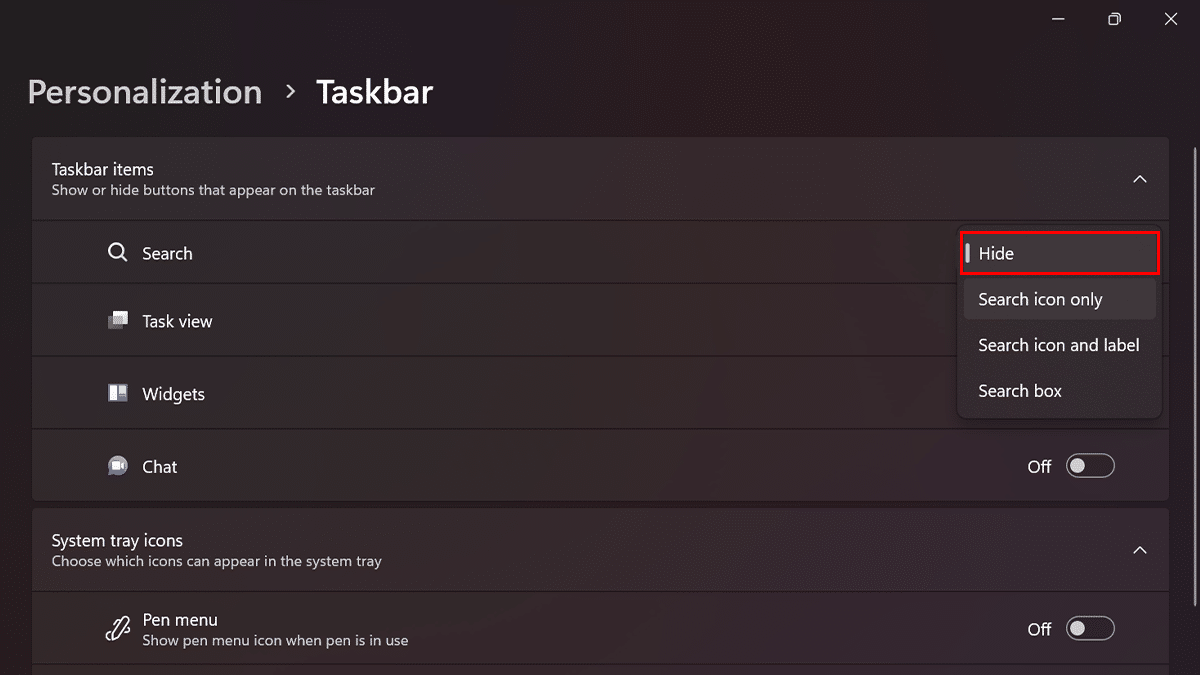
- Under the “Taskbar items” section > choose the Hide option for the “Search” setting.
- Optional: Choose the “Search icon only” option to remove the box and keep the icon in the Taskbar.
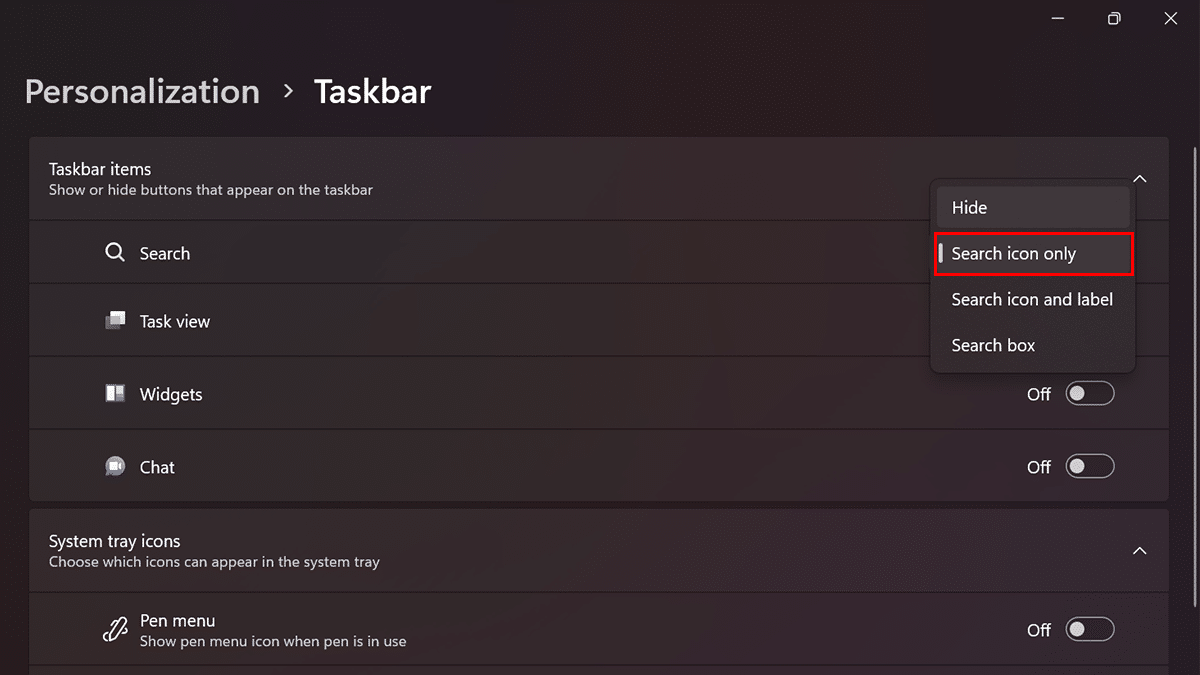
- Optional: Choose the “Search icon only” option to remove the box and keep the icon in the Taskbar.
- When done, the search box will no longer be available in the Taskbar. However, you can still search using the search box inside the Start menu.
How to disable the Taskbar search box from Registry
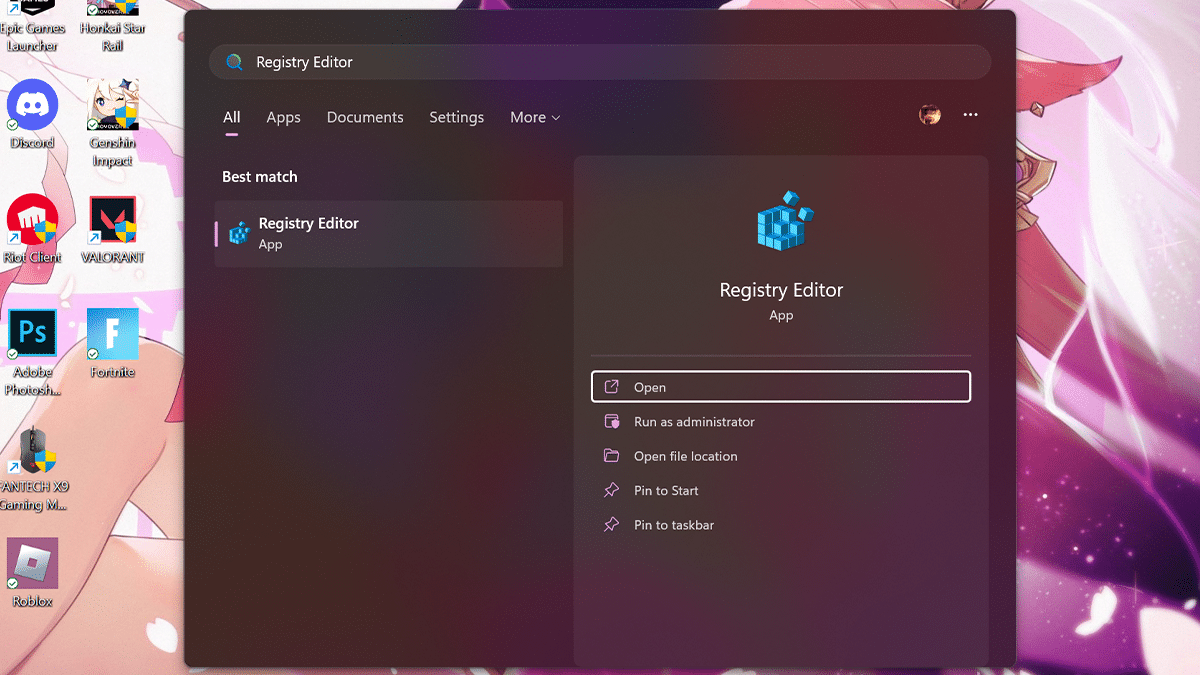
- Open Start > search for Registry Editor > click the Open button.
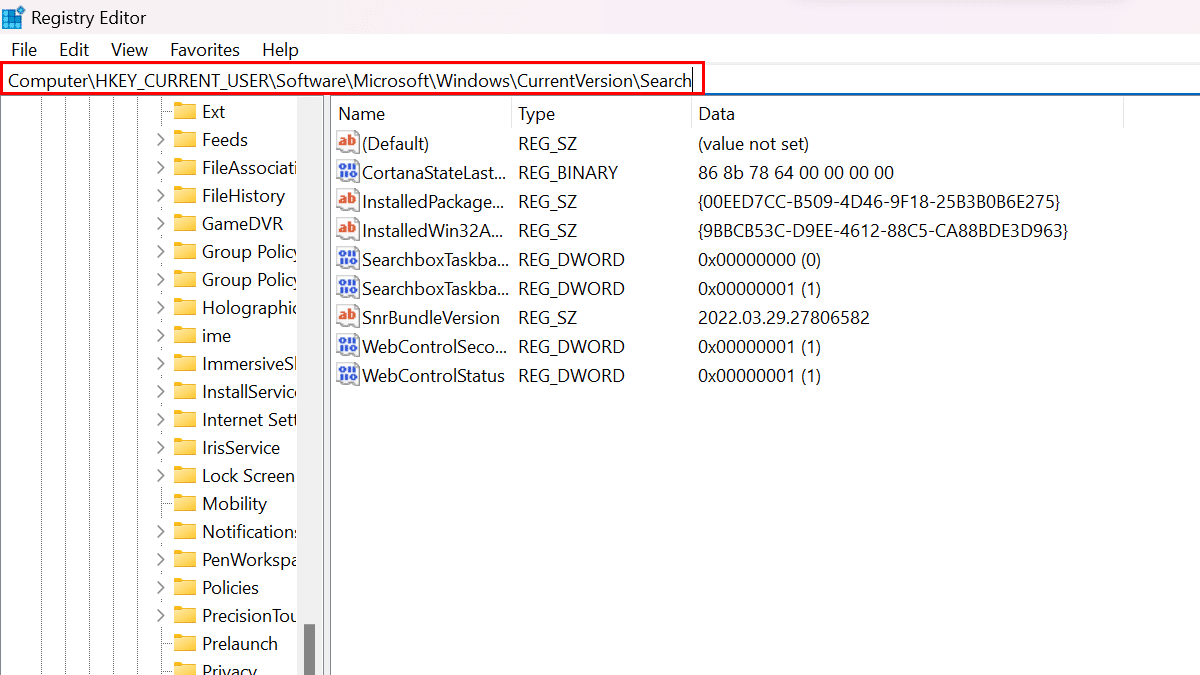
- Browse to the following path:
Computer\HKEY_CURRENT_USER\Software\Microsoft\Windows\CurrentVersion\Search
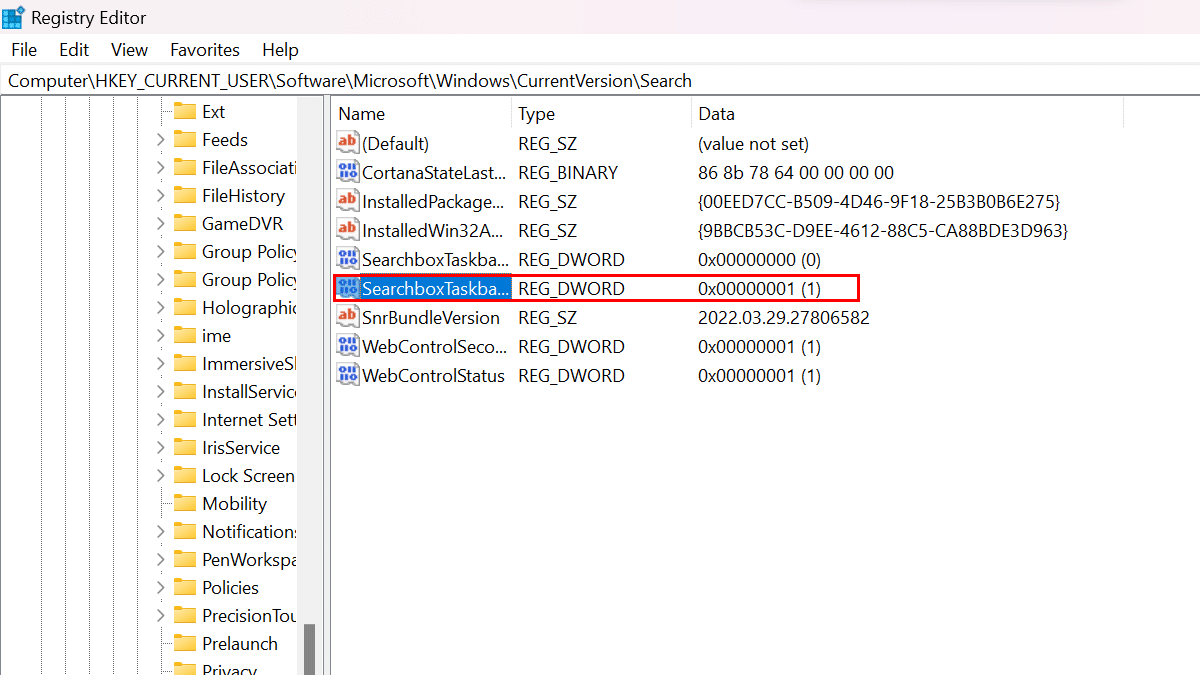
- Double-click the SearchboxTaskbarMode key.
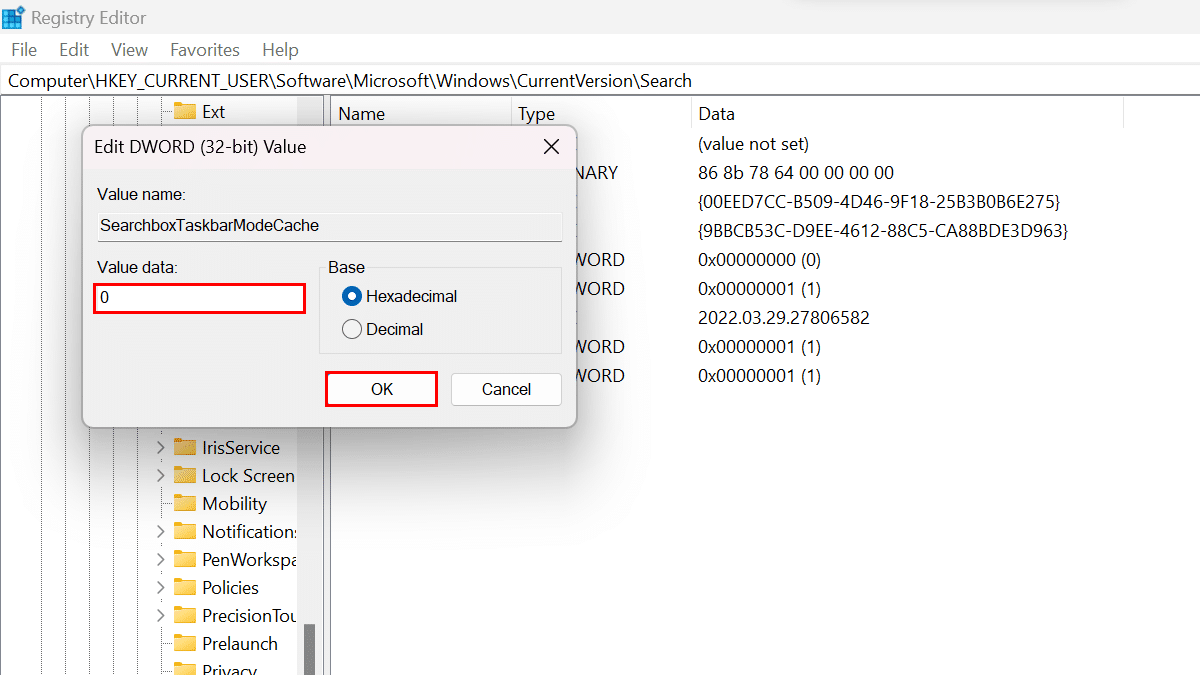
- Set its value to 0 > click the OK button.
- Restart the computer.
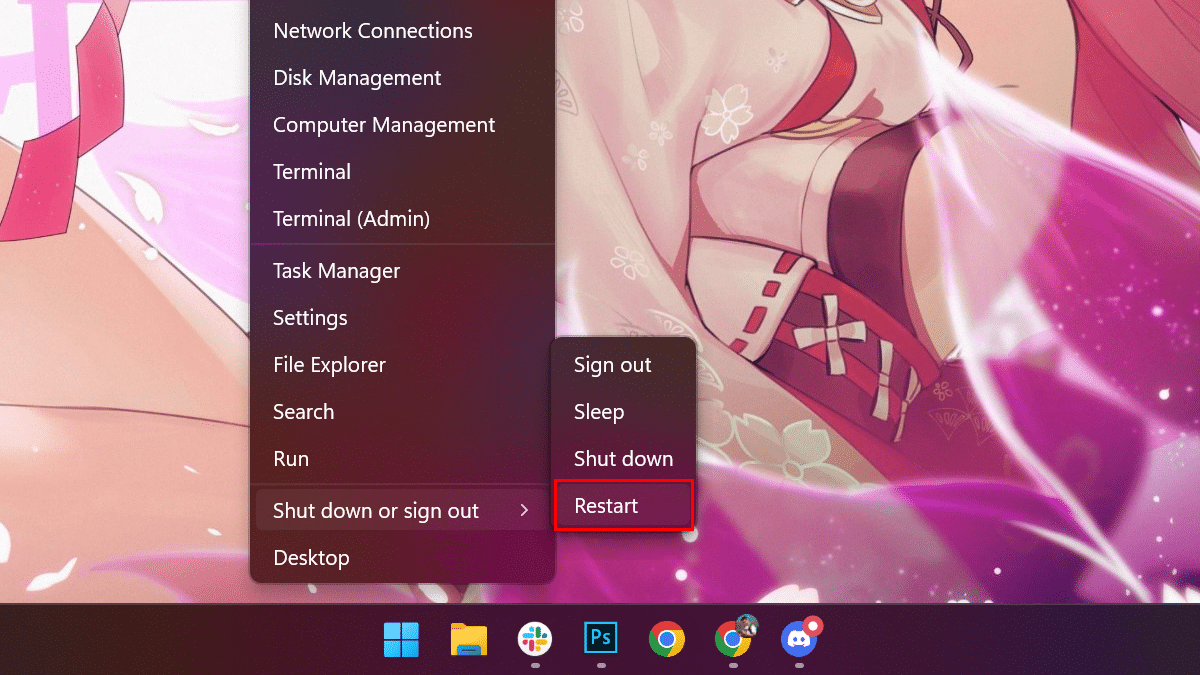
- When done, the search box will be removed from the Taskbar on Windows 11.
Read more:
- How to enable Dark Mode in Windows 11
- How to set up widgets in Windows 11 to monitor CPU, GPU, RAM, and more
- How to redirect Search and Widgets links to Chrome instead of Edge in Windows 11
- How to enable System Protection in Windows 11
- How to disable Lock Screen in Windows 11
- How to remove Bing button from Microsoft Edge in Windows 11