In Windows 11, you can temporarily pause updates for a week or more or If you want to disable updates permanently, you can change the automatic updates policy to disable in Group Policy.
Normally Windows 11 automatically downloads updates to help keep the device and data secure and ensure users have the latest improvements and bug fixes. However, it’s common for updates to roll out with problems and bugs that can negatively affect the experience.
In this guide, we will show you how to disable the automatic updates feature in Windows 11.
Here is how to disable automatic updates in Windows 11
How to temporarily disable automatic updates
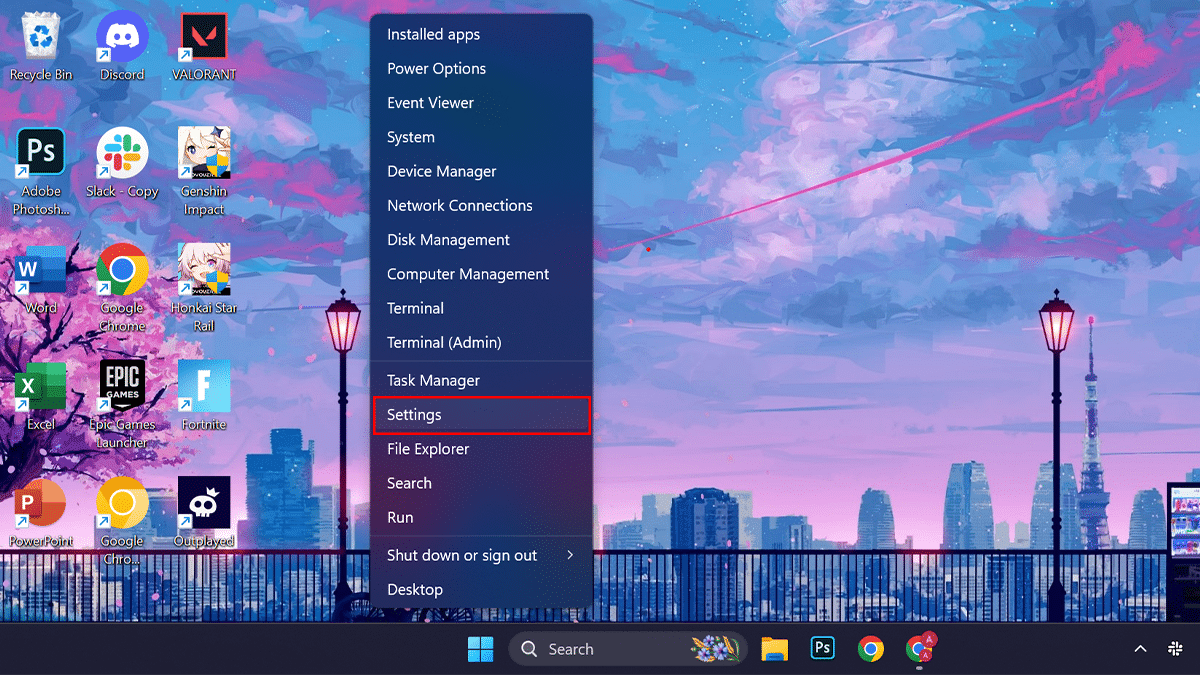
- Right-click on the Start > click on the Settings option.
- Click on Windows Update on the left pane > under the “More options” section > click the “Pause for 1-week” button to disable automatic updates for the “Pause updates” setting.
- Optional: You can also add more than one week if you want to pause it for a longer time.
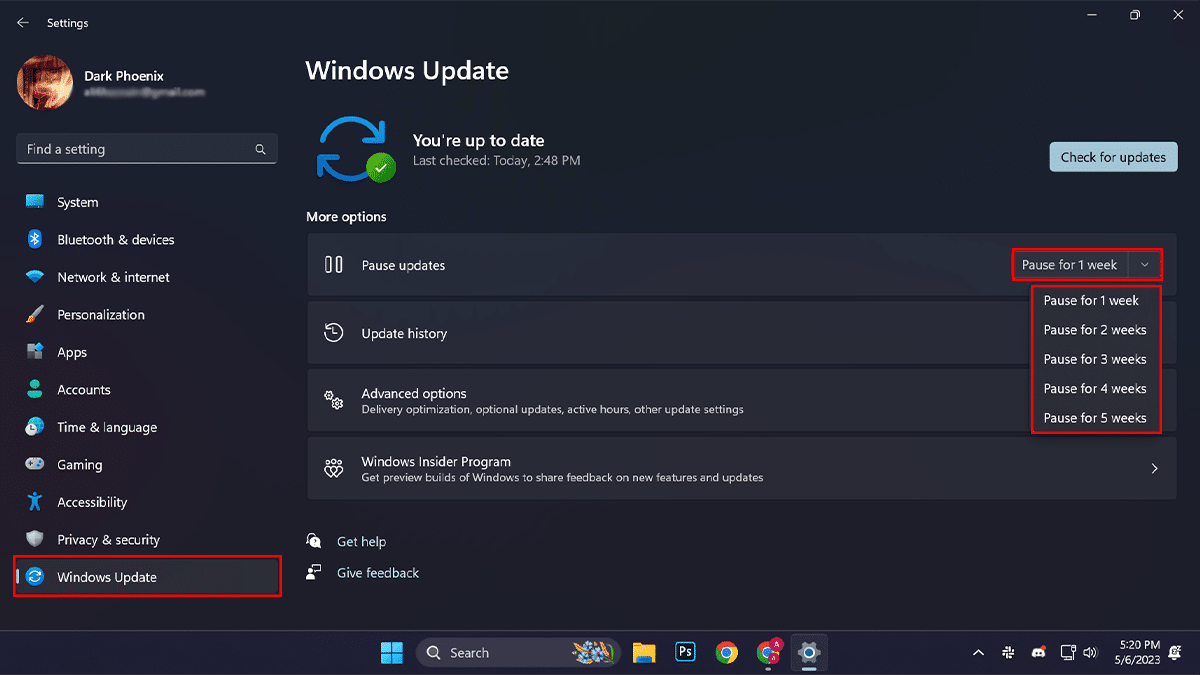
- Optional: You can also add more than one week if you want to pause it for a longer time.
- When done, Windows 11 updates will stop downloading on your computer for at least one week or until you click the “Resume updates” button.
How to permanently disable automatic updates
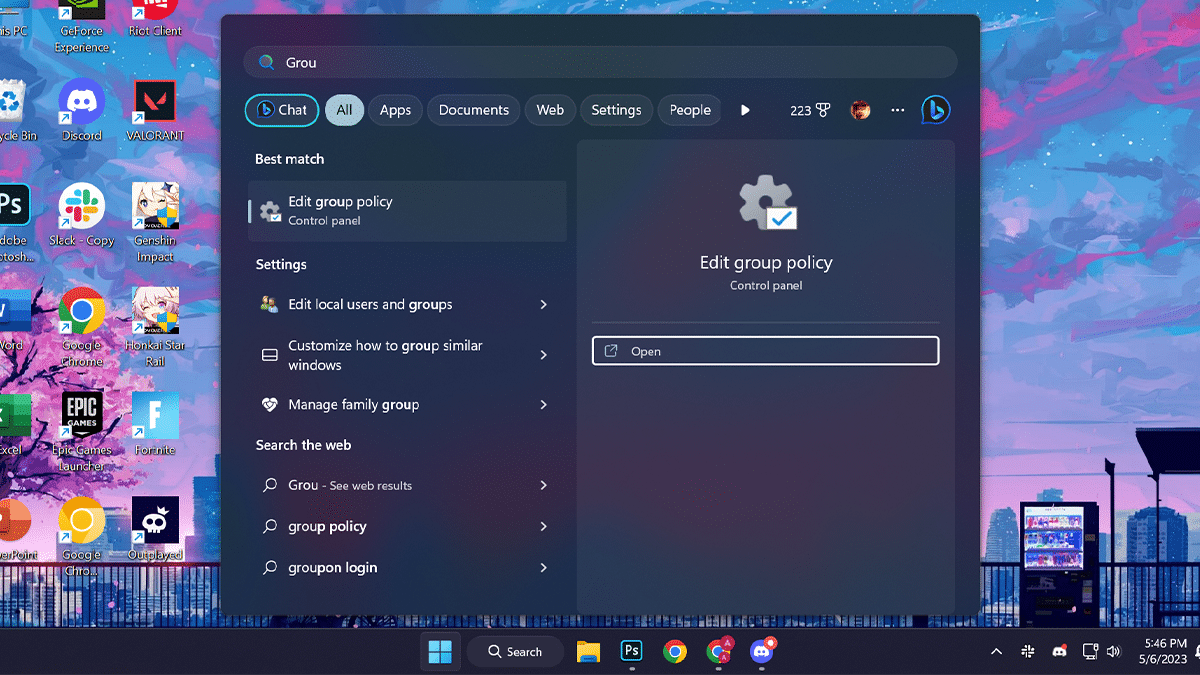
- Open Start > search for Group Policy Editor > click the Open button.
- Got to the following path: Computer Configuration > Administrative Templates > Windows Components > Windows Update > open the “Manage and user experience”.
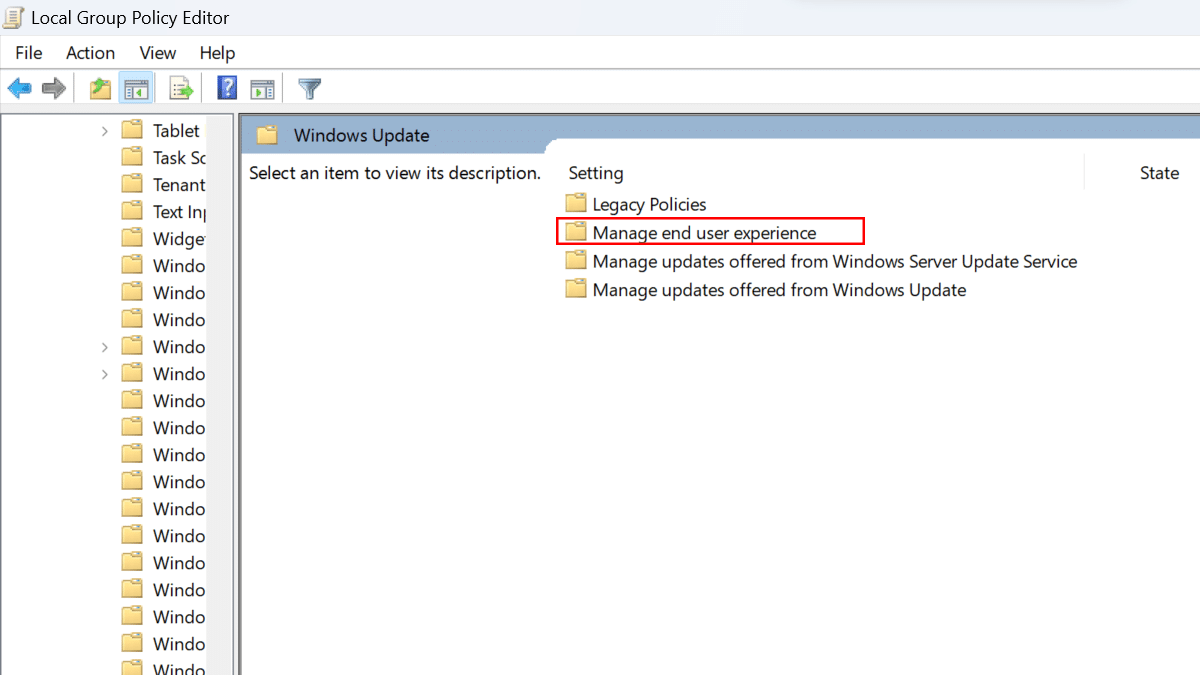
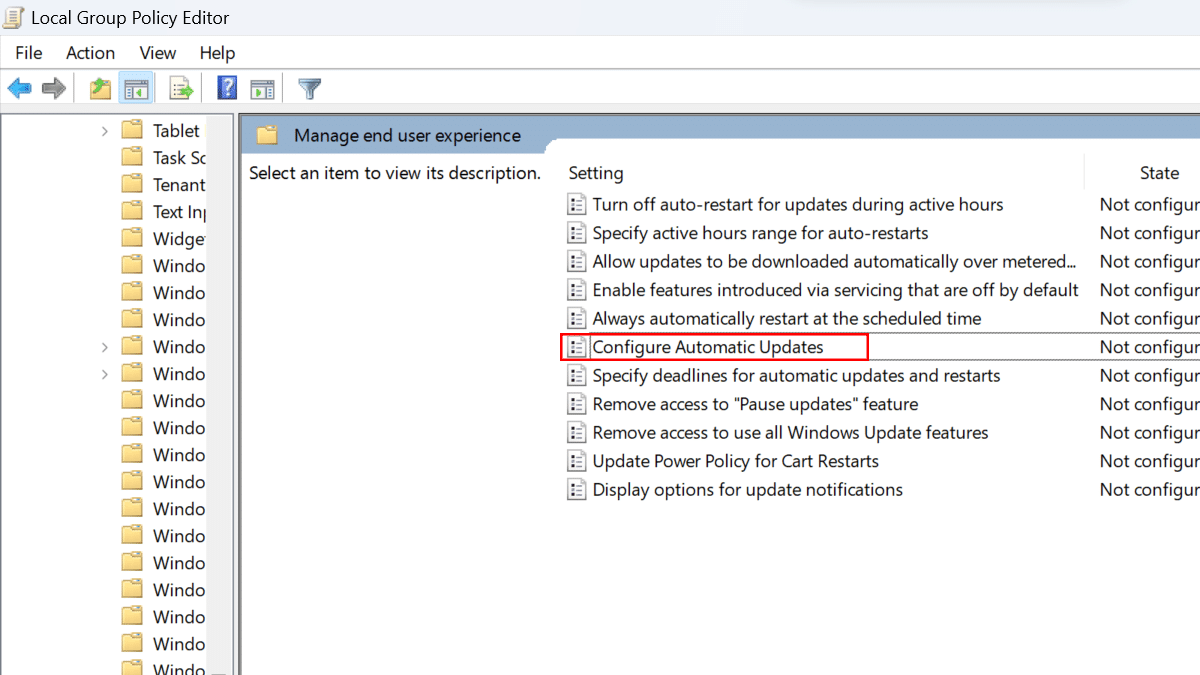
- Double-click “Configure Automatic Updates”.
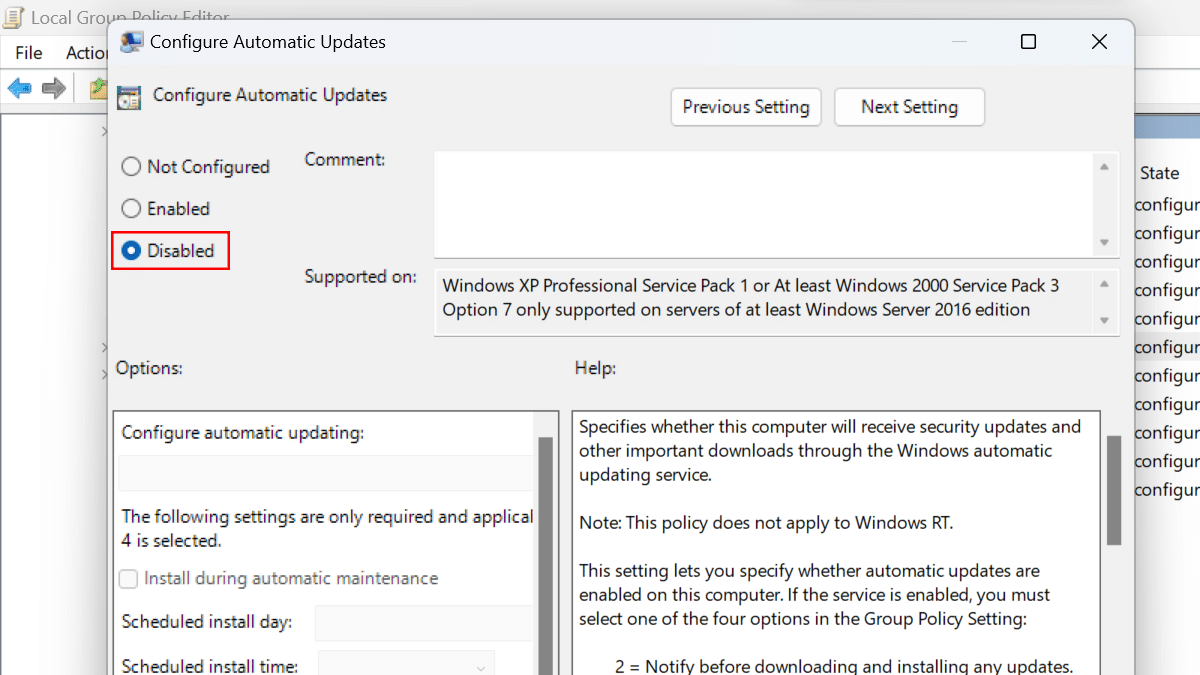
- Choose the “Disabled” option to disable Windows Update permanently.
- Click the Apply button > click the OK button.
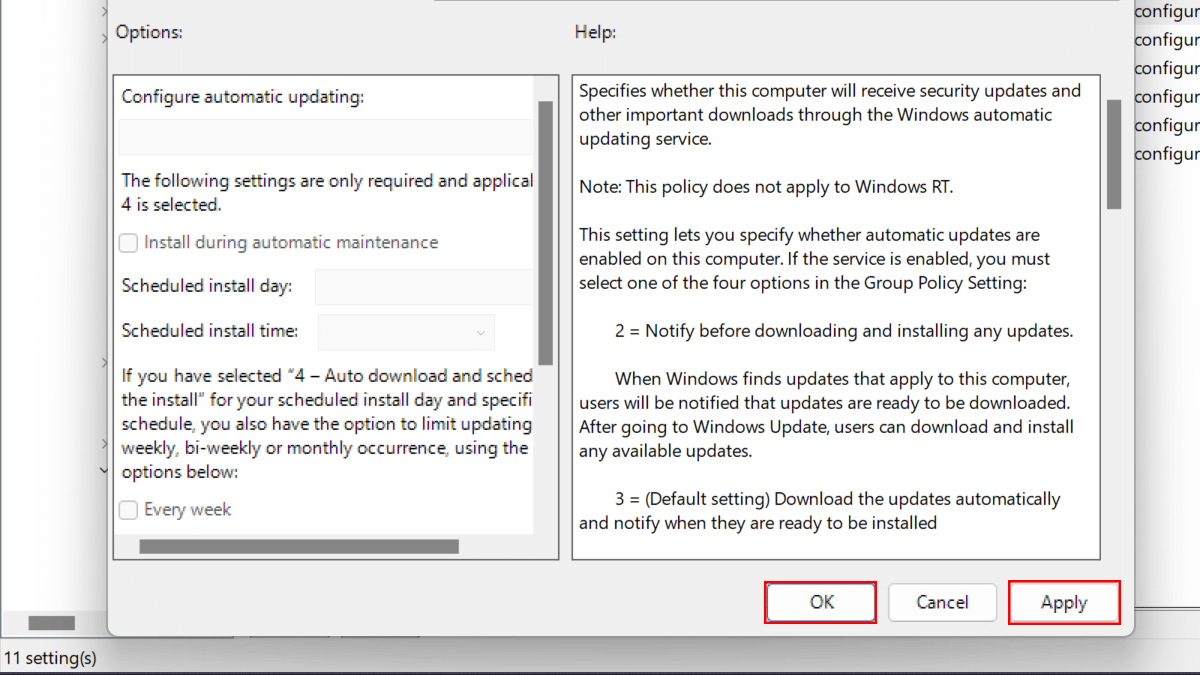
- When done, Windows Update will no longer install system updates automatically on Windows 11. However, you can still check for updates manually through the Settings app.
Read more:
- How to easily create a passkey on a Google Account in Windows 11
- How to downgrade a PC from Windows 11 to Windows 10
- How to “print to PDF” from any app in Windows 11 and Windows 10
- How to install the YouTube web app on Windows 11 and Windows 10
- How to change Chrome tabs’ memory saver time in Windows 11