Windows 11 provides users with battery saver feature that helps laptops to consume less energy while giving you low performance but extending battery life as much as possible.
When battery-saver mode is enabled, the laptop disables some features to reduce power consumption like sync for emails, OneDrive, and other features, and certain apps won’t work in the background. It will decrease screen brightness and the energy will be managed differently in favor of battery life instead of performance.
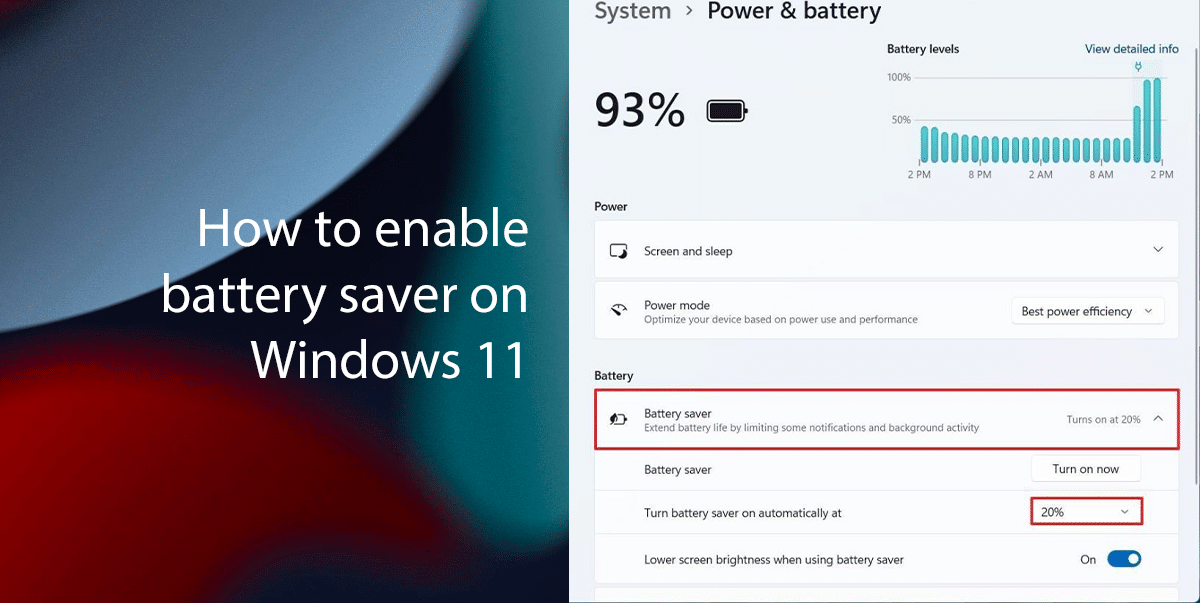
Battery saver mode automatically turns on when the laptop reaches 20 percent of battery life and disables automatically when you plug the device into a power outlet. However, it’s also possible to enable the battery-saver mode manually, and even customize the battery level before the battery-saver mode turns on automatically.
In this guide, we will show you how to manually turn on the battery-saver feature and customize the battery level before the feature turns on automatically on Windows 11.

Here is how to enable battery saver on Windows 11
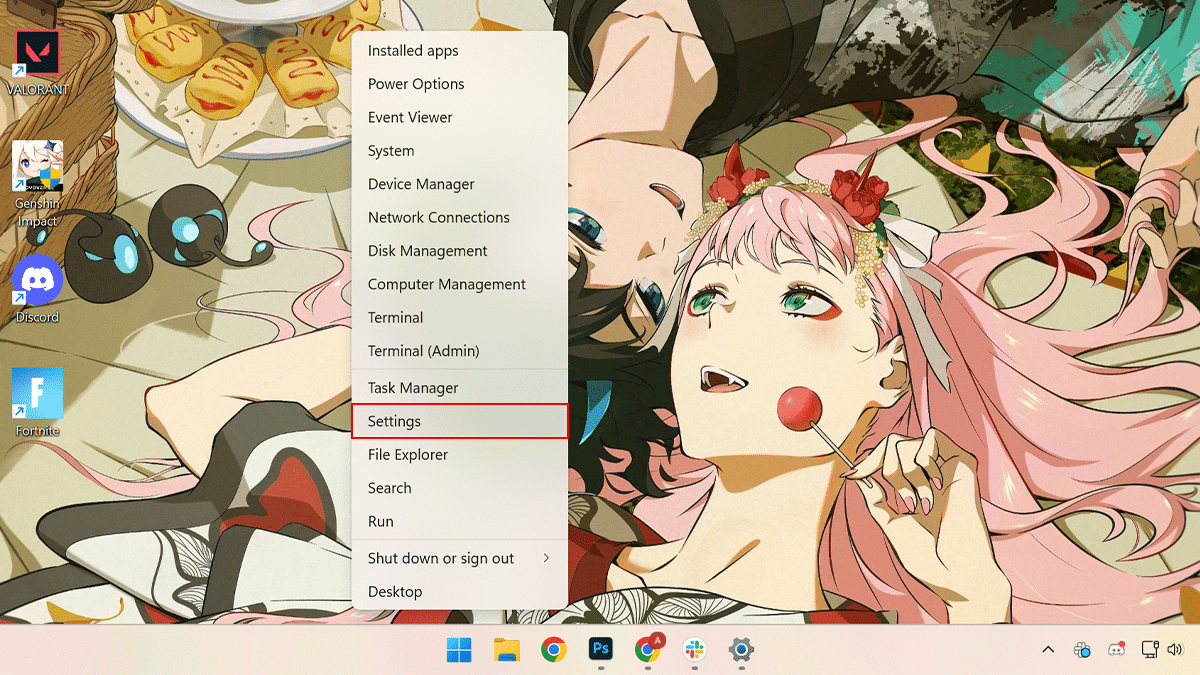
- Right-click on the Start > click on the Settings option.

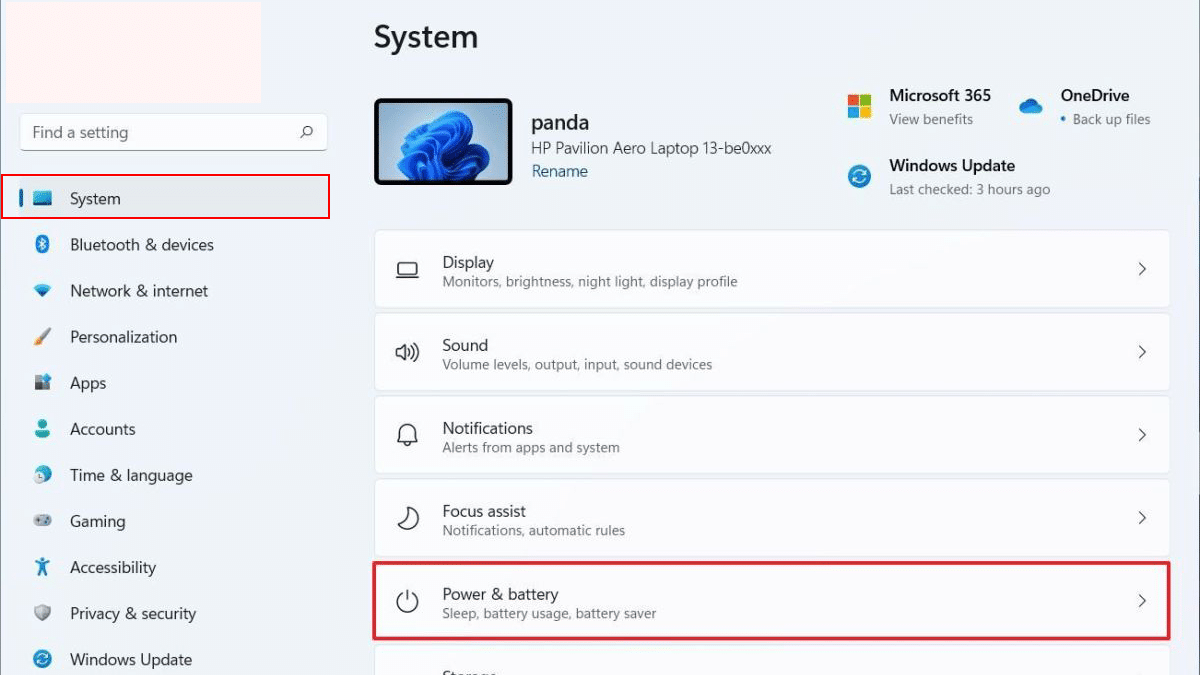
- Click on System on the left pane > click the Power & battery tab.

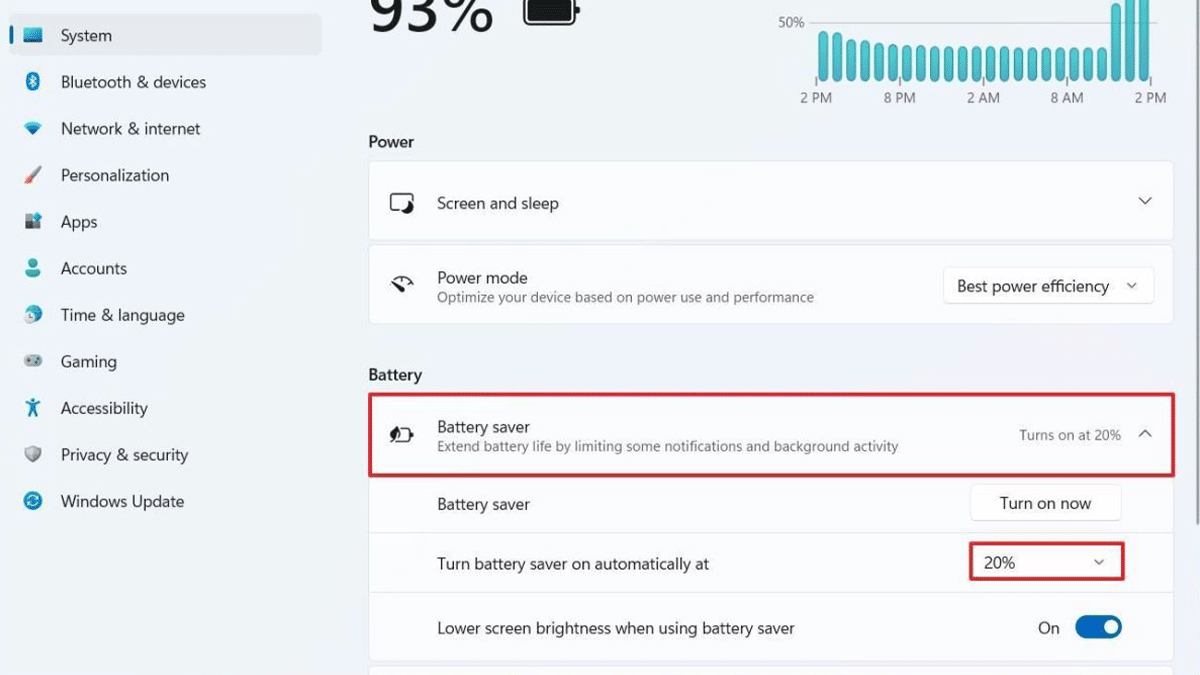
- Under the Battery section > click the Battery saver setting > click the Turn on now button for the Battery saver setting.

- When done, the battery saver mode will turn on and will start conserving battery life.
How to change automatic battery saver
- Right-click on the Start > click on the Settings option.

- Click on System on the left pane > click the Power & battery tab.

- Under the Battery section > click the Battery saver setting > with the “Turn battery saver on automatically at” option you can change the battery level before the battery saver mode enables automatically.

- When done, the battery saver mode will enable when the battery goes below the specified level.
Read more: