A while back, we brought you instructions for setting up a private Minecraft server. While the default server works well, modding your server takes it to the next level. One of my favorite server mods is called Cuboid, and allows for area-protection, advanced server commands, and easy shape forming, among other things. Cuboid has multiple tutorials for installing on Windows, but very few for Mac OS X. Here’s a super simple guide to making your Minecraft server even better:
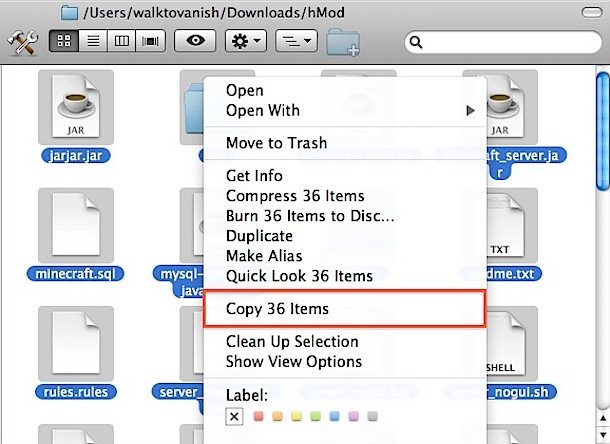
Step 1: Download and install hMod. In order to install Cuboid, hMod(a server mod plugin) needs to be installed. Download here, then extract the zip. Copy all the files inside the folder, and paste them in the same directory as your minecraft_server.jar. When asked, choose to replace existing files. (Note: hMod is in the process of being replaced by Bukkit. However, hMod is much more stable and has better Mac support. In the future, an upgrade to Bukkit may be necessary.)

Step 2: Download the Cuboid plugin here, and drag it into the plugins folder under the same directory as the minecraft_server.jar. For example, if the minecraft_server.jar is at Users/~/Desktop/Server/ then the CuboidPlugin.jar would go to Users/~/Desktop/Server/plugins/.
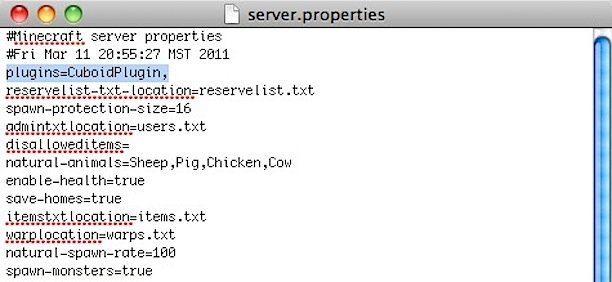
Step 3: Edit server.properties and add the line “plugins=CuboidPlugin,” making sure not to have any spaces, and paying careful attention to capitalization. Please note that any previous settings will need to be reconfigured as server.properties was overwritten in Step 1. Once finished, save and exit the file.

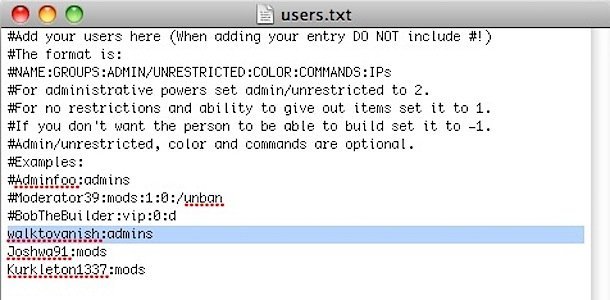
Step 4: Edit users.txt. At the bottom, any users you wish to give Mods or Admin privileges to must be entered in this format: <name>:<group>. You want to make sure that you are an admin since you are in charge of the server. For example, I am listed as walktovanish:admins. For others you wish to give privileges, I recommend adding them as mods(moderators). When finished, save and exit.

Step 5: Edit groups.txt. Add “/cuboid” under admins, and “/protect,/ignoresOwnership” to mods, as seen below. Be careful to double check capitalization. Save the file when finished, and then exit.

Step 6: Run Minecraft_Mod.jar to launch the server with Cuboid installed. DO NOT launch minecraft_servero.jar as it WILL NOT WORK. To launch the server with 1GB of dedicated RAM, cd to it’s directory in Terminal, type “java -Xmx1024M -Xms1024M -jar Minecraft_Mod.jar”, and hit enter.

For a step-by-step guide for windows, along with a demonstration on how to use Cuboid in-game, click here. To add other hMod plugins, repeat steps 2 and 3, adding the name of the plugin(minus “.jar”) directly after the comma, and with correct capitalization. Enjoy!