In Windows 11, users can use “File History” to create a file backup on an external or network drive to have the means to recover files in case of accidental deletion, modification, or corruption.
File History is a built-in backup feature in Windows 11 that can be used to automatically back up your personal files to an external hard drive, network location, or another internal drive. This can help you protect your files from accidental deletion, corruption, or hardware failure.
By default, File History will back up your files every hour. You can change the backup frequency by clicking “Advanced settings.”
File History will keep your backups for as long as you have space on the storage device that you are using. You can change the amount of time that File History keeps your backups by clicking “Delete old backups.”
File History is a simple and easy way to protect your personal files from accidental deletion, corruption, or hardware failure. By enabling File History and backing up your files regularly, you can help ensure that you will never lose important data.
In this guide, we will show you how to set up File History on an external drive in Windows 11.
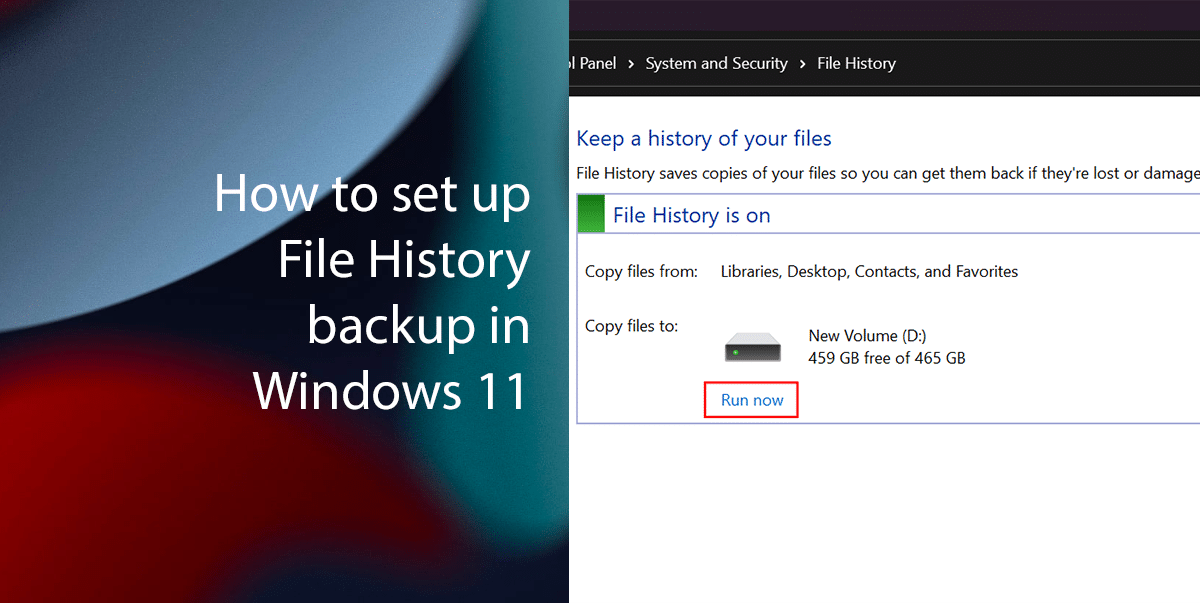
Here is how to set up File History backup in Windows 11
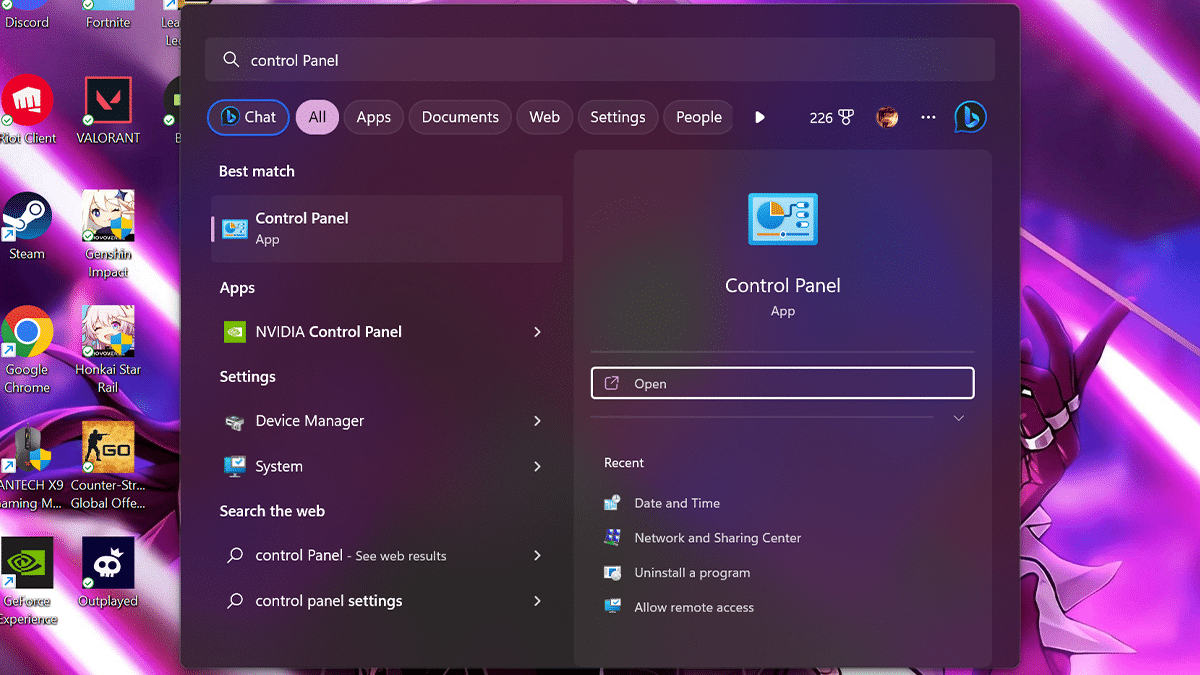
- Open Start > search Control Panel > click the Open button.
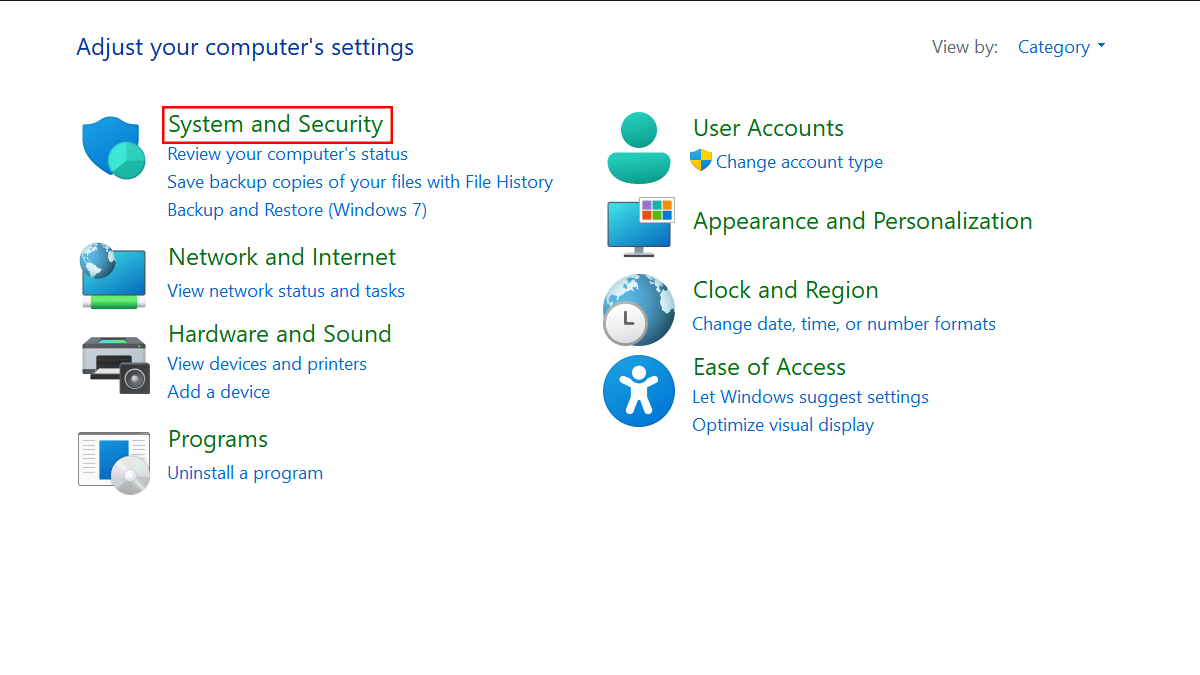
- Click on System and Security.
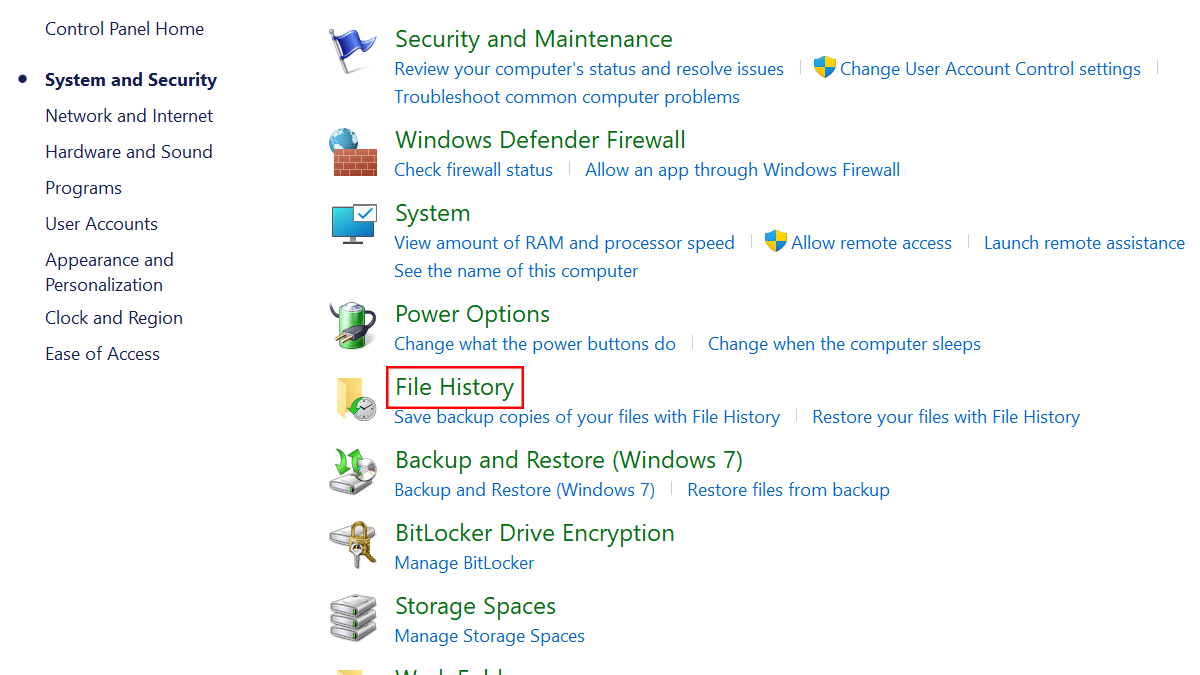
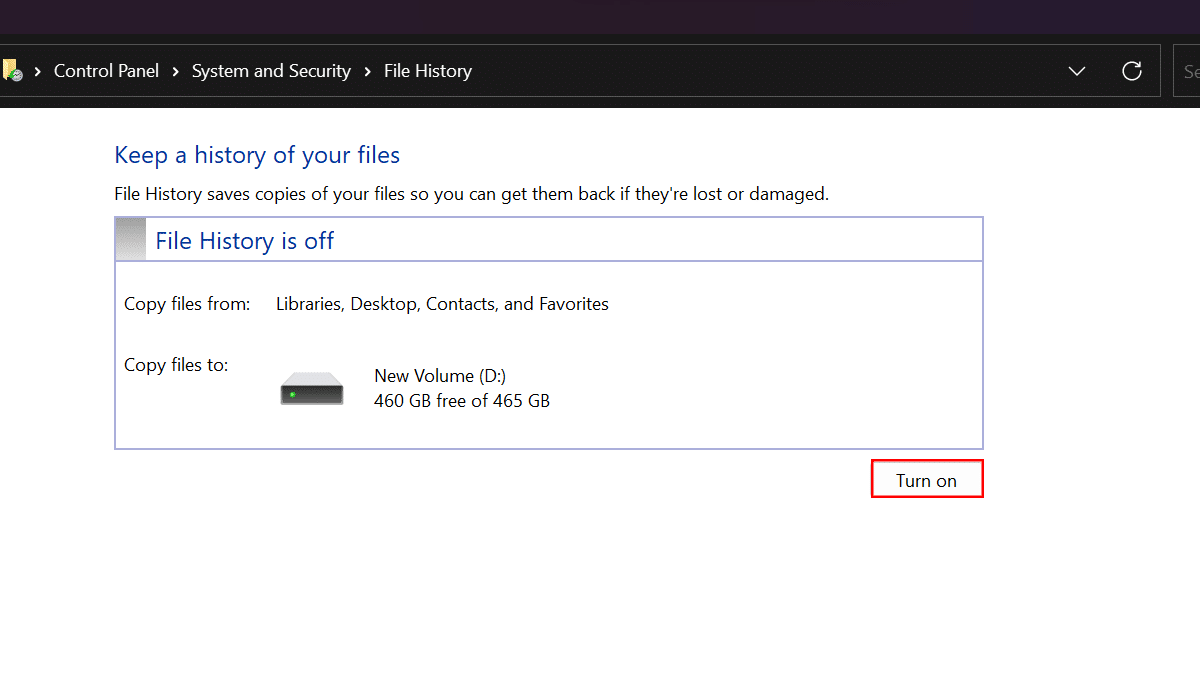
- Click on File History.
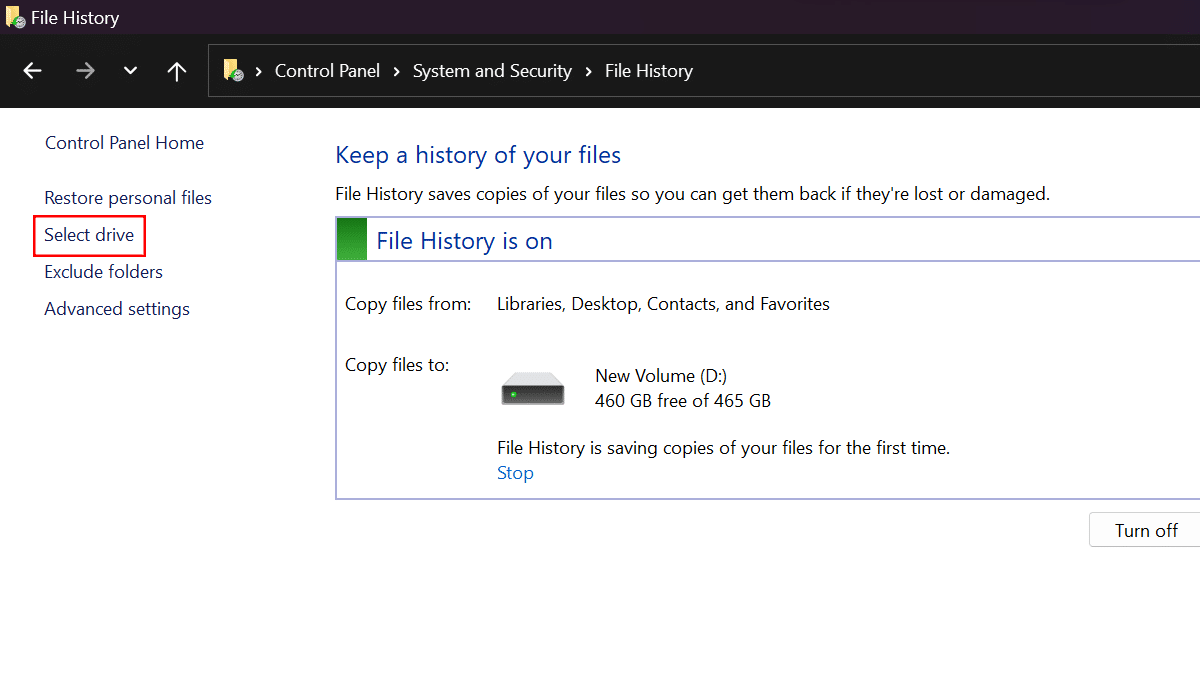
- Click the “Turn on” button if the backup drive already shows in the list.
- Click the Select Drive option from the left pane.
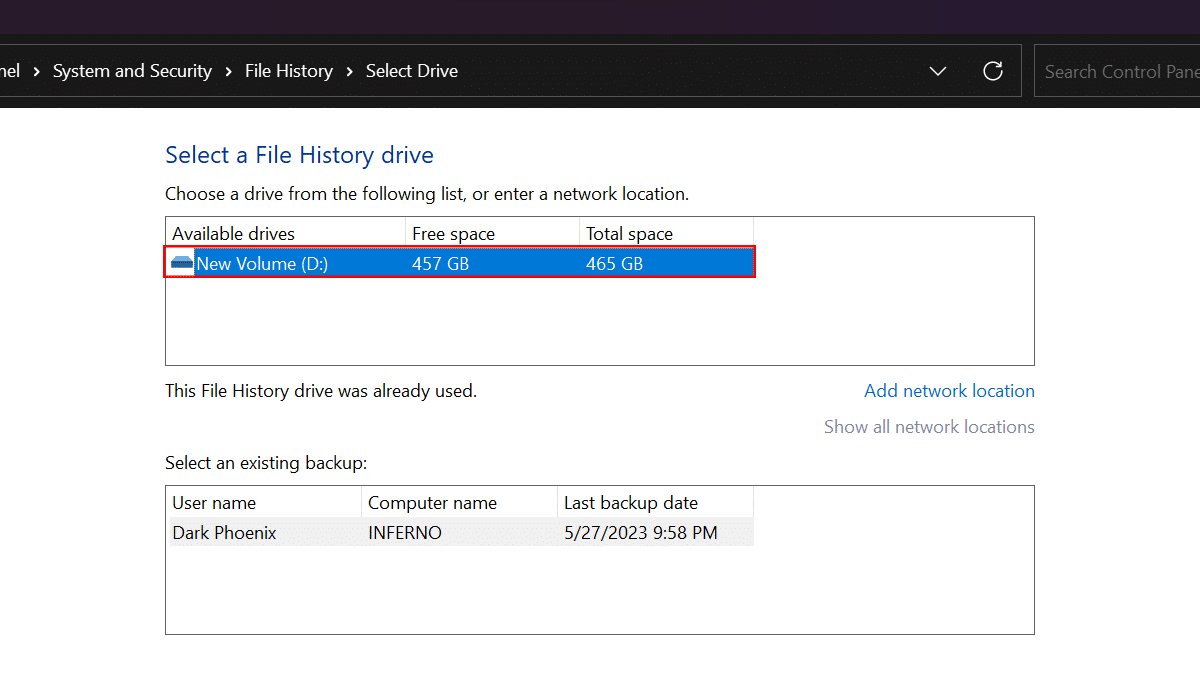
- Select the Hard Drive.
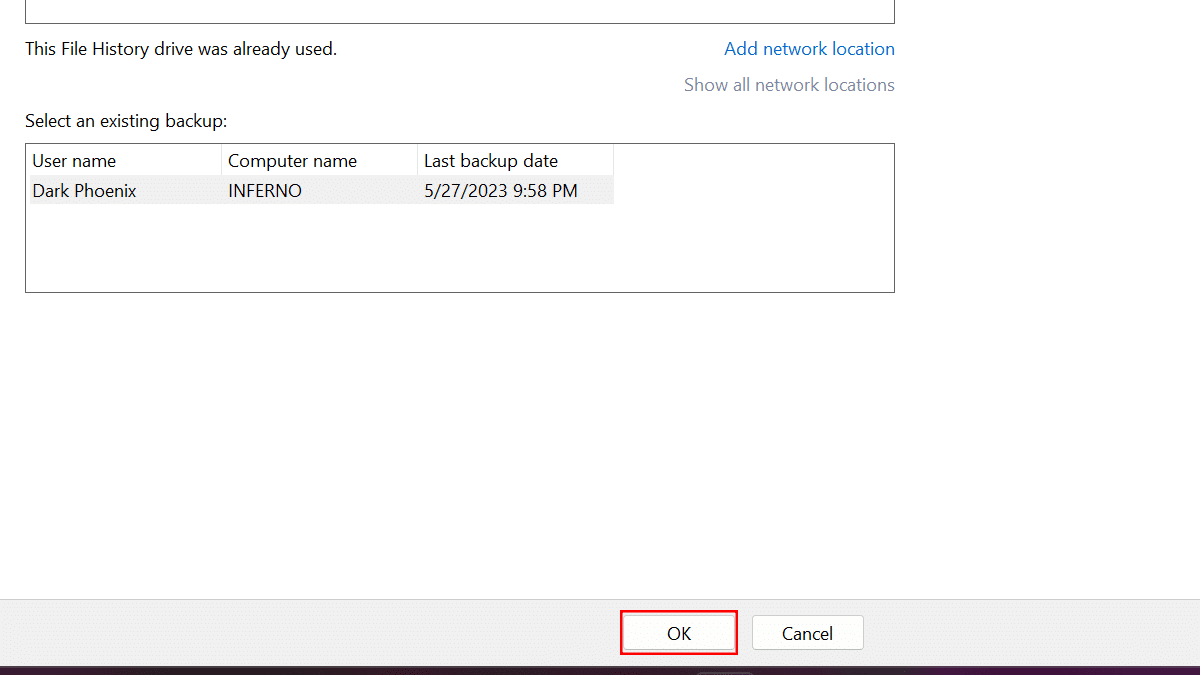
- Click the OK button.
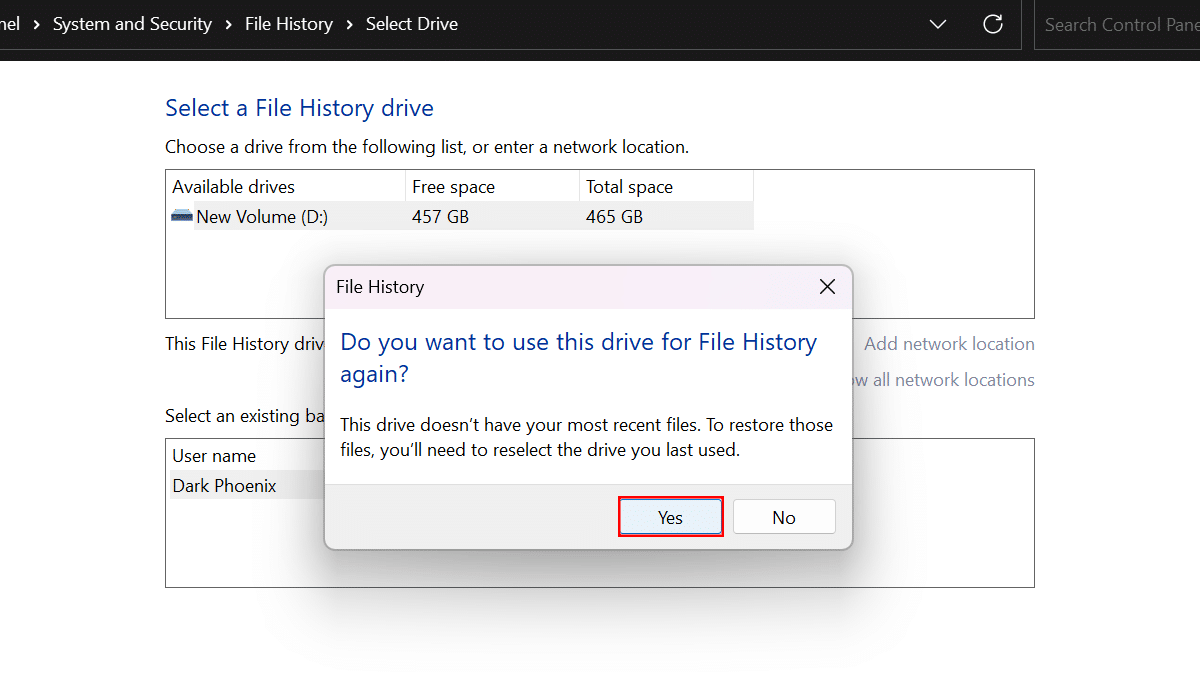
- Click the Yes button.
- Click the Run Now button.
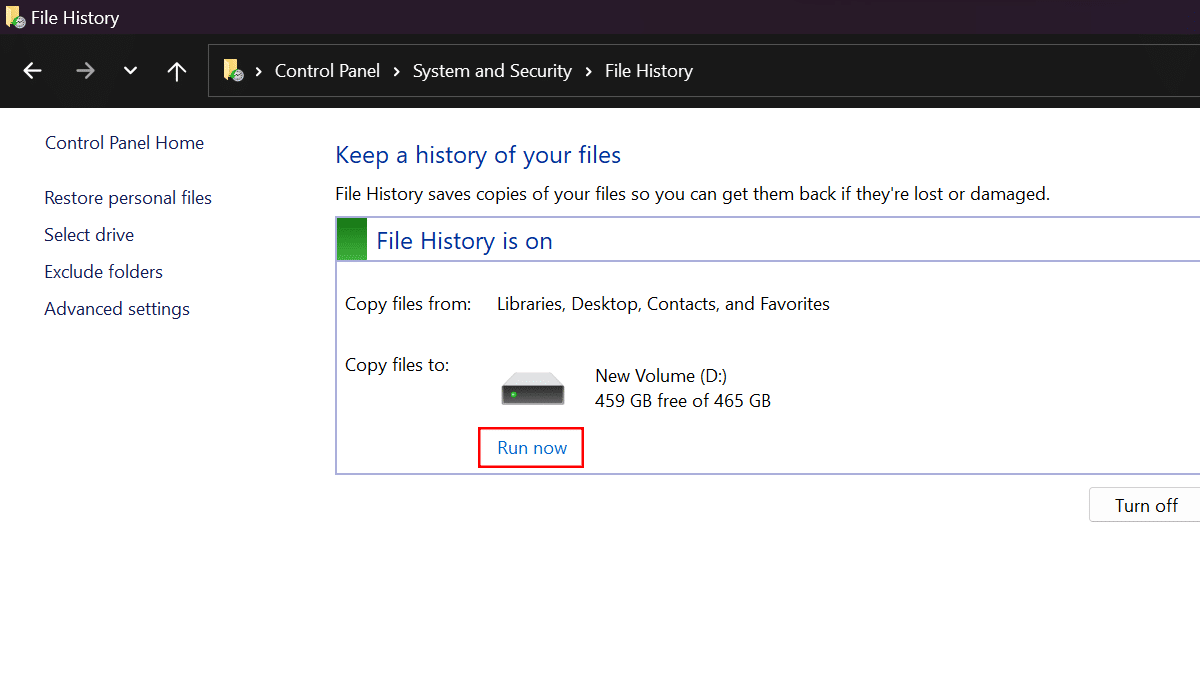
- When done, File History will begin saving copies of your files in the external storage.
Read more: