In Windows 11, users can use the Windows Package Manager (WinGet) command to uninstall or install the OneDrive sync client application.
OneDrive is the Microsoft cloud service that connects users to all their files. It lets them store and protect their files, share them with others, and get to them from anywhere on all their devices.
In addition to downloading and installing the client manually from the Microsoft website, you can also use the WinGet tool to install and uninstall the app.
WinGet is a command-line tool designed to make it easier to automate the process of searching, downloading, installing, upgrading, and configuring applications on the computer. You can use the tool to install apps, such as OneDrive, Microsoft Teams, and VirtualBox, or uninstall them.
Although OneDrive is installed by default on every installation of Windows, sometimes you may need to reinstall the client when it is not working properly, or you may need to remove it because you don’t use it.
In this guide, we will show you how to add or remove the OneDrive application in Windows 11.

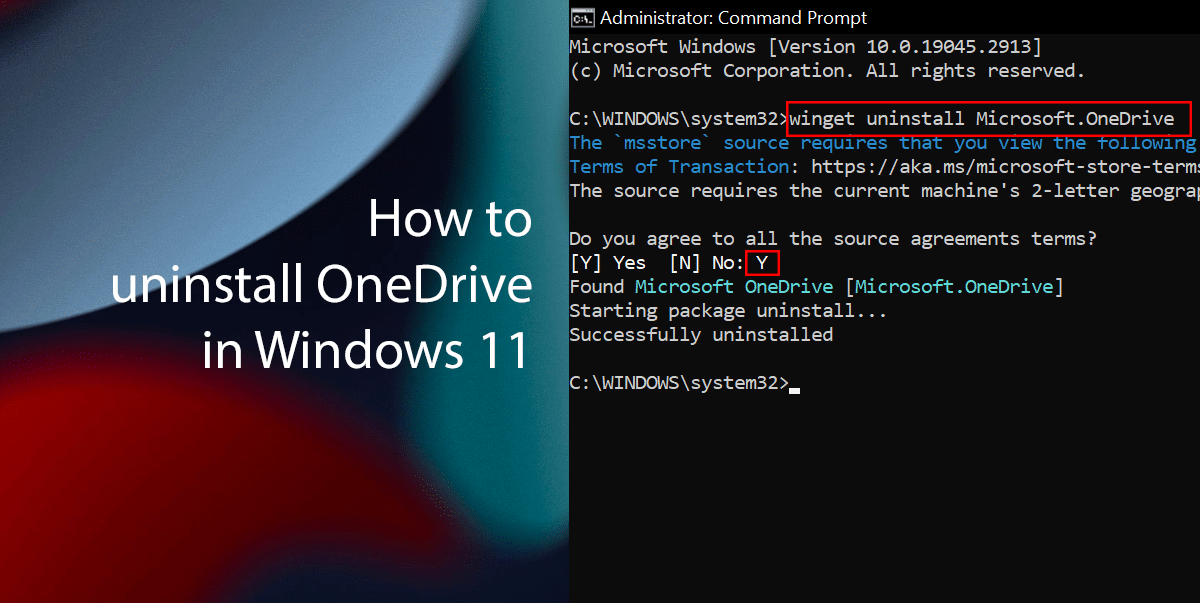
Here is how to uninstall OneDrive in Windows 11
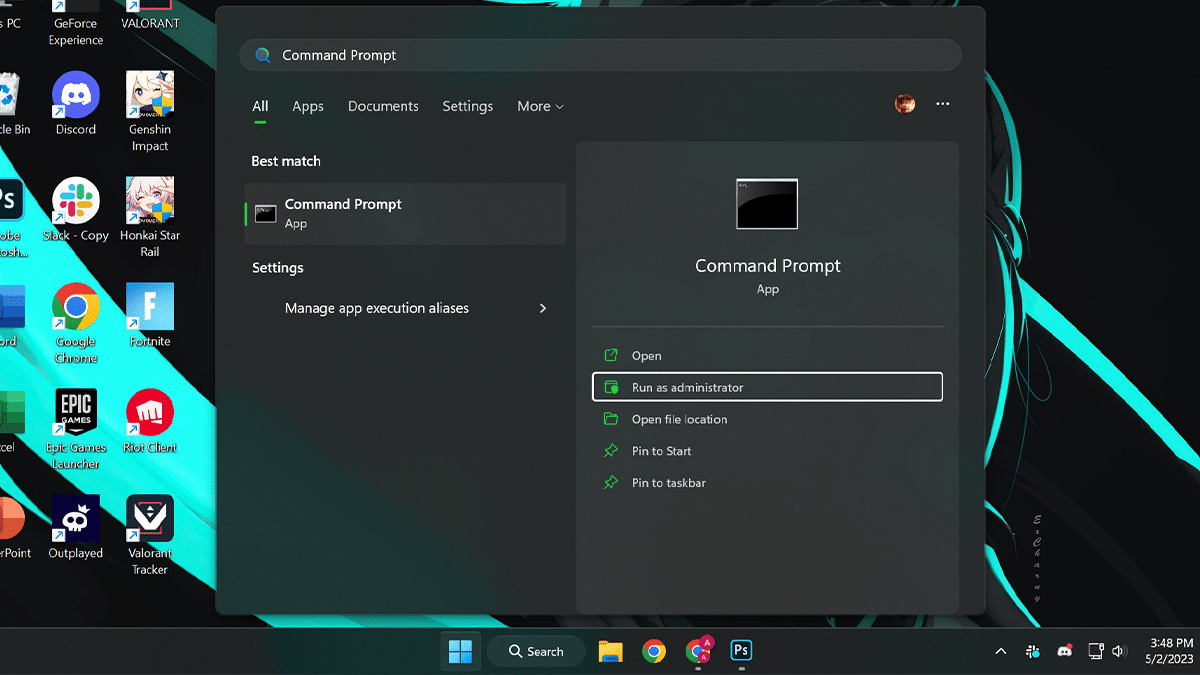
- Open Start > search for Command Prompt > select Run as administrator option.

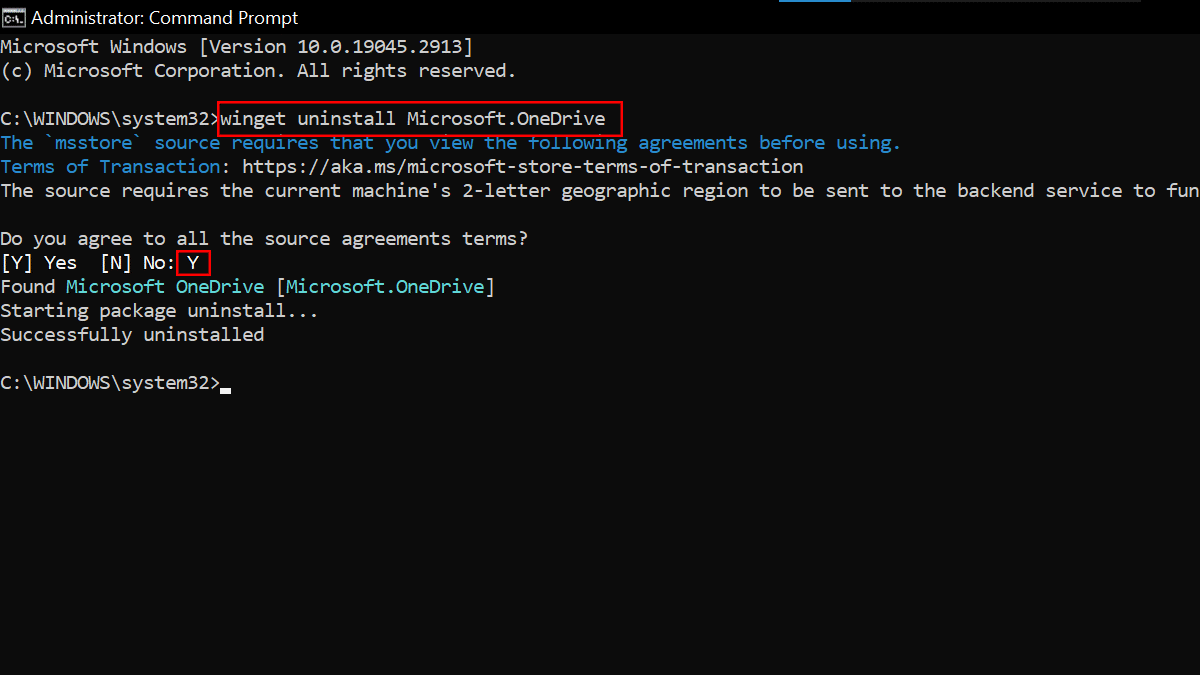
- Type the following command to uninstall OneDrive > press Enter on the keyboard.
winget uninstall Microsoft.OneDrive
- Type Y > press Enter on the keyboard.

- When done, the OneDrive sync client application will be removed from your computer.
How to install OneDrive on Windows 11
- Open Start > search for Command Prompt > select Run as administrator option.

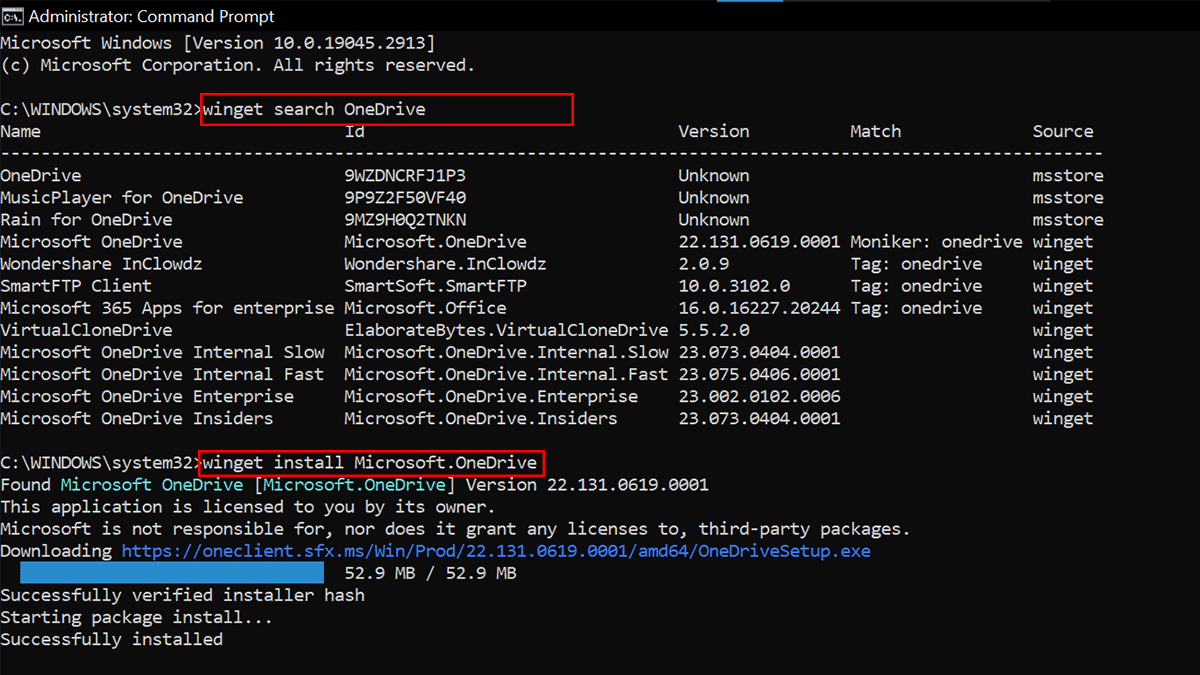
- Type the following command to search the app > press Enter on the keyboard.
winget search OneDrive
- Type the following command to install OneDrive using the app ID > press Enter on the keyboard.
winget install Microsoft.OneDrive

- When done, the Windows Package Manager will download and install the OneDrive app automatically in Windows 11.
Read more: