In Windows 11, users can determine the Wi-Fi password of the current connection or saved networks. Finding the Wi-Fi password can be useful when trying to help someone with a device join the same wireless network or remember it for future reference.
You can use Control Panel to find the Wi-Fi password of the current connection and Command Prompt to view the current and saved network passwords you connected to in the past.
In this guide, we will show you how to quickly find a Wi-Fi password in Windows 11 using Control Panel and Command Prompt.
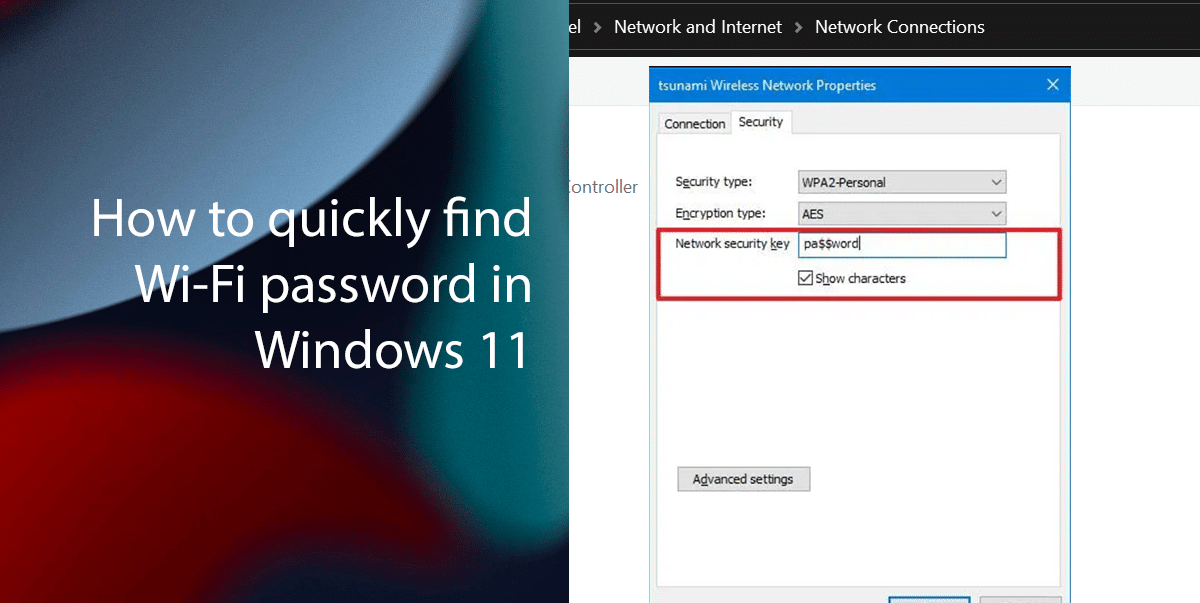
Here is how to quickly find the Wi-Fi password in Windows 11
How to determine the Wi-Fi password from Control Panel
- Open Control Panel > click on Network and Internet.
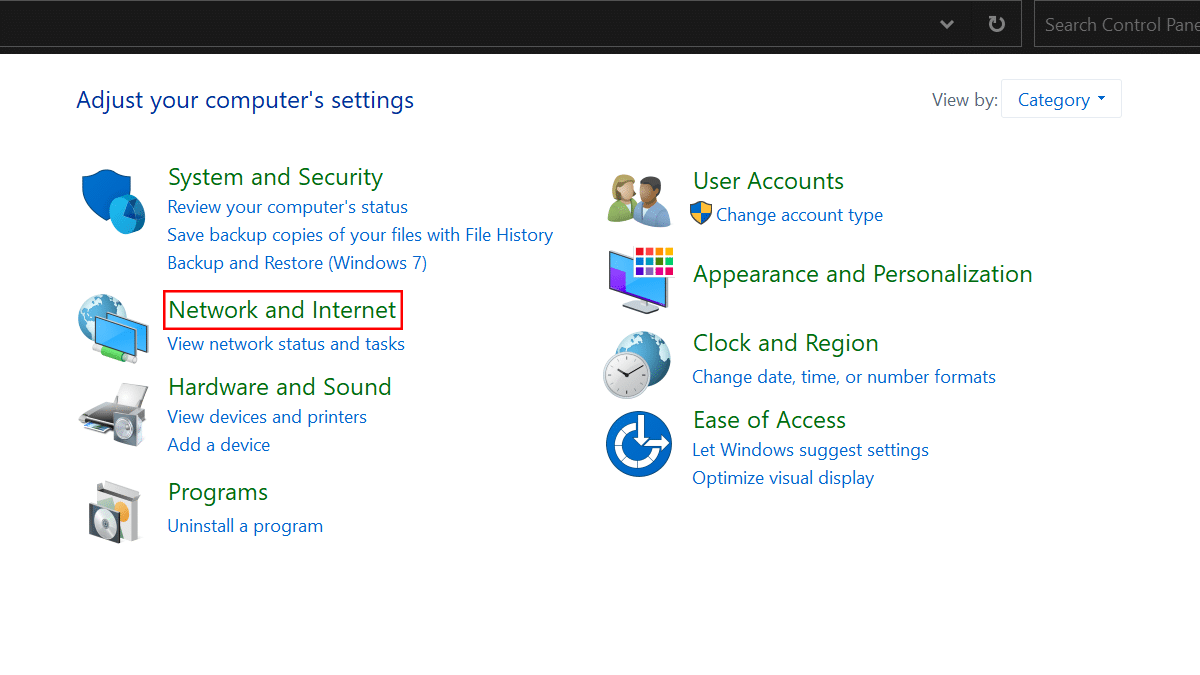
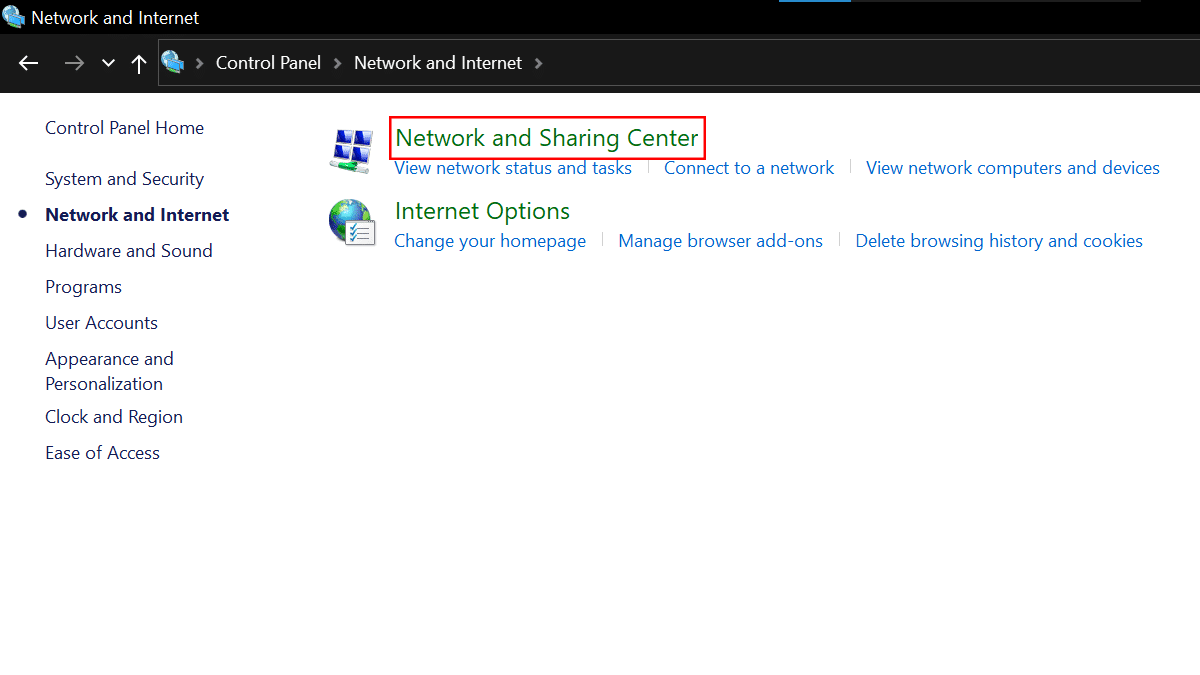
- Click on Network and Sharing Center.
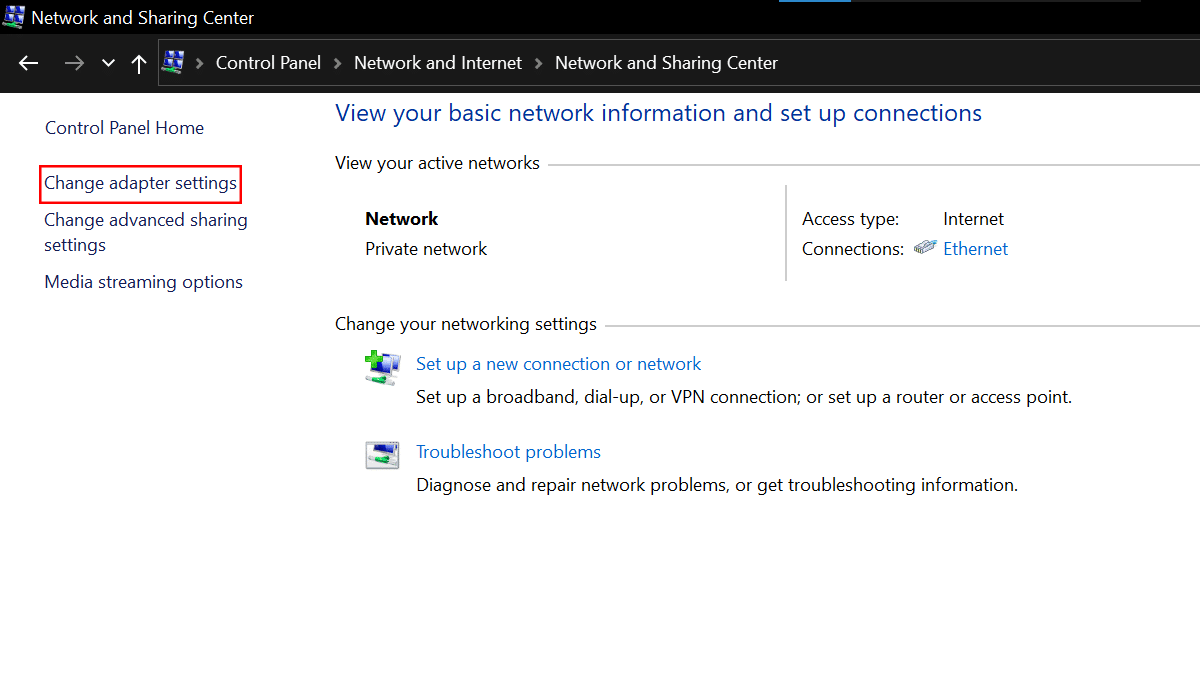
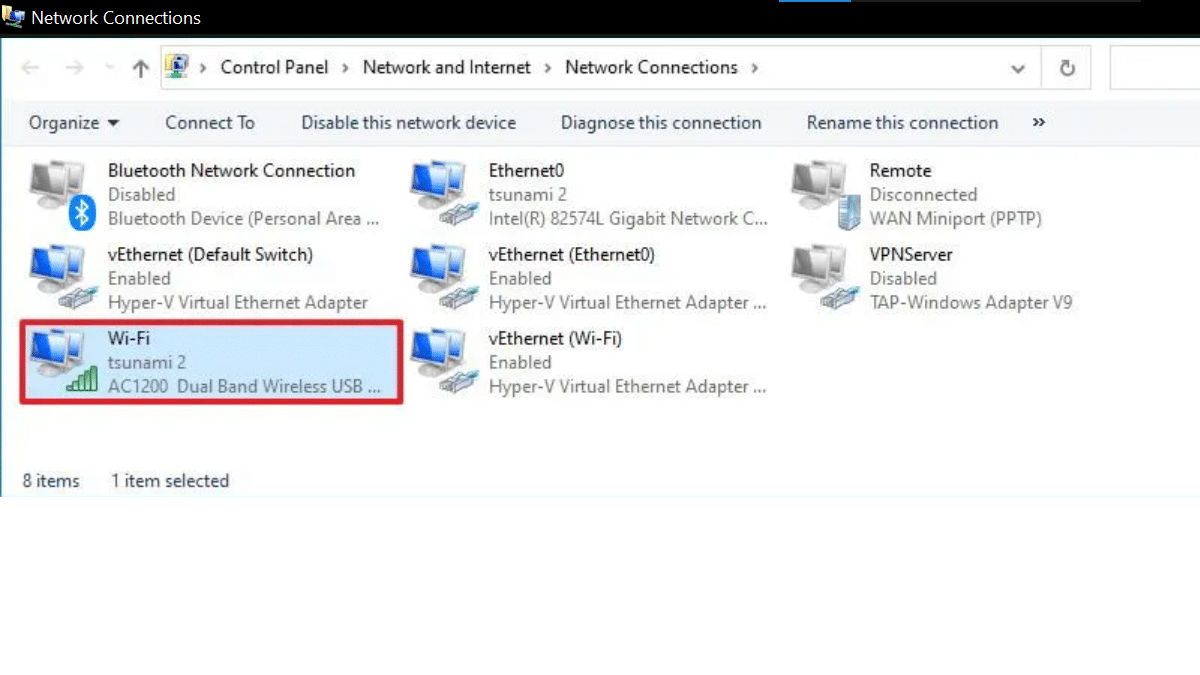
- Click the “Change adapter settings” option from the left pane.
- Double-click the wireless adapter.
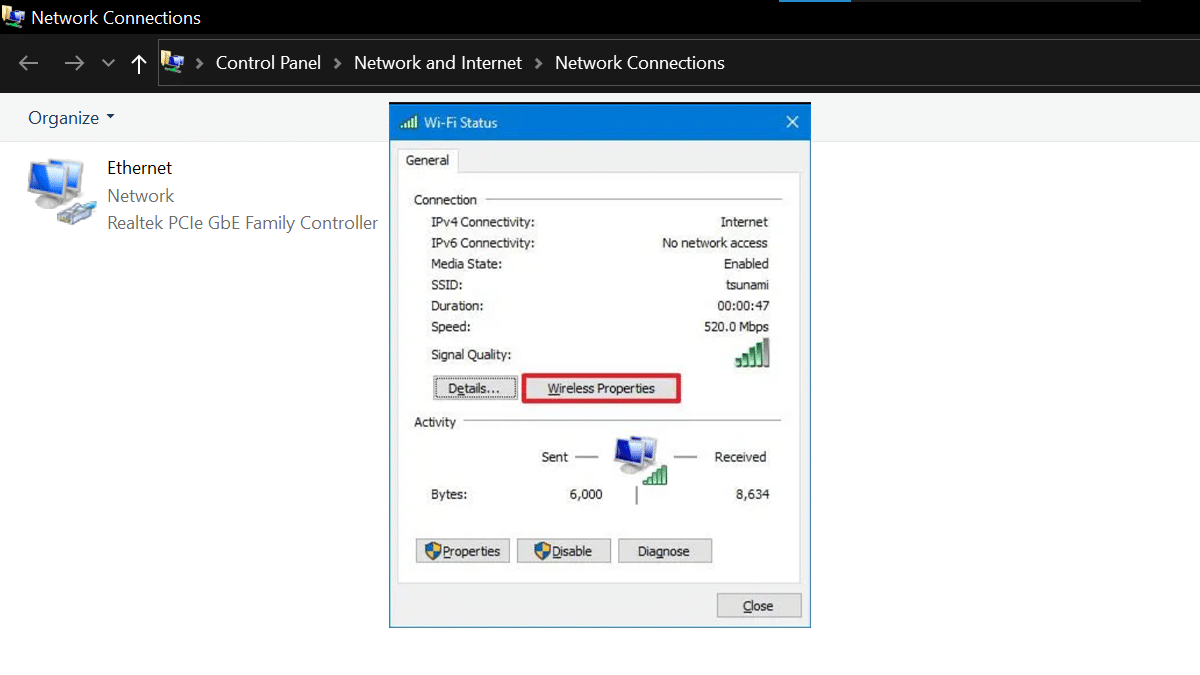
- Click the Wireless Properties button.
- Click the “Security” tab > check the Show characters option to find the Wi-Fi password on Windows 10 in the “Network security key” field.
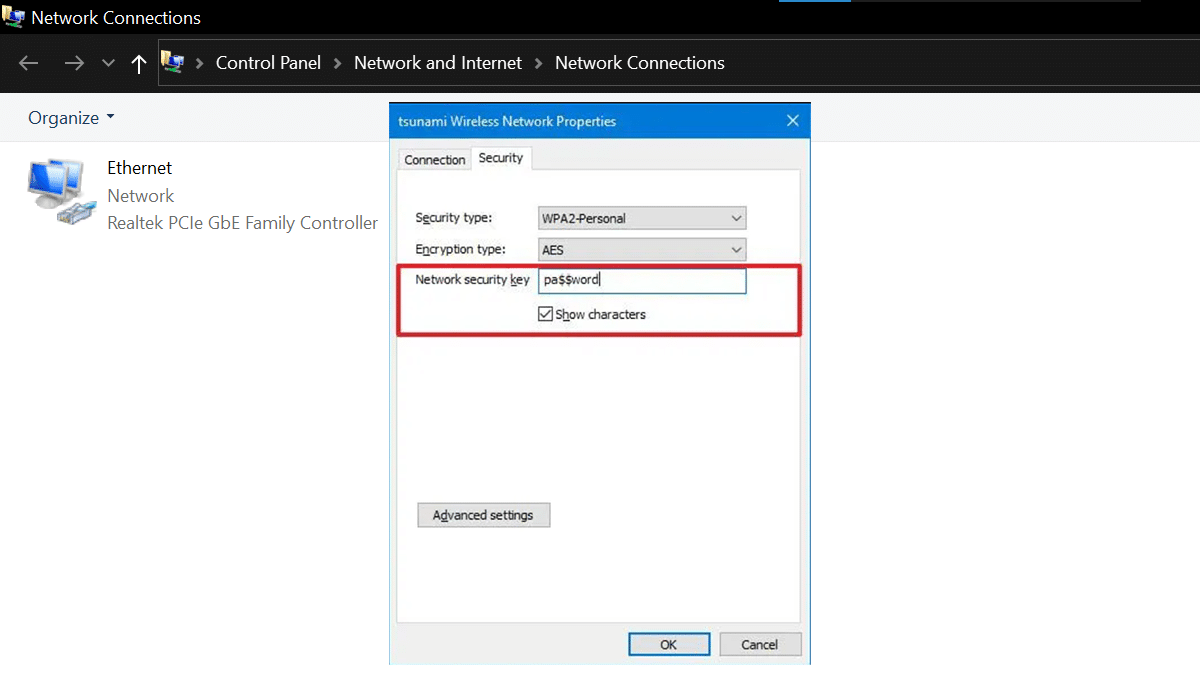
- When done, the wireless password will be revealed on Windows 11.
How to determine the Wi-Fi password from Command Prompt
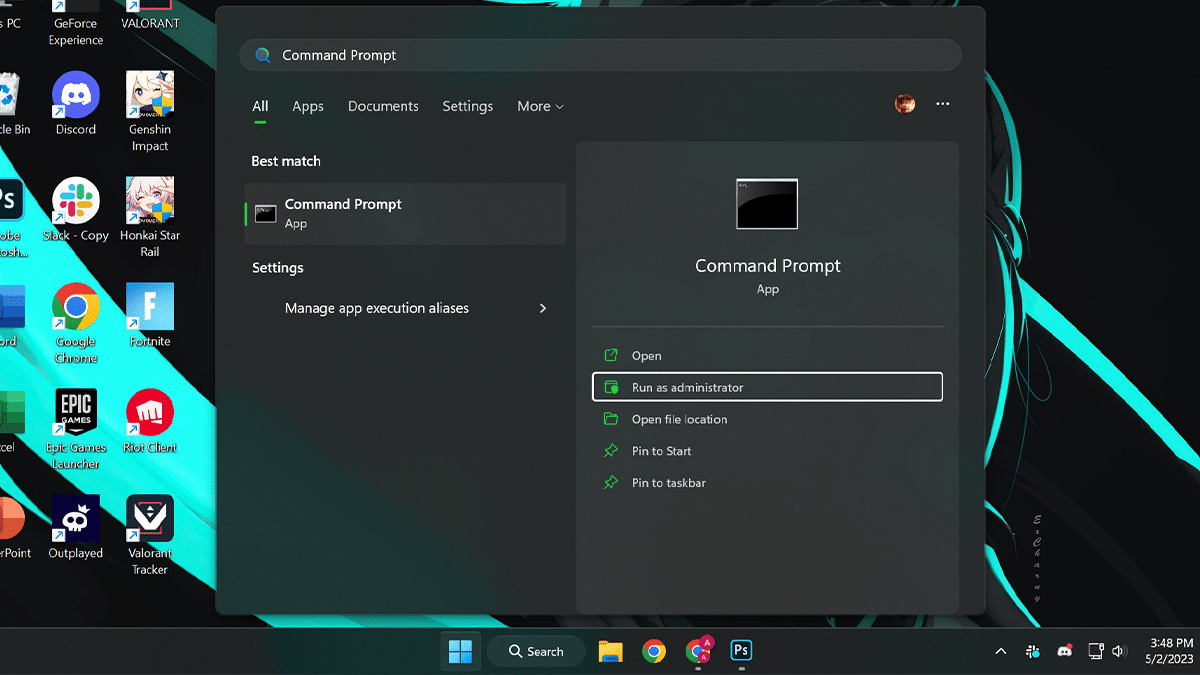
- Open Start > search for Command Prompt > select the Run as administrator option.
- Type the following command to view a list of the Wi-Fi networks your computer is connected to at one point in time > press Enter on the keyboard.
netsh wlan show profiles
- Type the following command to determine the Wi-Fi password for a particular network > press Enter on the keyboard.
netsh wlan show profile name="Wi-Fi-Profile" key=clear
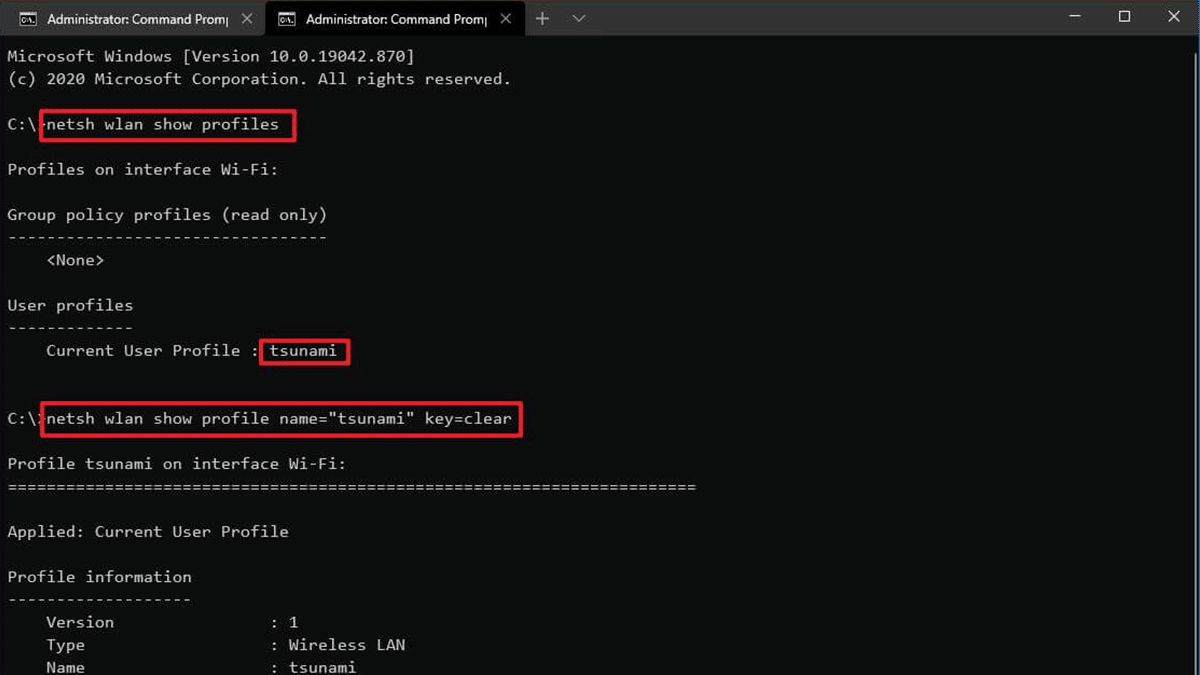
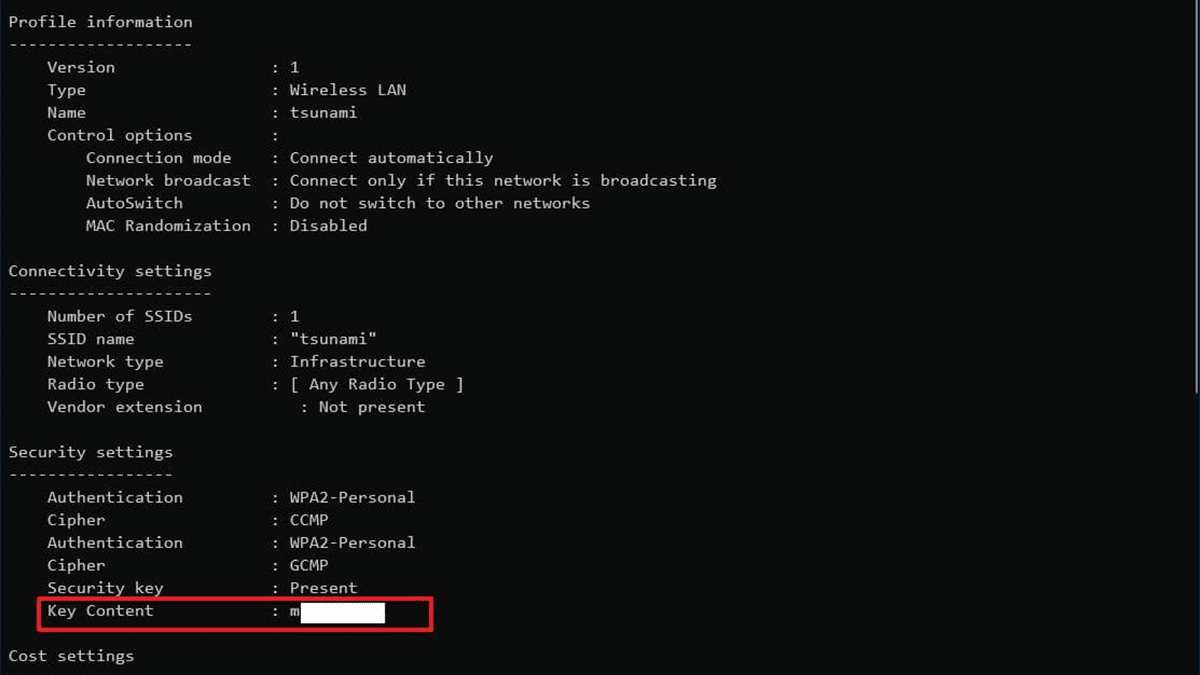
- When done, the password will be displayed in the Key Content field under “Security settings.” Remember to change Wi-Fi-Profile for the name of your current or saved network if you want to see the password in the command.
Read more: