Screenshots are very helpful. With the click of a few buttons, iPhone users can capture whatever is displayed on their screen and share it as an image with friends and family. While taking screenshots on iPhone is a simple process, if your Home or Power buttons are not working, you may need to resort to other measures. In this guide, we will be going through the process of how to take a screenshot on iPhone using AssistiveTouch.
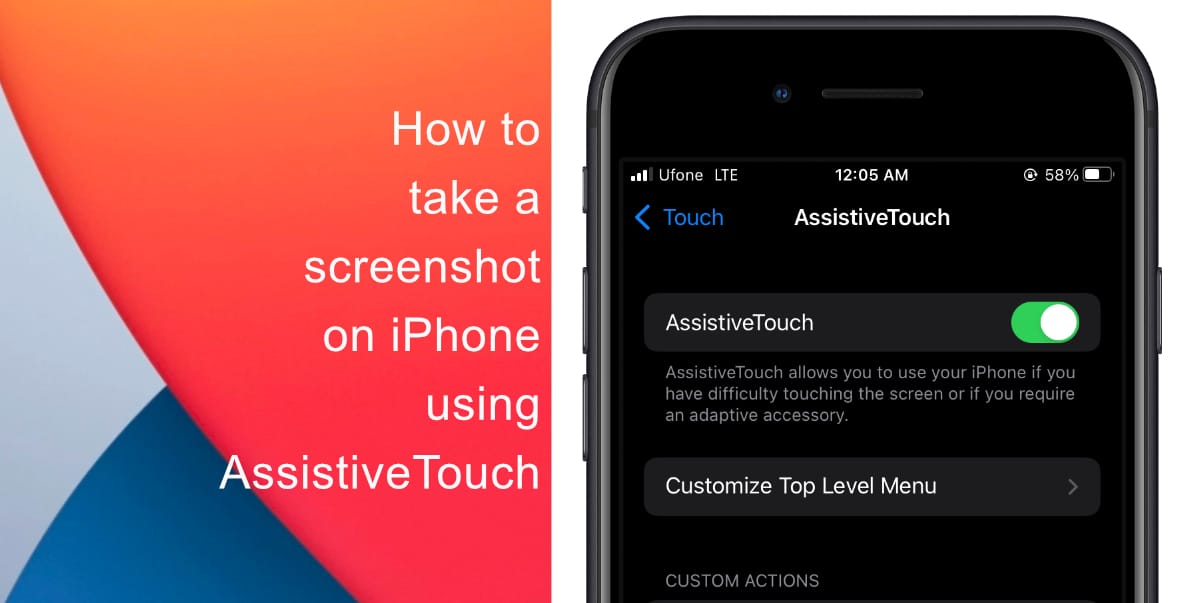
Learn how to take a screenshot on iPhone using AssistiveTouch
- Launch Settings from your Home screen.
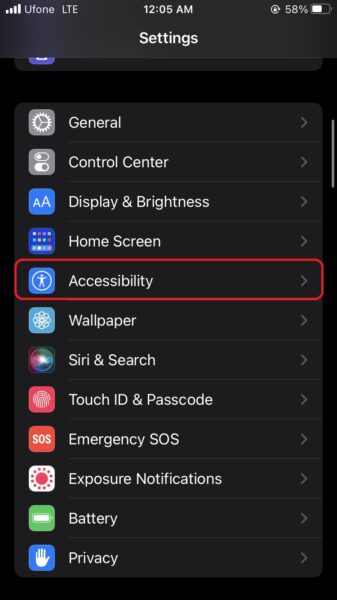
- Tap Accessibility.
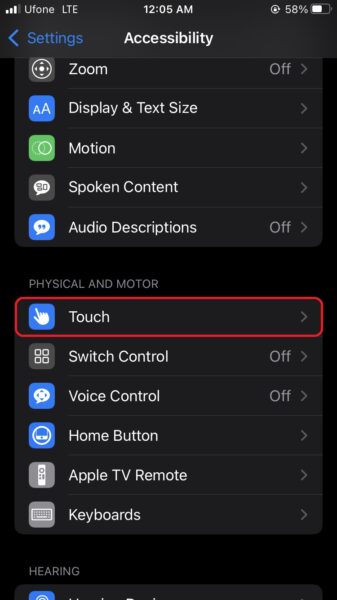
- Tap Touch.
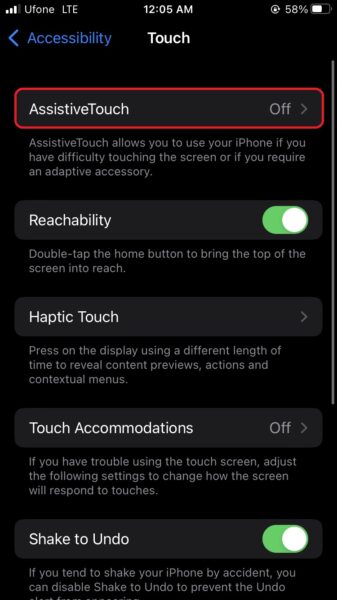
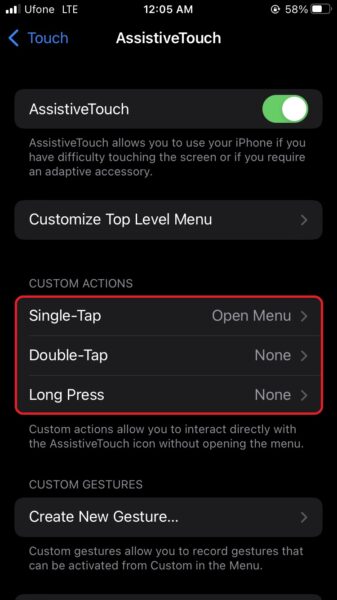
- Next, select AssistiveTouch.
- Turn on the toggle next to AssistiveTouch. With the feature active, you will immediately see a special AssistiveTouch button appear near the edge of your screen
- Select a suitable custom action – tap Single-Tap, Double-Tap, Long Press, or 3D Touch.
- Finally, select Screenshot from the list of available options.
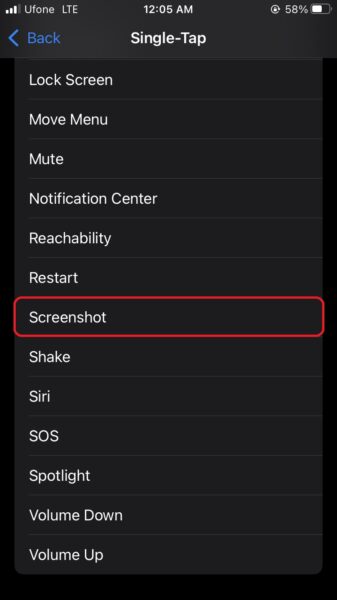
Now when you use the custom action assigned for screenshots, a screengrab of whatever is on your display will be captured by iOS.
Learn how to take and share a screenshot using Siri on iOS here and how to take a screenshot by tapping the back of your iPhone here. We hope this guide helped you learn how to take a screenshot on iPhone using AssistiveTouch. If you have any questions, let us know in the comments below.
Read more:
- How to record ProRes video on iPhone 13 Pro and iPhone 13 Pro Max
- How to set Gmail to delete Instead of archive in stock Mail app on iPhone & iPad
- How to clear cookies from Safari without deleting your browsing history on iPhone & iPad
- How to automatically and manually send text messages instead of iMessages on iPhone
- How to clear cookies from Safari without deleting your browsing history on iPhone & iPad
- How to use iOS 15 portrait video and audio effects in any app including Instagram, Snapchat and TikTok
- How to use an email instead of a phone number for iMessage on iPhone & iPad
- How to SharePlay music, screen, TikTok and more on iPhone and iPad
- How to reduce the size of your iCloud backup on iPhone and iPad
- How to use Screen Time to set a time limit for websites on iPhone and iPad