In earlier versions of iOS, to encourage users to get on the latest version of their software, new software updates were downloaded automatically in the background and then installed through an Automatic Updates feature. However, in iOS 13.6, Apple added an option that gives users more control over the downloading and installing of iOS software updates.
There are many benefits to let your iPhone update itself automatically, namely a smoother user experience and fewer glitches. But. if your iPhone is near its data limit or almost drained of its battery, you may want to update it over a stable Wi-Fi connection while it’s fully charged. Major iOS updates can be up to a few gigabytes in size. Here’s a simple guide on how to stop automatic software updates on iPhone.

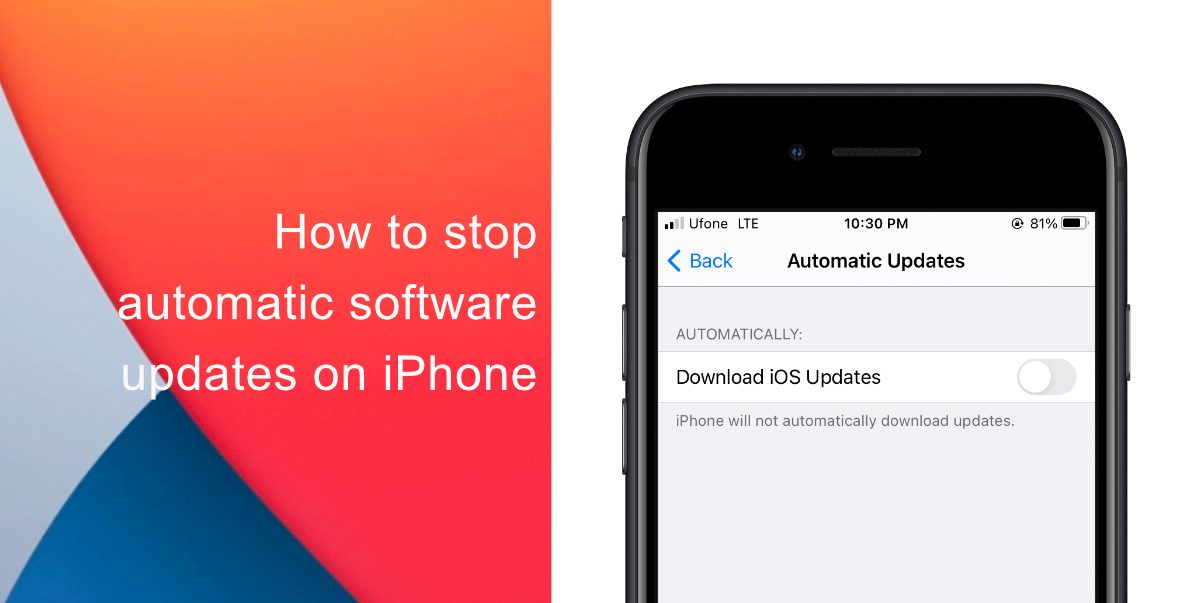
How to stop automatic software updates on iPhone
Automatic Updates are enabled by default, so you’ll need to turn them off manually. Here’s how to stop automatic software updates on iPhone In a few simple steps.
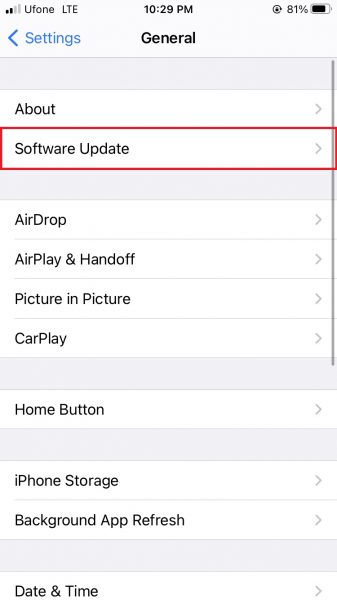
- Open the Settings app and scroll down to the General tab.
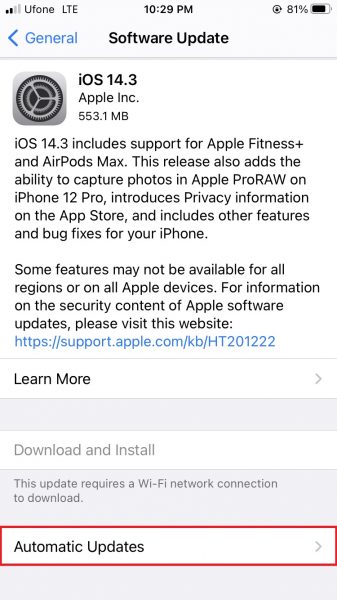
- Tap the Software Update tab.

- Tap Automatic Updates.

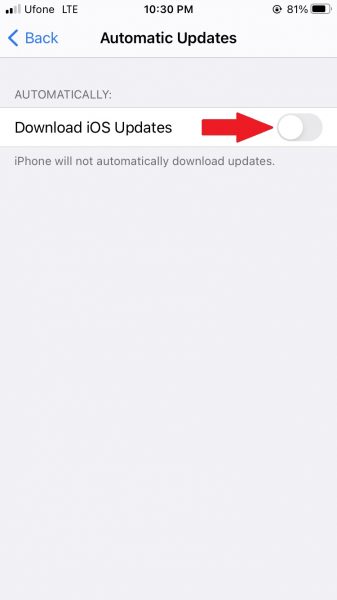
- Next, toggle the switch off (so it turns white instead of green).

It is important to note that you will always receive a notification before updates are installed, and your device must be charging and connected to Wi-Fi to complete the update. If you want to turn automatic updates back on, simply toggle the switch back to green.
We hope this guide helped you learn how to stop automatic software updates on iPhone.
Read Also:
- How to free iCloud storage by deleting old backups
- How to share iPhone screenshots without saving them to Photos
- How to find and delete all screenshots from iPhone
- How to launch actions by tapping on the back of your iPhone
- Learn to easily add and remove widgets on an iPhone Home screen
- Install third-party keyboards on iPhone and iPad with easy steps
- How to quickly delete multiple contacts at once on an iPhone
3 comments
Comments are closed.