Windows 11 allows users to switch from a Microsoft account to a local account. Although a Microsoft account is the default type when setting up a new user on the PC, letting you manage everything all in one place and provides better security, integration with Microsoft services, and easy files and settings synchronization across devices.
However, this is not an account type everyone wants since many people don’t like the idea of large companies handling their information or using cloud services. And the main advantage of using a local account is that you don’t send personal data to Microsoft when creating one. The account exists only on your Windows 10 or Windows 11 PCs, and its password is stored locally.
In this guide, we will teach you how to switch from a Microsoft account to a traditional local account on Windows 11.
Here is how to change from Microsoft account to a local account
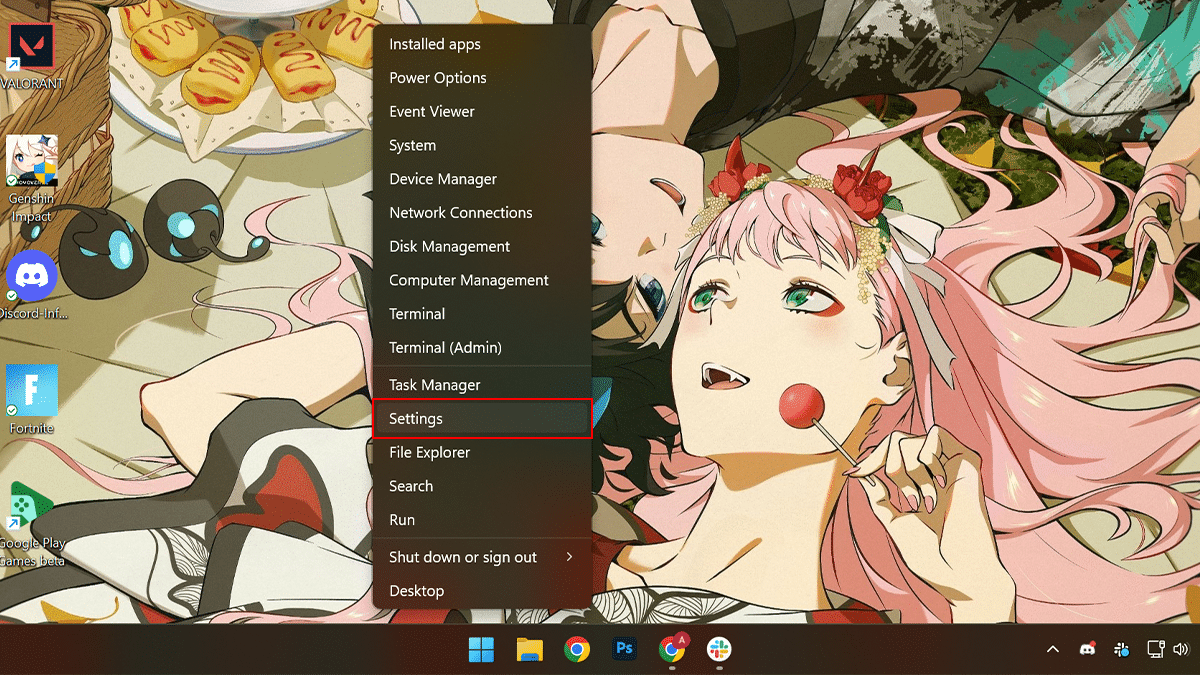
- Right-click on Start > click on Settings.
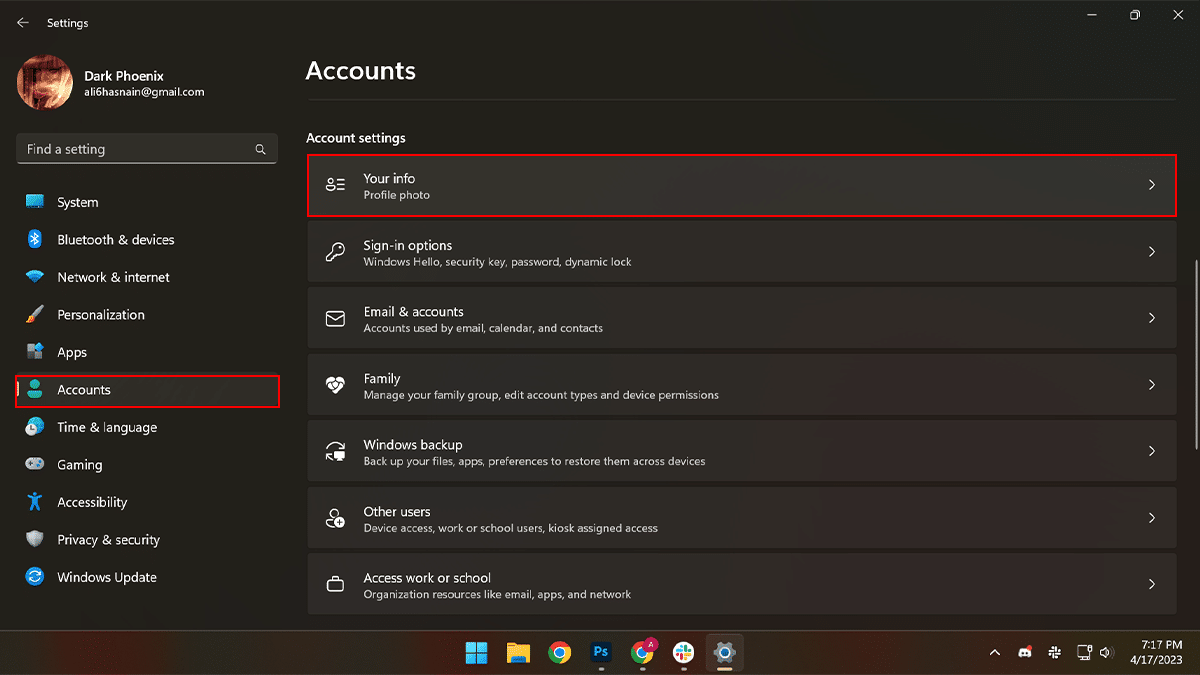
- Click on Accounts > click the Your Info tab.
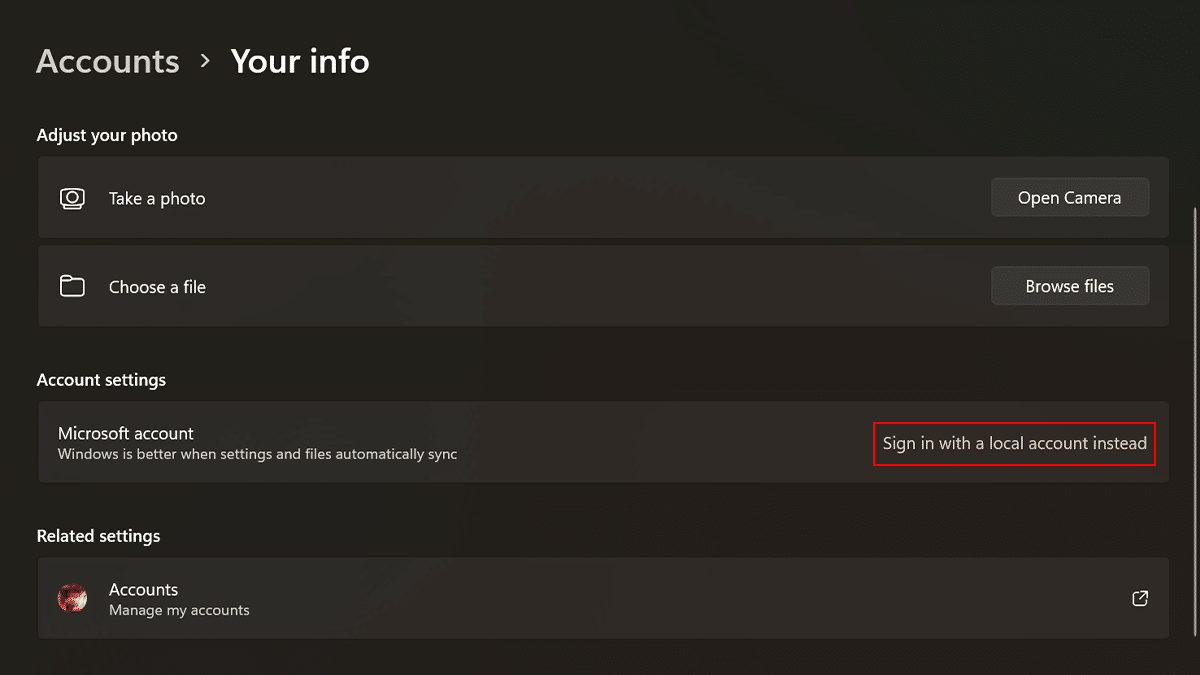
- Under the “Account settings” section, click the “Sign in a local account instead” option to disconnect the account.
- Click the Next button.
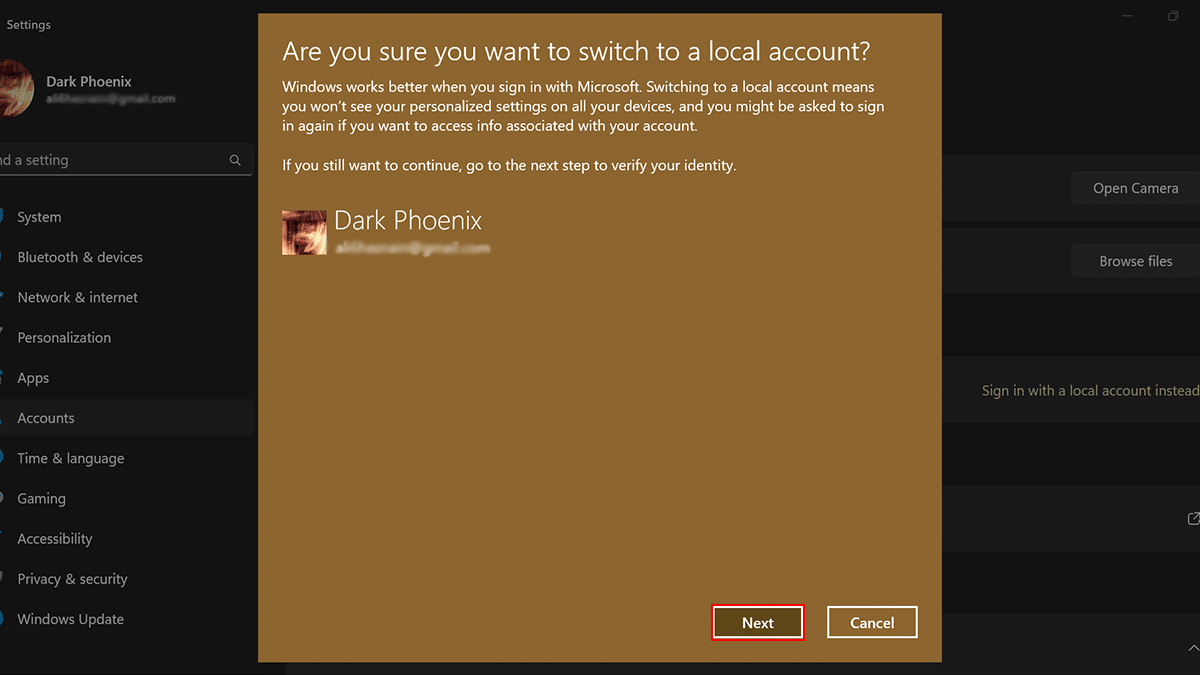
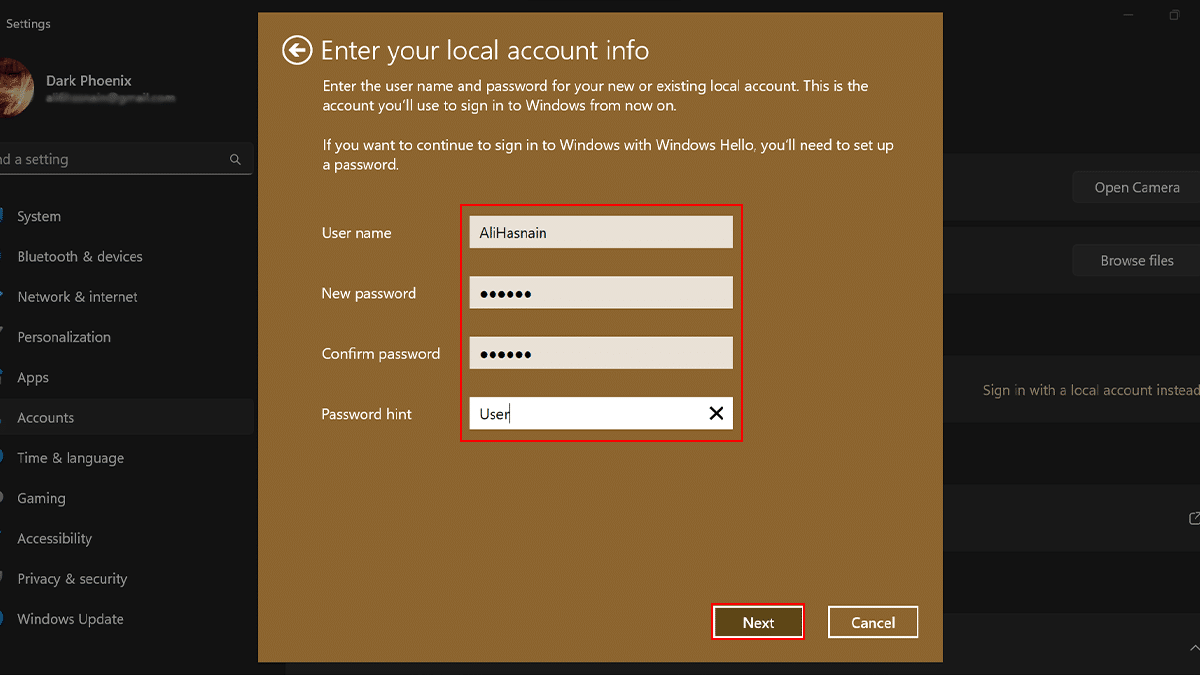
- Confirm your PC password > create a name for the local account > create a password for the account > confirm the password > create a password hint > click the Next button.
- Click the “Sign out and finish” button.
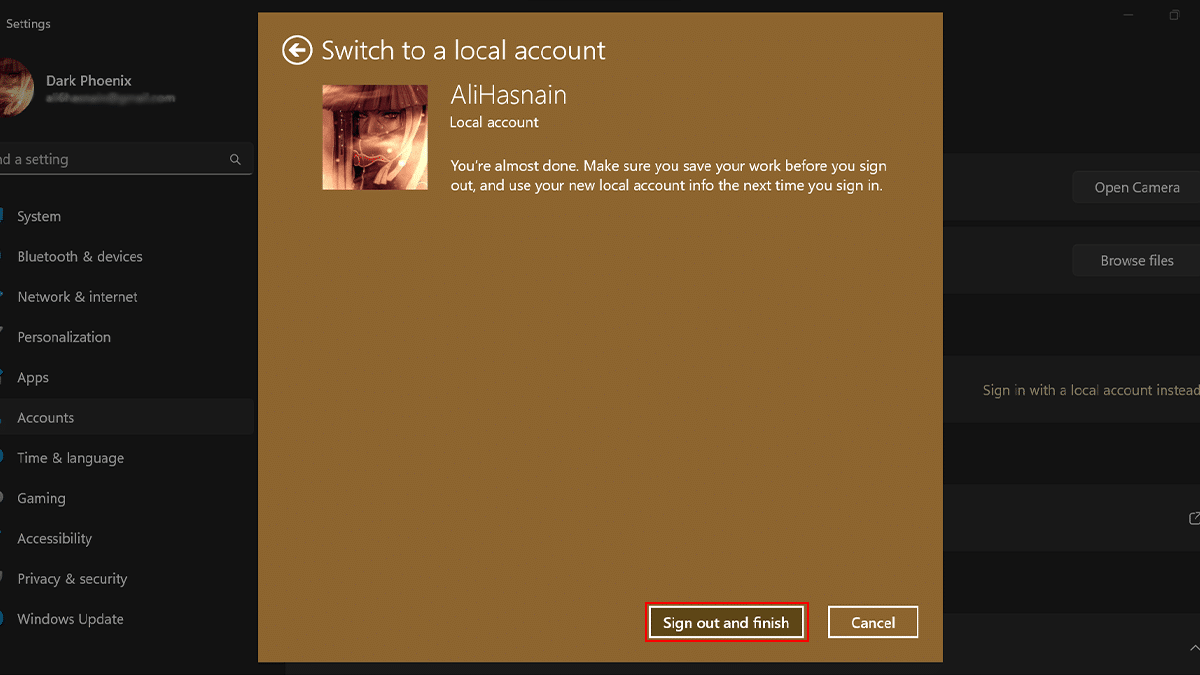
- When done, the Microsoft account will switch to a local account. You can always change back to a Microsoft account with these instructions.
Read more:
- How to sync your Google Contacts with iPhone using iCloud
- How to enable Voice Isolation on cellular iPhone calls
- How to play Android games on Windows 11
- How to check hard drive health on Windows 11
- How to create a new folder on Windows 11
- How to enable new Copilot on OneNote in Windows 11
- How to change new Outlook app theme on Windows 11