Transferring photos and videos between your iPhone and Windows PC may seem like a hard job at first and you may think that you will third-party apps for it. However, it is not the case as the process is easy to perform.
iPhones with smaller storage spaces like 64GB, or 16GB iPhone 6 and older smartphones, may require some users to transfer their memorable photos and videos to a much more spacious device like a laptop or PC. Here is how it is done.
Transfer Photos and Videos from iPhone to Windows PC
Apple requires you to have the latest version of iTunes installed on your Windows PC, even though you are not going to use the application in the process. Simply go to Microsoft Store and search for iTunes to download the latest version on your Windows PC.
Next, follow these steps:
- Connect your iPhone to your laptop or PC via a USB-to-lightning cable.
- Unlock your iPhone and enter your passcode.
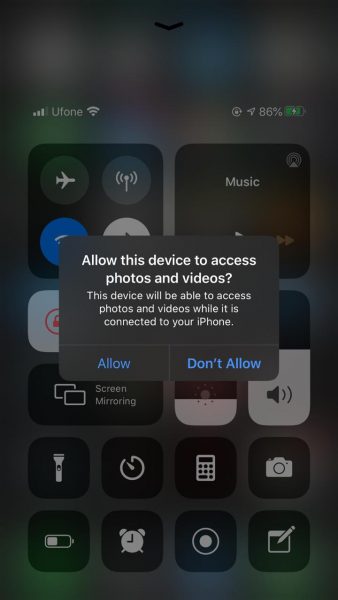
- Click on ‘Allow’ when the below permission prompt appears.
- Open File Explorer on your PC and click on the icon with your iPhone’s name. This will open your iPhone’s Internal Storage for photos and videos.
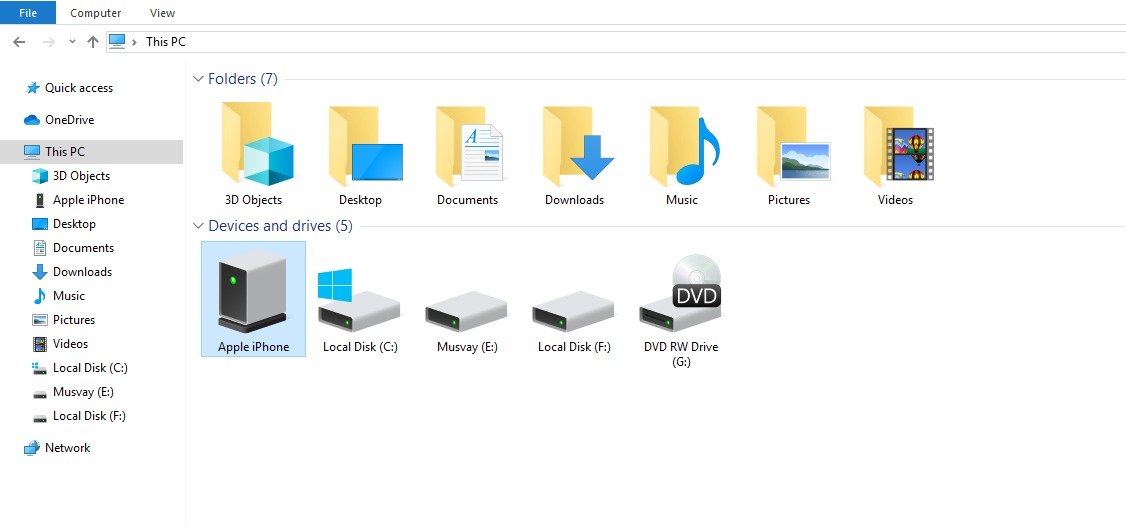
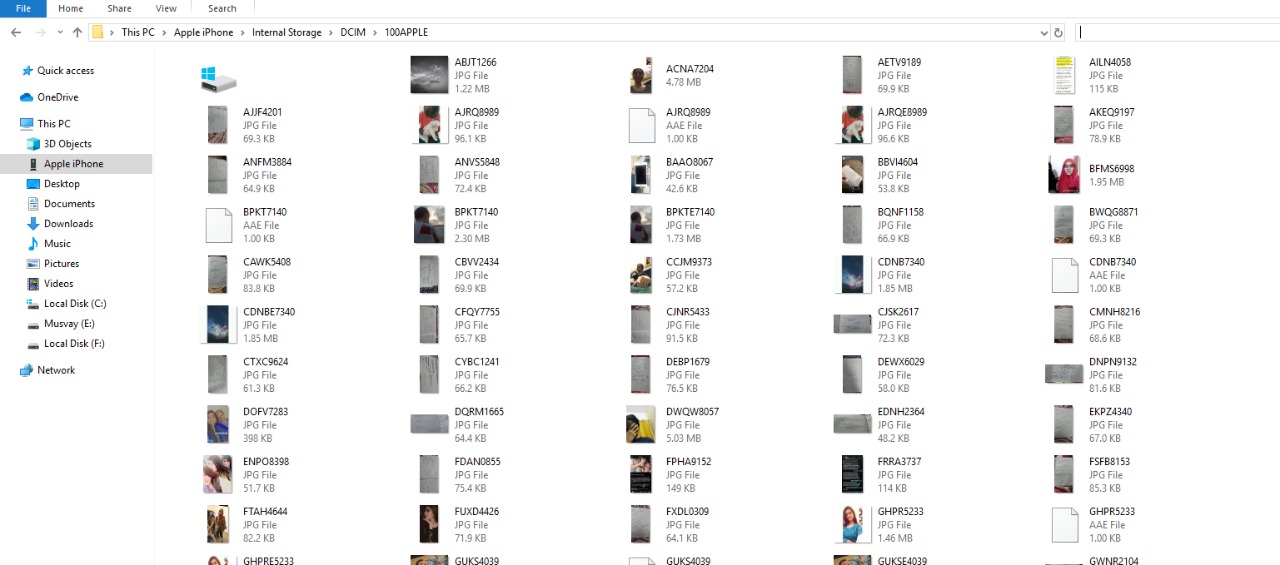
- Double click on the DCIM folder.

- If you have a lot of pictures and videos, your iPhone will automatically create more than one folder in DCIM.

- You will now see the list of photos and videos on your iPhone. Select the photos you want to move by right-clicking and select copy or cut.
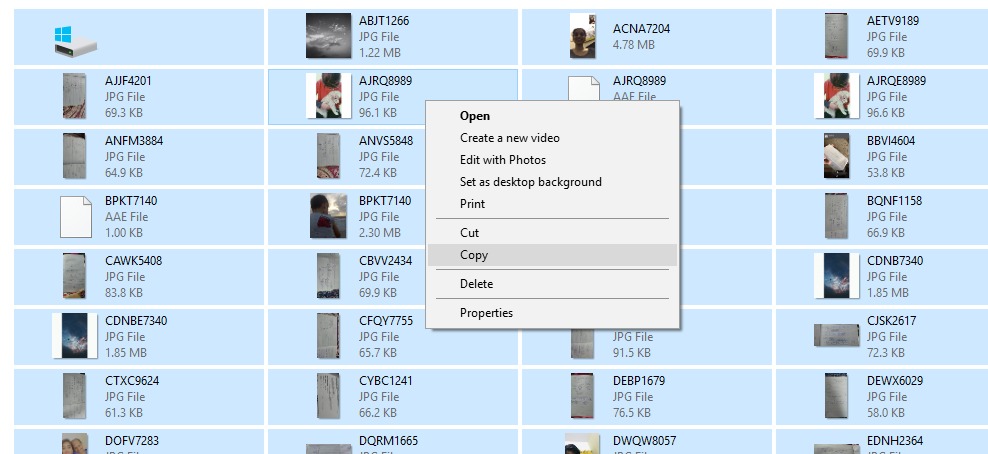
- Select the destination folder on your PC in the menu, then right click and paste the photos.
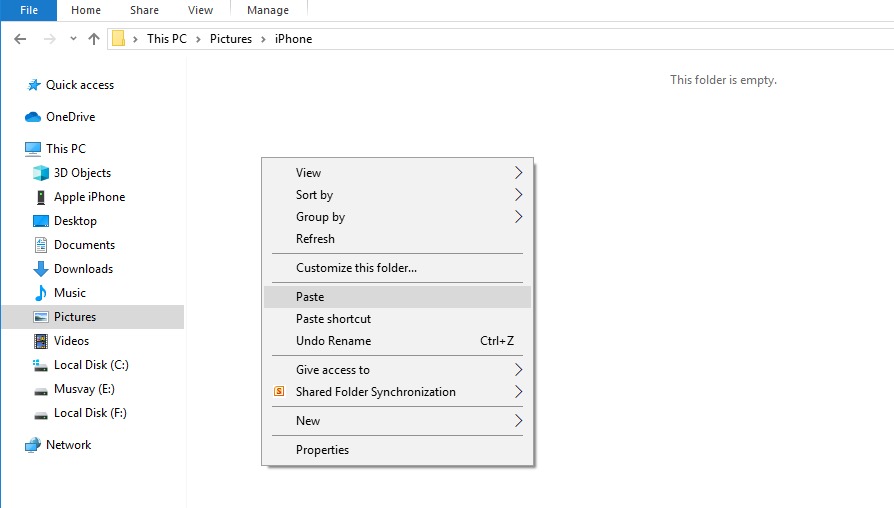
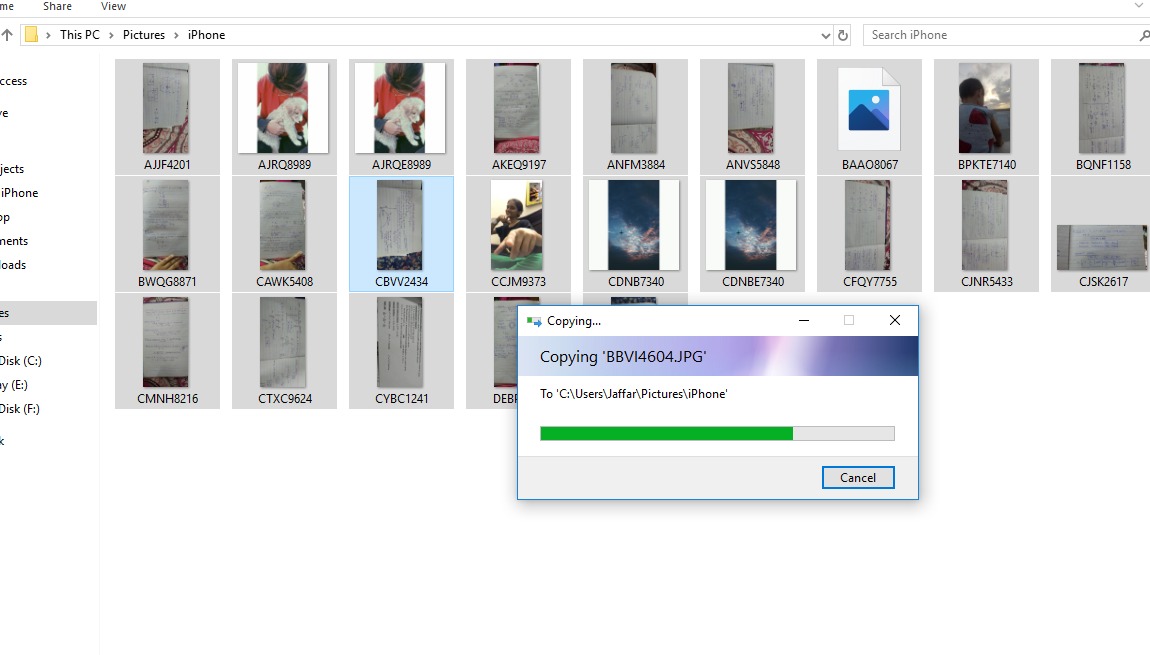
- The selected photos and videos will start transferring from your iPhone to PC, immediately.
Users do not need to open iTunes to transfer photos or videos but Apple’s support page recommends all users to have the latest version of iTunes installed on their PC, in case the smartphone isn’t recognized by Windows.
Read Also:
